はじめに
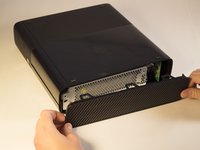
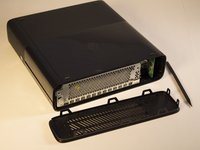
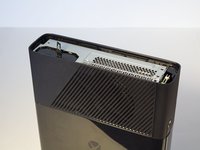
Use this guide to replace the RF module in your Xbox 360 E.
必要な工具と部品
-
-
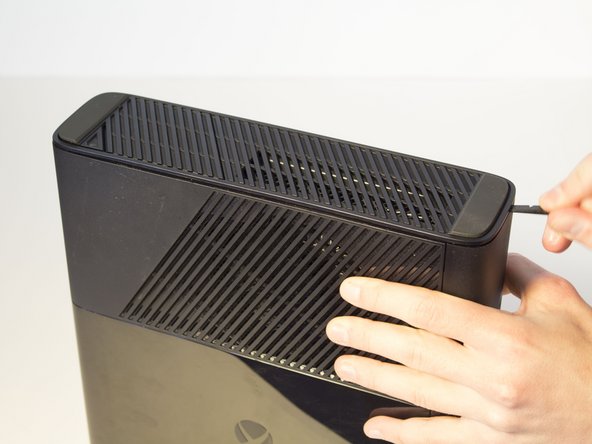
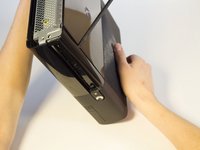
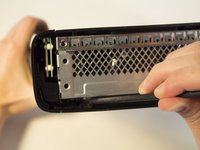
Push the Spudger into the crevice between the grated top panel of the Xbox and the bottom body with the rubber feet.
-
Pull back on the spudger like a lever, keeping it pressed firmly into the crevice.
 FixBotに聞いてみる
-
-
-
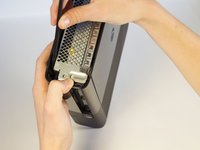
Slide the spudger along the separation you have created between the grated panel and the bottom body of the Xbox.
-
Periodically pull back on the spudger like a lever, keeping it pressed firmly into the crevice.
-
-
-
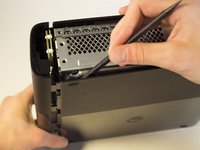
Continue sliding the spudger along the perimeter of the left grated face of the Xbox.
-
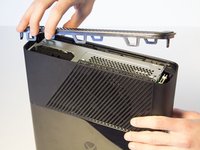
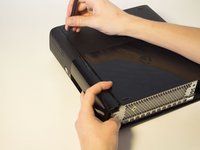
Pull the top panel off.
-
-
-
Push the spudger into the crevice between the right grated face and the top body of the Xbox. It's easier to begin away from the vent.
-
Pull up on the spudger like a lever, keeping it pressed firmly into the crevice.
-
-
-
Slide the spudger along the crevice to separate the grated face and the top body.
-
-
-
-
Wiggle the spudger in the crevice as you slide the spudger to loosen the bottom plate.
-
Slide the spudger along the crevice, going completely about the perimeter of the bottom panel.
-
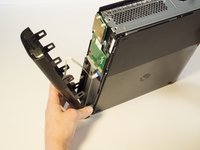
Pull the bottom panel off.
-
-
-
In front of the CD drive you will find the Xbox logo. Press on the area left of the Xbox logo, and the disk tray panel will pop off.
-
-
-
Beginning on the left side without the grate, run the spudger along the crevice until you've reached the grated part, while holding the part that's being separated as you go.
-
-
-
Keep holding the partially separated panel open. It's easiest to do this by wedging a spudger into the opening but can also be held open by your hands.
-
Rotate the Xbox to the left to locate the clip connecting the front panel to the body. Insert the spudger inside the gap to release the clip. This may require wiggling the spudger. The clip will pop off, making the front panel looser.
-
-
-
Flip the Xbox so the opposite side is towards you. Make sure to keep the separation open.
-
Locate the other clip and insert the spudger to remove it.
-
-
-
Continue to run the spudger along the crease to release any further clips that may still be attatched.
-
Now that the front panel has been released from its clips you can pull off the front panel.
-
-
-
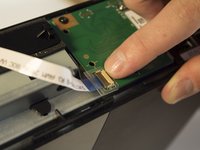
Find the brown section where the ribbon cable enters the green board. Flip the brown part up and pull out the plastic tab at the end of the ribbon.
-
-
-
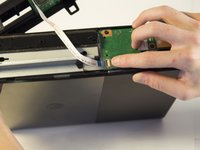
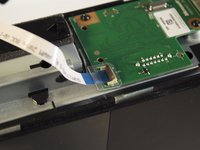
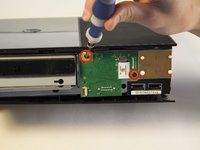
Looking at the body of the device, locate the green panel to the right of the CD drive.
-
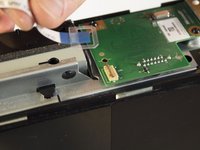
Remove the two 6 mm screws located on the top left and middle right with a T8 Torx screwdriver.
-
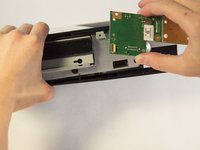
Grip the middle of the green board and gently pull it out.
-


To reassemble your device, follow these instructions in reverse order.
6 の人々がこのガイドを完成させました。
チーム

Cal Poly, Team 2-11, Amido Winter 2014 Cal Poly, Team 2-11, Amido Winter 2014人のメンバー
CPSU-AMIDO-W14S2G11
4 メンバー
44のガイドは作成済み
2件のガイドコメント
Were can I buy an RF module?