メインコンテンツにスキップ
リペアコミュニティに参加 - アカウントの作成

Wen 2307 Speed Adjustment Assembly Replacement

必要な工具と部品

    1. Wen 2307 Speed Adjustment Assembly Replacement, Front Panel: 手順 1、 1の画像 1
      • Unscrew the locking sleeve.

      FixBotに聞いてみる

      コメントを追加

    2. Wen 2307 Speed Adjustment Assembly Replacement: 手順 2、 1の画像 1
      • Remove the hanging clip.

      FixBotに聞いてみる

      コメントを追加

    3. Wen 2307 Speed Adjustment Assembly Replacement: 手順 3、 2の画像 1 Wen 2307 Speed Adjustment Assembly Replacement: 手順 3、 2の画像 2
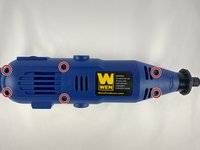
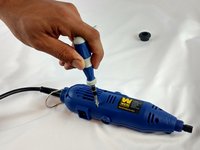
      • Unscrew the six 8mm PH2 screws.

      FixBotに聞いてみる

      コメントを追加

    4. Wen 2307 Speed Adjustment Assembly Replacement: 手順 4、 1の画像 1
      • While pressing the spindle lock button, unscrew the collet nut and remove it along with the brass collet.

      FixBotに聞いてみる

      コメントを追加

    5. Wen 2307 Speed Adjustment Assembly Replacement: 手順 5、 1の画像 1
      • To remove the front panel, pry the device apart while holding the device with the other hand.

      • The front panel should come out easily.

      FixBotに聞いてみる

      コメントを追加

    1. Wen 2307 Speed Adjustment Assembly Replacement, Power Cable: 手順 6、 2の画像 1 Wen 2307 Speed Adjustment Assembly Replacement, Power Cable: 手順 6、 2の画像 2
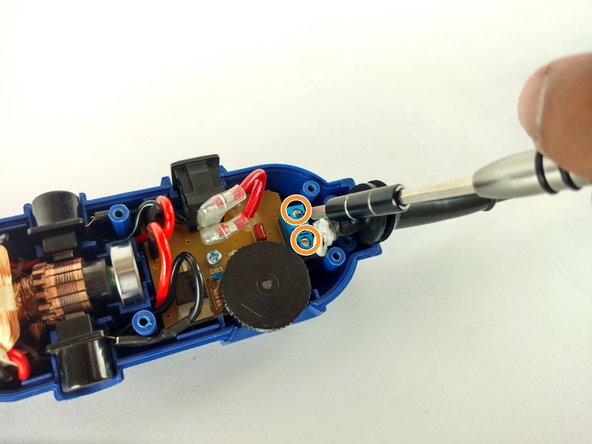
      • Identify the screws.

      • Unscrew the two 3mm phillips PH2.

      • Don't forget to put them appart from the ones unscrewed before.

      • Don't forget to put them appart from the ones unscrewed before.

      • Phillips PH2

      • Flathead 2.5mm

      FixBotに聞いてみる

      コメントを追加

    2. Wen 2307 Speed Adjustment Assembly Replacement: 手順 7、 1の画像 1
      • Remove the place boar carefully.

      FixBotに聞いてみる

      コメントを追加

    3. Wen 2307 Speed Adjustment Assembly Replacement: 手順 8、 1の画像 1
      • Pull out the power cable connectors.

      FixBotに聞いてみる

      コメントを追加

    4. Wen 2307 Speed Adjustment Assembly Replacement: 手順 9、 1の画像 1
      • Pull out the cord sleve for the new cable replacement.

      FixBotに聞いてみる

      コメントを追加

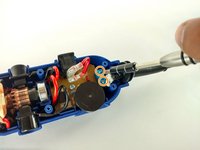
    1. Wen 2307 Speed Adjustment Assembly Replacement, Speed Adjustment Assembly: 手順 10、 1の画像 1
      • Remove the connected wiring from the circuit board.

      FixBotに聞いてみる

      コメントを追加

    2. Wen 2307 Speed Adjustment Assembly Replacement: 手順 11、 1の画像 1
      • Remove the single 4mm screw retaining the circuit board.

      FixBotに聞いてみる

      コメントを追加

    3. Wen 2307 Speed Adjustment Assembly Replacement: 手順 12、 1の画像 1
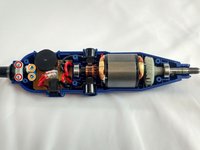
      • Gently pry the circuit board from the back piece.

      FixBotに聞いてみる

      コメントを追加

終わりに

To reassemble your device, follow these instructions in reverse order.

キャンセル: このガイドを終了できませんでした。

2 の人々がこのガイドを完成させました。

作成者

4人の作成者と共同で作成されました。

Dominick Chavez

メンバー登録日: 02/08/16

137 ポイント

1ガイドが承認済み

チーム

USF Tampa, Team 12-1, Eyestone Spring 2016 USF Tampa, Team 12-1, Eyestone Spring 2016人のメンバー

USFT-EYESTONE-S16S12G1

4 メンバー

6のガイドは作成済み

0件のガイドコメント

コメントを追加

統計データ:

過去 24時間: 1

過去 7 日: 14

過去 30 日: 29

今までの合計 1,190