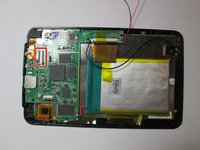
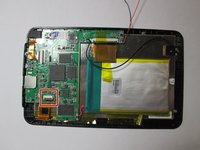
メインコンテンツにスキップ

Visual Land Prestige Elite 7Q Digitizer / Front Screen Replacement

必要な工具と部品

  1. Visual Land Prestige Elite 7Q Digitizer / Front Screen Replacement, Digitizer / Front Screen: 手順 1、 2の画像 1 Visual Land Prestige Elite 7Q Digitizer / Front Screen Replacement, Digitizer / Front Screen: 手順 1、 2の画像 2
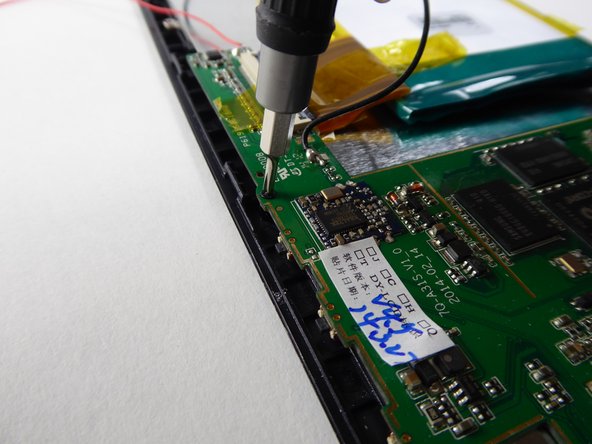
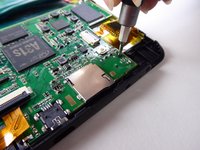
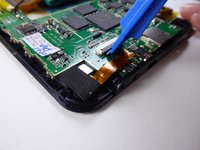
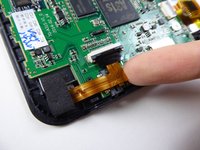
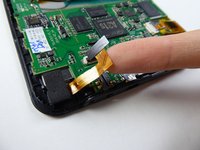
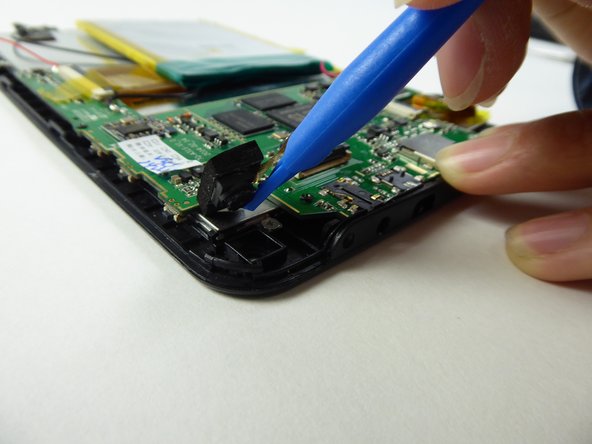
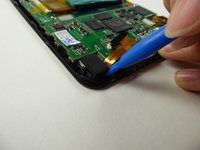
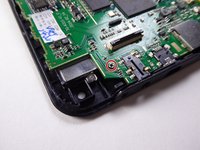
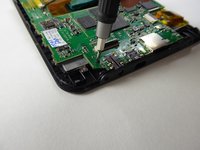
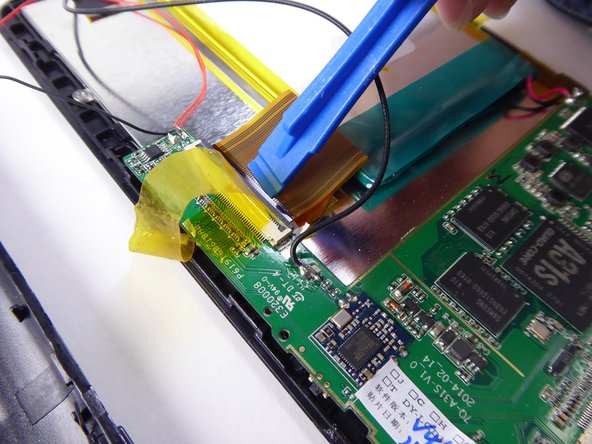
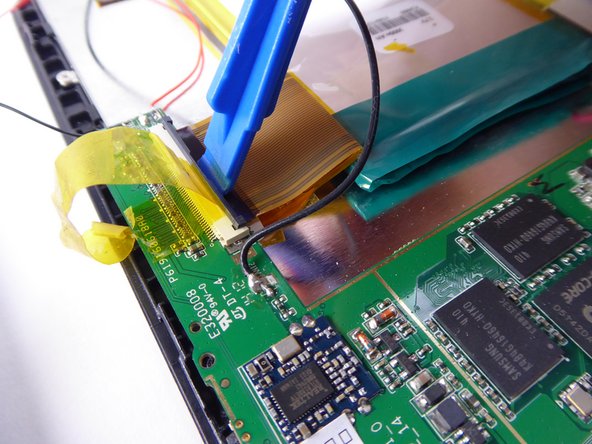
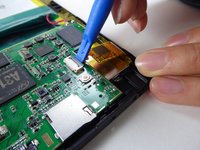
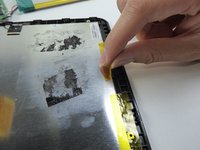
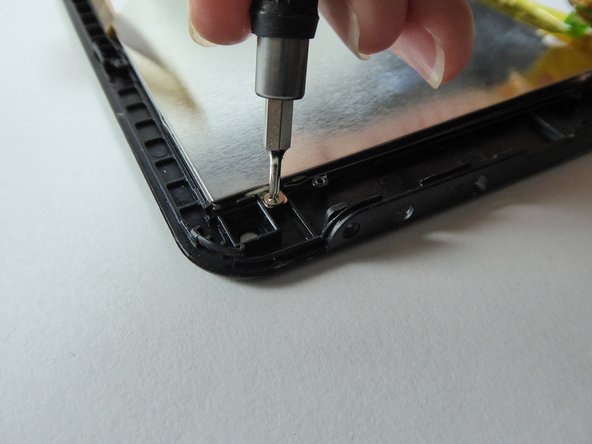
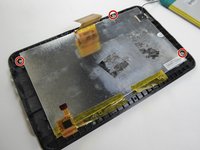
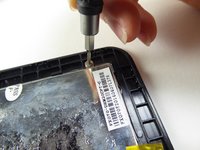
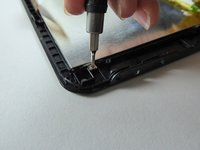
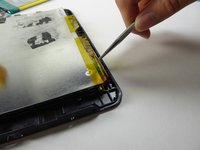
    • At the bottom of the tablet, remove the two 3.6mm screws with a Phillips #000 screwdriver.

  2. Visual Land Prestige Elite 7Q Digitizer / Front Screen Replacement: 手順 2、 2の画像 1 Visual Land Prestige Elite 7Q Digitizer / Front Screen Replacement: 手順 2、 2の画像 2
    • Wedge a plastic opening tool into the edges of the tablet to pry it open.

  3. Visual Land Prestige Elite 7Q Digitizer / Front Screen Replacement: 手順 3、 3の画像 1 Visual Land Prestige Elite 7Q Digitizer / Front Screen Replacement: 手順 3、 3の画像 2 Visual Land Prestige Elite 7Q Digitizer / Front Screen Replacement: 手順 3、 3の画像 3
    • Wedge a curved metal spudger under the speaker in order to remove it.

    • The speaker is held in place by an adhesive and can be difficult to remove.

  4. Visual Land Prestige Elite 7Q Digitizer / Front Screen Replacement: 手順 4、 3の画像 1 Visual Land Prestige Elite 7Q Digitizer / Front Screen Replacement: 手順 4、 3の画像 2 Visual Land Prestige Elite 7Q Digitizer / Front Screen Replacement: 手順 4、 3の画像 3
    • Use a Phillips #000 screwdriver to remove the two 3.6mm screws.

  5. Visual Land Prestige Elite 7Q Digitizer / Front Screen Replacement: 手順 5、 3の画像 1 Visual Land Prestige Elite 7Q Digitizer / Front Screen Replacement: 手順 5、 3の画像 2 Visual Land Prestige Elite 7Q Digitizer / Front Screen Replacement: 手順 5、 3の画像 3
    • Use a plastic opening tool to lift the black tab.

  6. Visual Land Prestige Elite 7Q Digitizer / Front Screen Replacement: 手順 6、 2の画像 1 Visual Land Prestige Elite 7Q Digitizer / Front Screen Replacement: 手順 6、 2の画像 2
    • Carefully lift and remove the ribbon cable from the black tab.

  7. Visual Land Prestige Elite 7Q Digitizer / Front Screen Replacement: 手順 7、 2の画像 1 Visual Land Prestige Elite 7Q Digitizer / Front Screen Replacement: 手順 7、 2の画像 2
    • Use a plastic opening tool to remove the camera.

  8. Visual Land Prestige Elite 7Q Digitizer / Front Screen Replacement: 手順 8、 2の画像 1 Visual Land Prestige Elite 7Q Digitizer / Front Screen Replacement: 手順 8、 2の画像 2
    • Use a Phillips #000 screwdriver to remove the 3.6mm screw.

  9. Visual Land Prestige Elite 7Q Digitizer / Front Screen Replacement: 手順 9、 3の画像 1 Visual Land Prestige Elite 7Q Digitizer / Front Screen Replacement: 手順 9、 3の画像 2 Visual Land Prestige Elite 7Q Digitizer / Front Screen Replacement: 手順 9、 3の画像 3
    • Lift the tape holding down the battery.

  10. Visual Land Prestige Elite 7Q Digitizer / Front Screen Replacement: 手順 10、 2の画像 1 Visual Land Prestige Elite 7Q Digitizer / Front Screen Replacement: 手順 10、 2の画像 2
    この手順で使用する道具:
    Plastic Cards
    $2.99
    購入する
  11. Visual Land Prestige Elite 7Q Digitizer / Front Screen Replacement: 手順 11、 3の画像 1 Visual Land Prestige Elite 7Q Digitizer / Front Screen Replacement: 手順 11、 3の画像 2 Visual Land Prestige Elite 7Q Digitizer / Front Screen Replacement: 手順 11、 3の画像 3
    • Use a plastic opening tool to lift the black tab.

  12. Visual Land Prestige Elite 7Q Digitizer / Front Screen Replacement: 手順 12、 2の画像 1 Visual Land Prestige Elite 7Q Digitizer / Front Screen Replacement: 手順 12、 2の画像 2
    • Carefully lift and remove the ribbon cable from the black tab.

  13. Visual Land Prestige Elite 7Q Digitizer / Front Screen Replacement: 手順 13、 3の画像 1 Visual Land Prestige Elite 7Q Digitizer / Front Screen Replacement: 手順 13、 3の画像 2 Visual Land Prestige Elite 7Q Digitizer / Front Screen Replacement: 手順 13、 3の画像 3
    • Use a plastic opening tool to lift the black tab.

  14. Visual Land Prestige Elite 7Q Digitizer / Front Screen Replacement: 手順 14、 1の画像 1
    • Safely remove the battery and motherboard from the tablet.

  15. Visual Land Prestige Elite 7Q Digitizer / Front Screen Replacement: 手順 15、 3の画像 1 Visual Land Prestige Elite 7Q Digitizer / Front Screen Replacement: 手順 15、 3の画像 2 Visual Land Prestige Elite 7Q Digitizer / Front Screen Replacement: 手順 15、 3の画像 3
    • Lift the tape on the sides.

  16. Visual Land Prestige Elite 7Q Digitizer / Front Screen Replacement: 手順 16、 3の画像 1 Visual Land Prestige Elite 7Q Digitizer / Front Screen Replacement: 手順 16、 3の画像 2 Visual Land Prestige Elite 7Q Digitizer / Front Screen Replacement: 手順 16、 3の画像 3
    • Use a Phillips #000 screwdriver to remove the three 2.5mm screws.

  17. Visual Land Prestige Elite 7Q Digitizer / Front Screen Replacement: 手順 17、 3の画像 1 Visual Land Prestige Elite 7Q Digitizer / Front Screen Replacement: 手順 17、 3の画像 2 Visual Land Prestige Elite 7Q Digitizer / Front Screen Replacement: 手順 17、 3の画像 3
    • Wedge a metal spudger underneath the LCD screen to remove it.

  18. Visual Land Prestige Elite 7Q Digitizer / Front Screen Replacement: 手順 18、 1の画像 1
    • Replace the front screen to replace the digitizer.

終わりに

To reassemble your device, follow these instructions in reverse order.

作成者

5人の作成者と共同で作成されました。

Sabrina Scholten

メンバー登録日: 09/22/16

621 ポイント

6のガイドは作成済み

チーム

UC Davis, Team 2-1, Oliver Fall 2016 UC Davis, Team 2-1, Oliver Fall 2016人のメンバー

UCD-OLIVER-F16S2G1

5 メンバー

12のガイドは作成済み

0 件のコメント

コメントを追加

統計データ:

過去 24時間: 0

過去 7 日: 0

過去 30 日: 1

今までの合計 534