この翻訳は機械によって生成されたものであり、まだ人間による校正は行われていません。 日本語を話せますか? レビューはこちらから。
はじめに
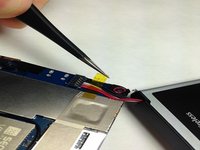
この修理ガイドでは、Verizon Ellipsis Jetpack MHS800Lのバッテリーを取り外す手順を解説します。
必要な工具と部品
-
-
この手順で使用する道具:Phillips #00 Screwdriver$5.49
-
デバイスを裏返し、ラベルが手前に来るように置きます。デバイスの左上隅にあるゴム製のネジカバーを取り外します。
-
ゴムの円形パーツの下にある1.25 mmのネジを、プラスドライバー#00を使用して取り外します。
-
-
-
この手順で使用する道具:iFixit Opening Picks (Set of 6)$4.95
-
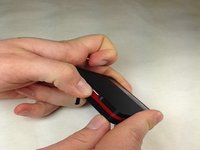
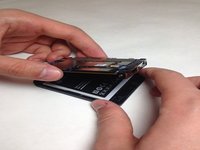
接合部に オープニングピック を差し込み、ケースをこじ開けて外します。
-
-




 FixBotに聞いてみる


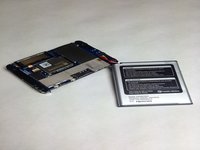


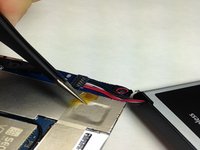


デバイスを再組み立てするには、これらのインストラクションを逆の順番に従って作業を進めてください。
6 の人々がこのガイドを完成させました。

チーム

IUPUI, Team 3-3, Baechle Spring 2016 IUPUI, Team 3-3, Baechle Spring 2016人のメンバー
IUPUI-BAECHLE-S16S3G3
4 メンバー
15のガイドは作成済み
5件のガイドコメント
I'd like to let you know that after step 9, it is possible to unwrap the battery and break loose the circuit board on the battery. At which point you can reinstall the circuit board in the router with no battery attached. This makes the Jetpack plug-in only which is all I need it for anyways. It was a great and free fix for my swollen battery.
Thanks for the article!
Jeff Lovett - 返信 共有
Opps, I think that steps 3 & 4 have been reversed. You can't get to the "3 additional screws" until you're looking at the red cover which is below the black cover that needs to be pried off first.
Otherwise, the process seems to be going well.
bevrievley - 返信 共有
It’s unclear. Once you unscrew that first screw, you have to remove the TOP black portion (the picture looks like you’re removing the bottom). Once you remove that top portion, the red plastic is exposed, revealing the three other screws.
And -- continuing with step 5, there are some plastic "snap" locks between the red and black covers -- 5 by my count, 2 along each of the long edges, 1 along the charging port edge. Always good to pry carefully.
Once apart, battery is on bottom and can be easily removed/replaced as per steps 7 & 8.
bevrievley - 返信 共有
now how do we FORCE a factory data reset without the admin password?
baily jacoby - 返信 共有
