メインコンテンツにスキップ
リペアコミュニティに参加 - アカウントの作成

Turtle Beach Pure Air Button Microswitch Replacement

必要な工具と部品

    1. Turtle Beach Pure Air Button Microswitch Replacement, Bottom Cover: 手順 1、 2の画像 1 Turtle Beach Pure Air Button Microswitch Replacement, Bottom Cover: 手順 1、 2の画像 2
      • Power off the mouse by moving the power switch to the center.

      FixBotに聞いてみる

      コメントを追加

    2. Turtle Beach Pure Air Button Microswitch Replacement: 手順 2、 2の画像 1 Turtle Beach Pure Air Button Microswitch Replacement: 手順 2、 2の画像 2
      • Peel back the mouse feet.

      • Remove the three 1.6mm screws using a JIS #000 screwdriver.

      • Remove the single 1.6mm screws using remove using a 1.3 mm hex screwdriver.

      FixBotに聞いてみる

      コメントを追加

    3. Turtle Beach Pure Air Button Microswitch Replacement: 手順 3、 2の画像 1 Turtle Beach Pure Air Button Microswitch Replacement: 手順 3、 2の画像 2
      • Carefully remove the bottom cover of the mouse.

      • Be cautious of the cable connecting the bottom cover to the rest of the mouse.

      FixBotに聞いてみる

      コメントを追加

    4. Turtle Beach Pure Air Button Microswitch Replacement: 手順 4、 3の画像 1 Turtle Beach Pure Air Button Microswitch Replacement: 手順 4、 3の画像 2 Turtle Beach Pure Air Button Microswitch Replacement: 手順 4、 3の画像 3
      • Disconnect the ribbon cable securing the upper shell to the motherboard.

      • Lift the locking clip to release the cable from its connector.

      FixBotに聞いてみる

      コメントを追加

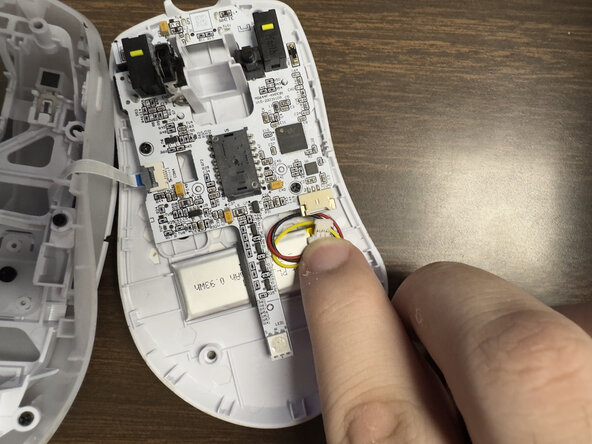
    1. Turtle Beach Pure Air Button Microswitch Replacement, Motherboard: 手順 5、 3の画像 1 Turtle Beach Pure Air Button Microswitch Replacement, Motherboard: 手順 5、 3の画像 2 Turtle Beach Pure Air Button Microswitch Replacement, Motherboard: 手順 5、 3の画像 3
      • Carefully disconnect the battery clip from the motherboard socket by softly pulling the bottom of the clip.

      FixBotに聞いてみる

      コメントを追加

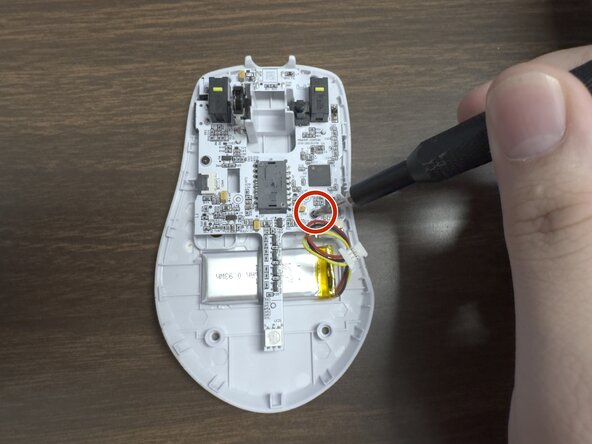
    2. Turtle Beach Pure Air Button Microswitch Replacement: 手順 6、 2の画像 1 Turtle Beach Pure Air Button Microswitch Replacement: 手順 6、 2の画像 2
      • Remove the two 1.6 mm screws on the middle left and lower right sides with a JIS000 screwdriver to disconnect the motherboard from the lower shell.

      FixBotに聞いてみる

      コメントを追加

    3. Turtle Beach Pure Air Button Microswitch Replacement: 手順 7、 2の画像 1 Turtle Beach Pure Air Button Microswitch Replacement: 手順 7、 2の画像 2
      • Gently lift the motherboard out of the housing.

      FixBotに聞いてみる

      コメントを追加

    1. Turtle Beach Pure Air Button Microswitch Replacement, Scroll Wheel: 手順 8、 3の画像 1 Turtle Beach Pure Air Button Microswitch Replacement, Scroll Wheel: 手順 8、 3の画像 2 Turtle Beach Pure Air Button Microswitch Replacement, Scroll Wheel: 手順 8、 3の画像 3
      • Pull the scroll wheel out of its mounting.

      FixBotに聞いてみる

      コメントを追加

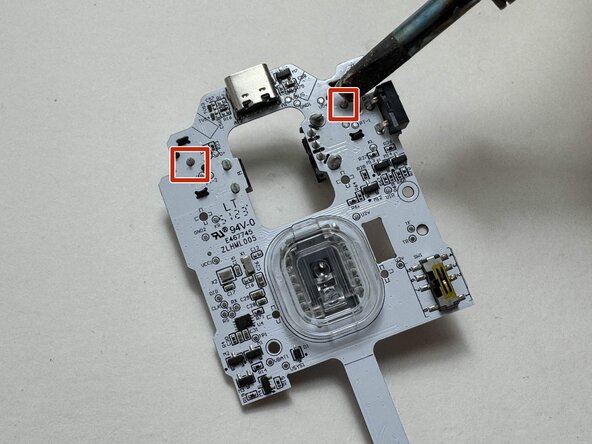
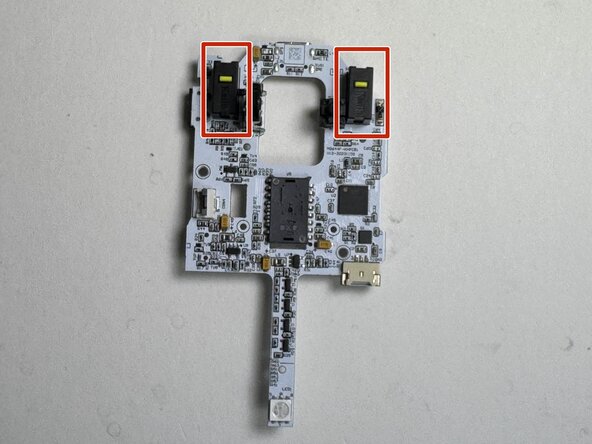
    1. Turtle Beach Pure Air Button Microswitch Replacement, Button Microswitch: 手順 9、 2の画像 1 Turtle Beach Pure Air Button Microswitch Replacement, Button Microswitch: 手順 9、 2の画像 2
      • Carefully lift the motherboard to expose the rear side of the board, including the microswitch solder joints.

      • Desolder the solder joints of the microswitch.

      FixBotに聞いてみる
      コメントを追加

終わりに

This guide is rated Moderate for disassembly. Replacing the microswitch itself requires soldering and is recommended only for users with advanced repair experience.To reassemble your device, follow these instructions in reverse order.

キャンセル: このガイドを終了できませんでした。

作成者

3人の作成者と共同で作成されました。

Malachi Davis

メンバー登録日: 02/04/26

245 ポイント

2のガイドは作成済み

チーム

Austin Community College, Team 9-1, Watkins Spring 2026 Austin Community College, Team 9-1, Watkins Spring 2026人のメンバー

AUSTINCC-WATKINS-S26S9G1

3 メンバー

6のガイドは作成済み

0件のガイドコメント

コメントを追加

統計データ:

過去 24時間: 0

過去 7 日: 8

過去 30 日: 24

今までの合計 105