メインコンテンツにスキップ
リペアコミュニティに参加 - アカウントの作成

Trio STEALTH-9 Motherboard Replacement

必要な工具と部品

  1. Trio STEALTH-9 Motherboard Replacement, Back Cover: 手順 1、 1の画像 1
    • Remove the two Phillips #00 screws on the side of the tablet.

  2. Trio STEALTH-9 Motherboard Replacement: 手順 2、 1の画像 1
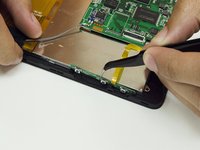
    • Take one of the plastic opening tools and wedge it in the middle of the tablet, starting on the USB Port side.

    • Holding the tool in place, take one of the 6 plastic opening picks and slide it across the opening you made with the opening tool.

  3. Trio STEALTH-9 Motherboard Replacement: 手順 3、 1の画像 1
    • Continue going around the tablet sides with the plastic pick, being sure that you are maintaining the openings you made with either your hand or the opening tool.

    • You will notice some popping as you go around with the pick. Don't worry, this is completely normal.

  4. Trio STEALTH-9 Motherboard Replacement: 手順 4、 1の画像 1
    • Remove the back cover of the tablet to reveal the internals.

    • To replace, pinch each of the ends together until all four sides are closed.

  5. Trio STEALTH-9 Motherboard Replacement, Battery: 手順 5、 1の画像 1
    • With the cover removed, slowly pull the electrical tape away as shown.

  6. Trio STEALTH-9 Motherboard Replacement: 手順 6、 1の画像 1
    • Slowly pull the Battery away from the tablet frame.

  7. Trio STEALTH-9 Motherboard Replacement: 手順 7、 1の画像 1
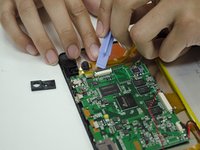
    • Prepare your Soldering Iron and Removal Tools.

    • Contact the iron with each of the battery leads, and pull the lead away from the board.

    • Remove any excess solder as needed.

  8. Trio STEALTH-9 Motherboard Replacement: 手順 8、 1の画像 1
    • To replace your battery, you must reinsert the Battery leads into the Motherboard, being sure that the Red wire goes into the + (positive) terminal and the Black wire goes into the - (negative) terminal.

    • Apply heat and solder to each lead individually.

    • Remove any excess solder if flooding occurs.

  9. Trio STEALTH-9 Motherboard Replacement, Camera: 手順 9、 2の画像 1 Trio STEALTH-9 Motherboard Replacement, Camera: 手順 9、 2の画像 2
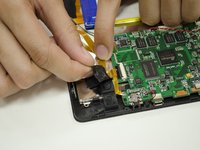
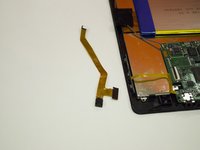
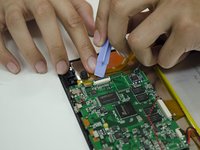
    • Slowly remove the two pieces of electrical tape holding down the Camera ribbon cable.

  10. Trio STEALTH-9 Motherboard Replacement: 手順 10、 2の画像 1 Trio STEALTH-9 Motherboard Replacement: 手順 10、 2の画像 2
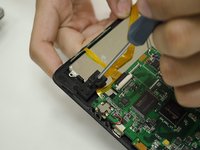
    • Remove the #00 Screw holding down the Camera mount, then remove the Camera mount.

  11. Trio STEALTH-9 Motherboard Replacement: 手順 11、 2の画像 1 Trio STEALTH-9 Motherboard Replacement: 手順 11、 2の画像 2
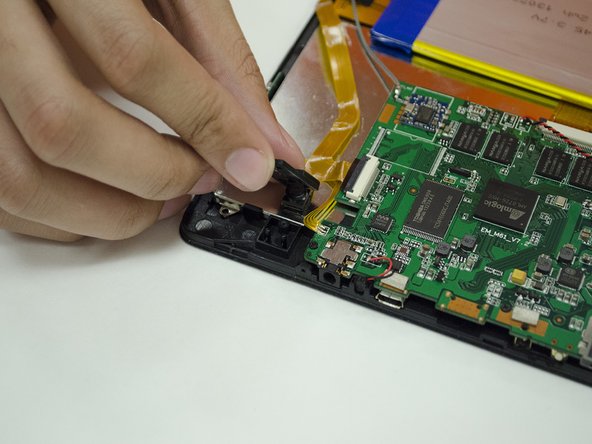
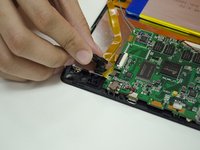
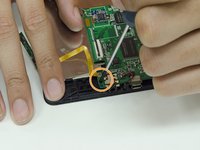
    • Detach the Camera's ribbon cable from the Motherboard using your fingernail or a plastic opening tool.

    • Remove the camera from the frame and replace as needed.

  12. Trio STEALTH-9 Motherboard Replacement, Speaker: 手順 12、 1の画像 1
    • Slowly remove the electrical tape holding down the Speaker wires.

  13. Trio STEALTH-9 Motherboard Replacement: 手順 13、 2の画像 1 Trio STEALTH-9 Motherboard Replacement: 手順 13、 2の画像 2
    • Remove the #00 screw on the Speaker mount and remove the Speaker mount.

  14. Trio STEALTH-9 Motherboard Replacement: 手順 14、 1の画像 1
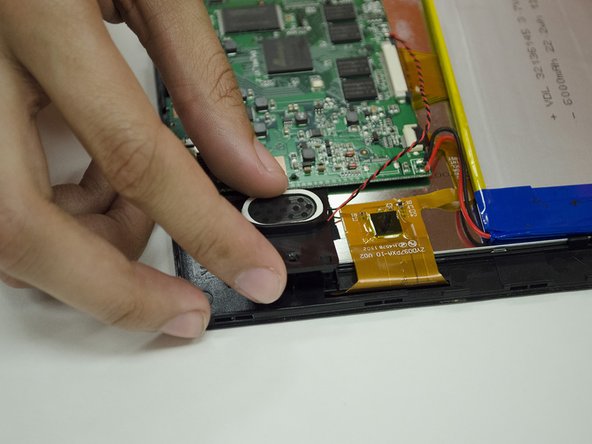
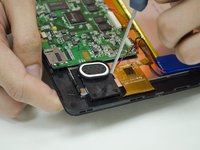
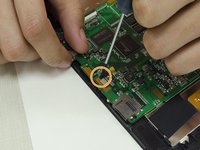
    • Prepare your Soldering tools. Desolder the Speaker leads from the Motherboard.

    • Remove any excess solder as necessary, and apply new solder when replacing a Speaker.

  15. Trio STEALTH-9 Motherboard Replacement, Motherboard: 手順 15、 1の画像 1
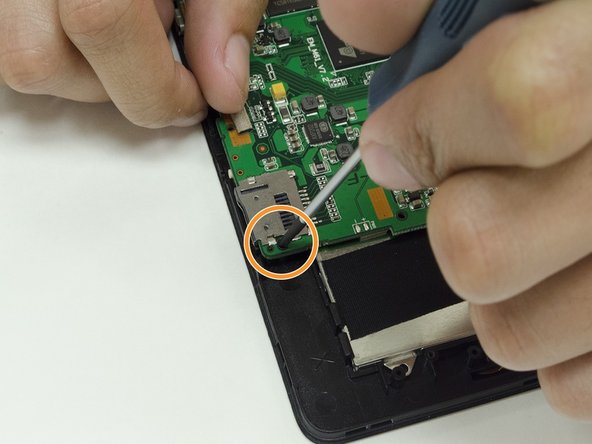
    • Prepare your Desoldering Tools. Remove the grey wire attached to the Motherboard.

    • Remove any excess solder as needed.

  16. Trio STEALTH-9 Motherboard Replacement: 手順 16、 3の画像 1 Trio STEALTH-9 Motherboard Replacement: 手順 16、 3の画像 2 Trio STEALTH-9 Motherboard Replacement: 手順 16、 3の画像 3
    • Remove the three #00 Screws holding down the Motherboard.

  17. Trio STEALTH-9 Motherboard Replacement: 手順 17、 2の画像 1 Trio STEALTH-9 Motherboard Replacement: 手順 17、 2の画像 2
    この手順で使用する道具:
    Tweezers
    $4.99
    • Use a pair of Tweezers to carefully pull the side buttons away from the frame.

    • Use the same Tweezers to carefully pull the microphone away from the front of the frame.

  18. Trio STEALTH-9 Motherboard Replacement: 手順 18、 3の画像 1 Trio STEALTH-9 Motherboard Replacement: 手順 18、 3の画像 2 Trio STEALTH-9 Motherboard Replacement: 手順 18、 3の画像 3
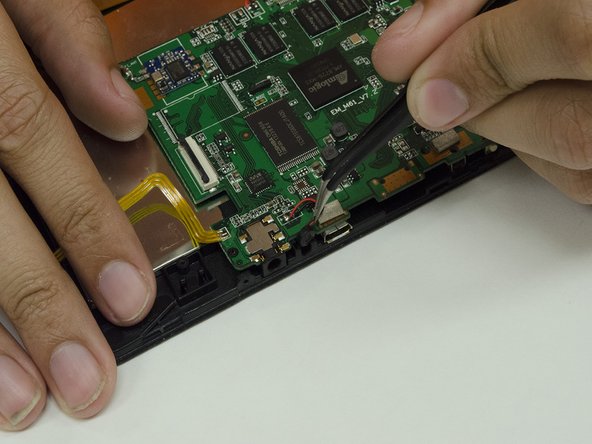
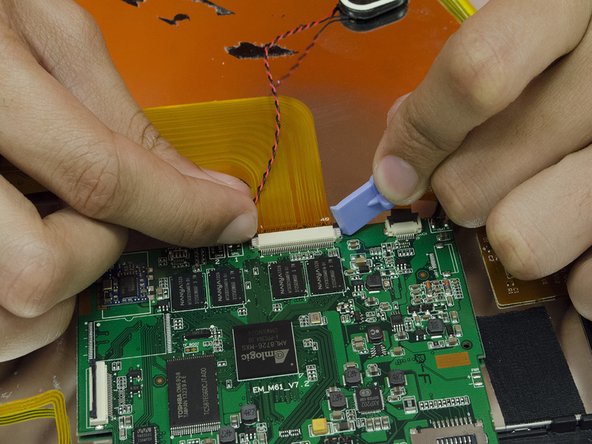
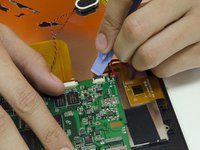
    • Use your fingernails or a plastic opening tool to remove any remaining ribbon cables from the Motherboard.

  19. Trio STEALTH-9 Motherboard Replacement: 手順 19、 1の画像 1
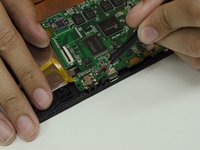
    • With the cables removed, lift the Motherboard off of the frame.

    • Repair or replace the Motherboard as needed.

終わりに

To reassemble your device, follow these instructions in reverse order while being careful with the electronics on your repaired/replaced Motherboard.

2 の人々がこのガイドを完成させました。

作成者

4人の作成者と共同で作成されました。

Mei Liang

メンバー登録日: 01/29/15

228 ポイント

2のガイドは作成済み

チーム

Clemson, Team 15-5, Shirley Winter 2015 Clemson, Team 15-5, Shirley Winter 2015人のメンバー

CLEM-SHIRLEY-W15S15G5

4 メンバー

4のガイドは作成済み

0件のガイドコメント

コメントを追加

統計データ:

過去 24時間: 3

過去 7 日: 13

過去 30 日: 25

今までの合計 773