必要な工具と部品
-
-
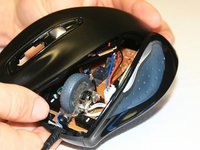
Flip the mouse over and peel off the stickers on the perimeter of the bottom of the mouse.
 FixBotに聞いてみる
-
-
-
Use the Phillips #1 screwdriver to remove four 5 mm screws from the bottom of the mouse.
-
Use the Phillips #1 screwdriver to remove the two 9 mm screws from the bottom of the mouse.
-
-
-
-
Touch your capacitor discharge tool to the capacitor leads on the board to release the stored energy. If leads are inaccessible, wait until you've removed the board from the mouse body.
-
-
-
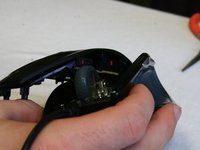
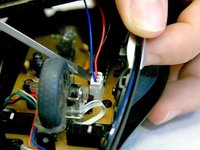
Use a spudger to pry underneath the white plug and pop it out to disconnect the upper board from the lower board.
-
-
-
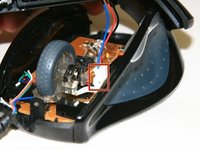
Remove the 5 mm round head screw holding the middle piece to the top piece.
-
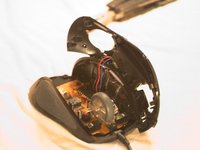
The outermost shell will now separate from the middle structure.
-


To reassemble your device, follow these instructions in reverse order.
3 の人々がこのガイドを完成させました。
チーム

Cal Poly, Team 18-36, Regan Winter 2013 Cal Poly, Team 18-36, Regan Winter 2013人のメンバー
CPSU-REGAN-W13S18G36
3 メンバー
30のガイドは作成済み