はじめに
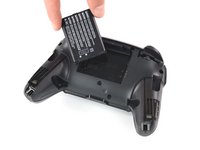
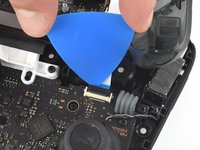
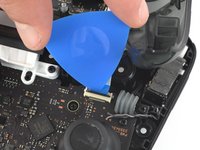
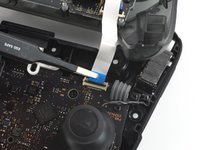
このガイドは、Nintendo Switch Proコントローラーのケースを交換するためのものです。リチウムイオンバッテリーを取り外しますので、注意して作業を行ってください。バッテリーが膨張している場合は、膨張したバッテリーの適切な処理方法 をご確認ください。このガイドを正しく完成させるためには、ホワイトリボンケーブルを損傷しないように手順8と9を完了させてください。
必要な工具と部品
-
-
-
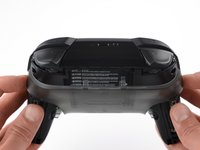
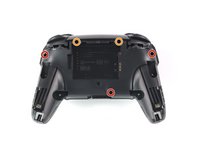
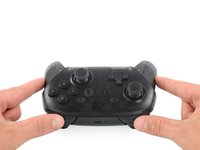
プラス#1ドライバーを使って、コントローラーの裏面から5mmネジを5本外します。
-
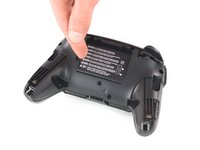
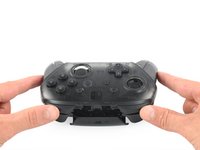
ハンドグリップの上にある2本のケースネジと、バッテリーベイの下にある1本のケースネジは、座面が浅くなっています。そのため、3本のネジは簡単に取り外すことができます。
-
ZRとZLのショルダーボタンに隣接する2つのケースネジは、座面が深くなっています。これらのネジに届くように、エクステンションまたは軸の長いプラスドライバーを使用してください。
-


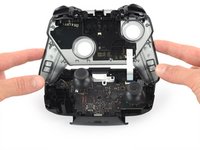


このデバイスを再組み立てするには、インストラクションを逆の順番に従って作業を進めてください。
このデバイスを再組み立てするには、インストラクションを逆の順番に従って作業を進めてください。
21 の人々がこのガイドを完成させました。
以下の翻訳者の皆さんにお礼を申し上げます:
100%

これらの翻訳者の方々は世界を修理する私たちのサポートをしてくれています。 あなたも貢献してみませんか?
翻訳を始める ›
チーム

The Citadel Military College of South Carolina, Team S2-G9, Eggleston Fall 2020 The Citadel Military College of South Carolina, Team S2-G9, Eggleston Fall 2020人のメンバー
CMCSC-EGGLESTON-F20S2G9
3 メンバー
18のガイドは作成済み
3 件のコメント
I wondered why Xbox X controllers grips were difficult to remove and also make a squeak sound when the plastic part is not closing properly but a double-sided tape should do it...
Nicholin V - 返信
Disassembly was fine, but reassembly was a bit trickier. Removing the front casing from the chassis as in step 8 required a bit of force, since it seemed like the two were clipped together. Putting the two together, I can't seem to find where exactly that clipping connection was. I'd ignore it and move on to the screws, but it doesn't fit flush and I'm left with this narrow gap at the top that seems to be causing trouble. Any idea where I should be looking/applying pressure?
At step eight, the easiest way to separate the two halves is to use your triangle pry tool, on the sides, underneath where the handle covers are, on both sides. I thought that I had missed a screw or something but that wasn't true. Just slowly pull them apart, I used this guide to clean my pro controller, thanks!