メインコンテンツにスキップ

Stabilizer Spring Replacement

必要な工具と部品

  1. Stabilizer Spring Replacement, Opening The Case: 手順 1、 1の画像 1
    • Push the gray tab down, using a spudger if necessary, and the battery will come out.

    • Failure to remove the battery prior to disassembly can result in harm.

  2. Stabilizer Spring Replacement: 手順 2、 3の画像 1 Stabilizer Spring Replacement: 手順 2、 3の画像 2 Stabilizer Spring Replacement: 手順 2、 3の画像 3
    • There are a total of six screws that must be removed using the the #000 Philips screwdriver.

    • As per picture one: there is one 4.9 mm Philips head screw on the left side of the camera.

    • As per picture two: on the bottom of the camera, there are three 3.4 mm Philips head screws; these are located on the darker area of the case.

    • As per picture three: there are two 5.3 mm Philips head screws on the right side, one is beneath the USB cover.

  3. Stabilizer Spring Replacement: 手順 3、 1の画像 1
    • Open the case by peeling off the back panel.

    • Pull the case apart gently so that the ribbon connector will not tear.

  4. Stabilizer Spring Replacement: 手順 4、 2の画像 1 Stabilizer Spring Replacement: 手順 4、 2の画像 2
    • Disconnect the two ribbon cables as shown in picture one.

    • Avoid using metal pry tools, as shown in the photo, on internal electronic components, as it can cause a short and damage the device. Use an ESD-safe tool such as a standard nylon spudger.

    • To disconnect a ribbon cable, use a spudger to lift the black tab then pull the ribbon out. This works the same for all ribbon cables.

  5. Stabilizer Spring Replacement: 手順 5、 1の画像 1
    • The back panel has now been removed.

  6. Stabilizer Spring Replacement, Sensor Assembly: 手順 6、 3の画像 1 Stabilizer Spring Replacement, Sensor Assembly: 手順 6、 3の画像 2 Stabilizer Spring Replacement, Sensor Assembly: 手順 6、 3の画像 3
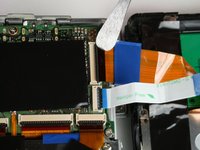
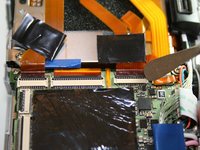
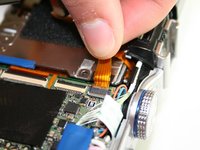
    • Using a spudger, remove the ribbon cables by pushing the black tab back and gently pulling the cable out.

    • Avoid using metal pry tools, as shown in the photo, on internal electronic components, as it can cause a short and damage the device. Use an ESD-safe tool such as a standard nylon spudger.

    • Do this process for the two ribbon cables shown in the third photo.

  7. Stabilizer Spring Replacement: 手順 7、 2の画像 1 Stabilizer Spring Replacement: 手順 7、 2の画像 2
    この手順で使用する道具:
    Tweezers
    $4.99
    購入する
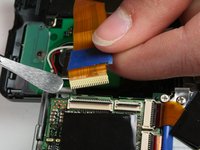
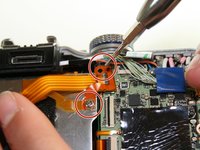
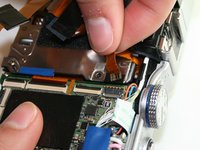
    • Using the #000 Phillips screwdriver, remove the 4.3 mm screw as shown by the screwdriver and the 6.0 mm screw holding down the ribbon.

    • These screws have washers on them, do not to lose them.

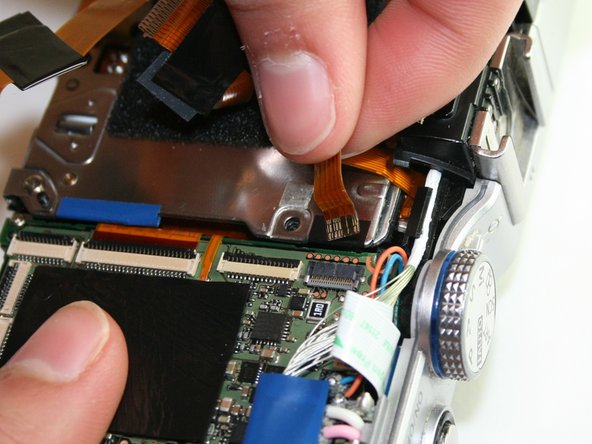
    • Using tweezers, gently lift the ribbon off the sticky pad.

  8. Stabilizer Spring Replacement: 手順 8、 3の画像 1 Stabilizer Spring Replacement: 手順 8、 3の画像 2 Stabilizer Spring Replacement: 手順 8、 3の画像 3
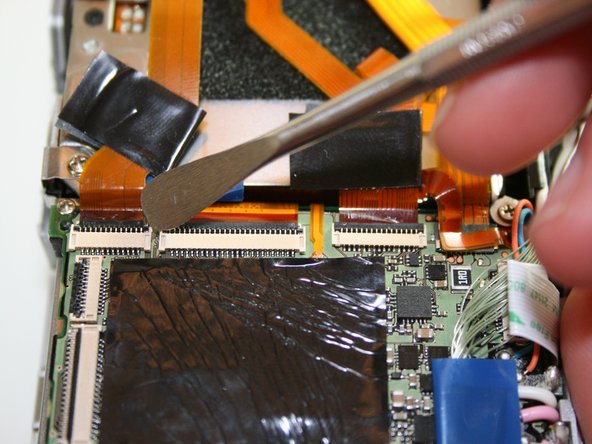
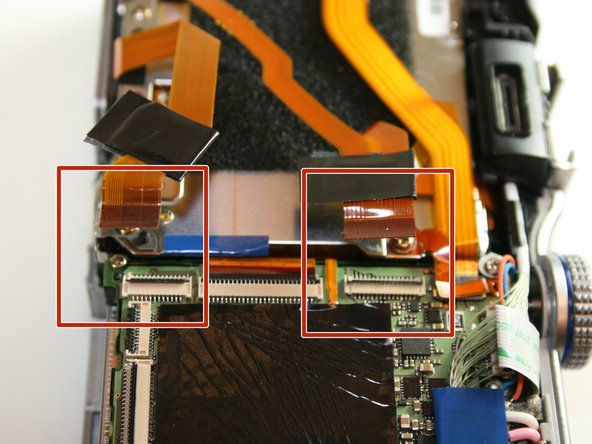
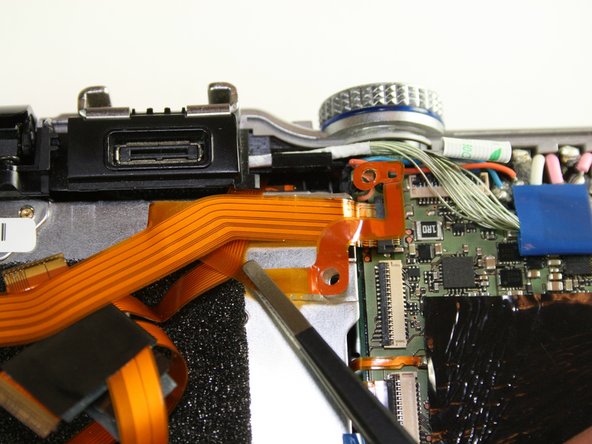
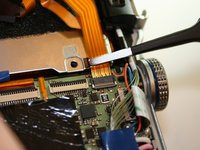
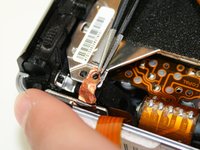
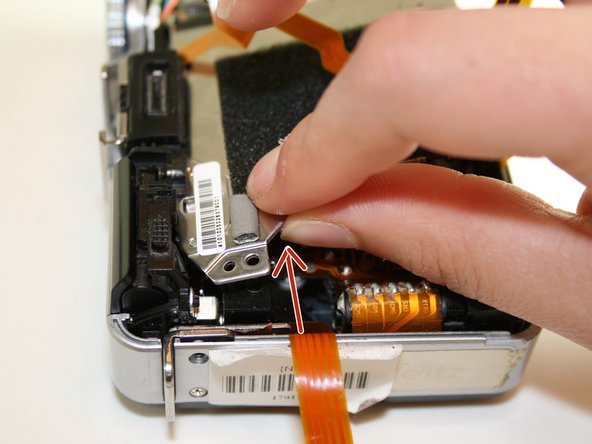
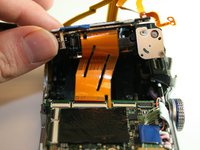
    • Unlike previous connectors, this cable has a light grey clip holding it in place on opposite side of the connector in regards where the ribbon is inserted. Flip it up and then using your fingers, gently pull the top ribbon cable out.

  9. Stabilizer Spring Replacement: 手順 9、 1の画像 1
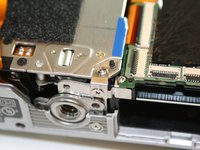
    • Using a #000 Phillips screwdriver, remove the 6.0 mm screw on the bottom left hand corner. You can locate the screw on the picture as the green circle.

  10. Stabilizer Spring Replacement: 手順 10、 2の画像 1 Stabilizer Spring Replacement: 手順 10、 2の画像 2
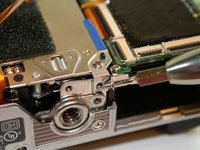
    • In the upper left hand corner, use the #000 Phillips screwdriver to remove the 6.0 mm screw.

    • Retain the copper washer held in by this screw.

    • Using tweezers gently lift the copper grounding strip.

    • Do not tear the strip as you pull it off, it must stay attached to the main camera body.

  11. Stabilizer Spring Replacement: 手順 11、 3の画像 1 Stabilizer Spring Replacement: 手順 11、 3の画像 2 Stabilizer Spring Replacement: 手順 11、 3の画像 3
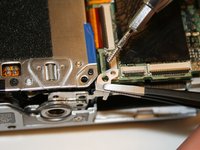
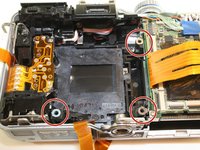
    • Remove the bracket in the lower right hand corner. In order to do so, you must remove two different screws.

    • Using the #000 Phillips screwdriver, remove the 2.4 mm screw on the bottom.

    • Using the #000 Phillips screwdriver, remove the 6.0 mm screw on the top and lift off the bracket.

  12. Stabilizer Spring Replacement: 手順 12、 3の画像 1 Stabilizer Spring Replacement: 手順 12、 3の画像 2 Stabilizer Spring Replacement: 手順 12、 3の画像 3
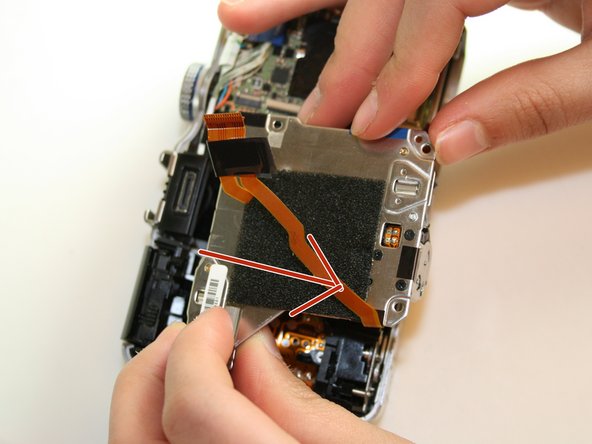
    • Now you can lift out the sensor assembly. The following steps will explain how to lift it out.

    • First, sightly lift the bottom half following the direction of the arrow.

    • Second, lift the top left up side up. It may be a little stuck so you will have to wiggle it out.

    • Finally, pull the entire assembly towards the bottom and away from the case.

    • There is a ribbon connector that is beneath the assembly. Be careful when lifting the assembly out. Do not yank it out very hard or you may damage the ribbon connector.

  13. Stabilizer Spring Replacement: 手順 13、 2の画像 1 Stabilizer Spring Replacement: 手順 13、 2の画像 2
    • This is the sensor assembly with the photo showing the connected ribbon cable.

    • There are three washers held in by the 6.0 mm screws as shown in picture two. Be sure to replace them when reassembling.

  14. Stabilizer Spring Replacement: 手順 14、 1の画像 1
    • The sensor assembly has been removed.

  15. Stabilizer Spring Replacement, Stablizer Spring: 手順 15、 1の画像 1
    この手順で使用する道具:
    Tweezers
    $4.99
    購入する
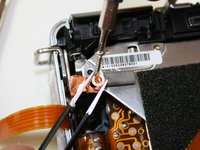
    • Using tweezers grasp the end opposite the screw, pull against the tension and twist the spring out. You may have to try it a couple times, but just keep twisting and pulling at the spring.

  16. Stabilizer Spring Replacement: 手順 16、 1の画像 1
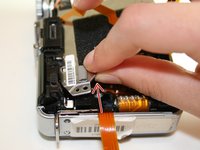
    • When you pull the spring off one side, it will easily come off the other side. Just slide the spring off.

終わりに

To reassemble your device, follow these instructions in reverse order.

2 の人々がこのガイドを完成させました。

作成者

4人の作成者と共同で作成されました。

Jeffery Smith

メンバー登録日: 03/11/15

748 ポイント

6のガイドは作成済み

チーム

Colorado Springs, Team 9-1, Panko Spring 2015 Colorado Springs, Team 9-1, Panko Spring 2015人のメンバー

UCCS-PANKO-S15S9G1

3 メンバー

12のガイドは作成済み

0 件のコメント

コメントを追加

統計データ:

過去 24時間: 1

過去 7 日: 3

過去 30 日: 59

今までの合計 3,735