はじめに
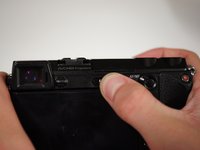
Use this guide to remove the front and back panels covering the housing of the camera, allowing you to replace the viewfinder. This guide will take time to complete, but the steps are not very difficult to perform.
必要な工具と部品
-
-
If the camera is on, rotate the power switch on top of the camera counterclockwise to turn the camera off.
 FixBotに聞いてみる
-
-
-
Flip the camera over such that the power switch points down.
-
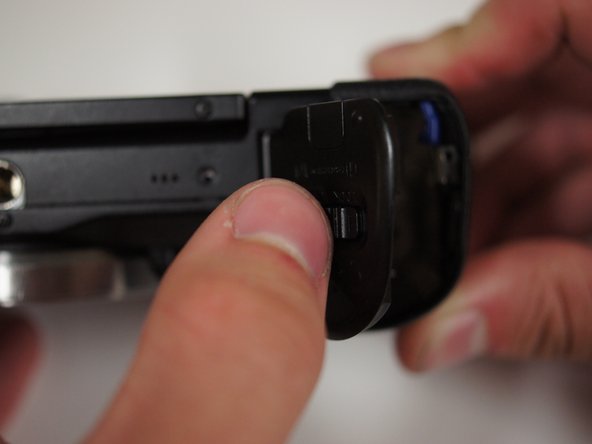
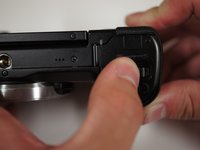
Slide the switch on the bottom of the camera grip towards the lens to open the battery door.
-
-
-
With the battery door open, push the blue lever in the battery compartment to release the battery.
-
-
-
To the left of the battery compartment, the SD card needs to be pushed down slightly with your fingers, which will cause the card to eject.
-
Pull the card out with your fingers.
-
-
-
First, turn the camera upside down.
-
Press the button located next to silver lens mount and rotate the lens counterclockwise.
-
Pull the lens away from the camera body.
-
-
-
Start by removing the two 5/32" #00 screws on the bottom of the camera using the Phillips #00 screwdriver.
-
-
-
Remove the 5/32" #00 screw at the top of the compartment using the Phillips #00 screwdriver.
-
Remove the two 5/32" #00 screws from inside the compartment using the Phillips #00 screwdriver.
-
-
-
Looking at the left side of the camera, lift open the door that has 'HDMI' written on it.
-
Remove the two visible 5/32" #00 screws using the Phillips #00 screwdriver.
-
-
-
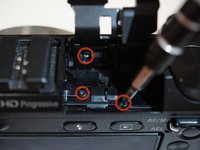
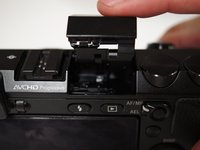
Looking at the back of the camera, press the button with a lightning bolt on it to pop the flash open.
-
Remove the three 5/32" screws from within the flash compartment using the Phillips #00 screwdriver.
-
Close the flash compartment.
-
-
-
この手順で使用する道具:Tweezers$4.99
-
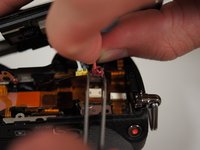
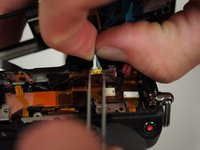
Using tweezers or your fingers, gently remove the blue ribbon cable from the port.
-
-
-
Place the tips of your tweezers on either side of the red jack.
-
Gently pull the red plug out of the jack.
-
Repeat those steps for the yellow jack and plug.
-
Now that the top is free, place it aside for later.
-
-
-
Lift the LCD screen with your fingers such that the screen is bent slightly away from the camera.
-
-
-
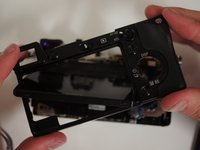
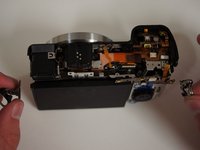
Starting at the bottom, gently pry the back panel away from the body of the camera using your fingers.
-
Once the back panel is free from the body, rotate the camera such that back is facing you and pull the back panel past the screen by rotating it to fit around the screen.
-
Set the back panel aside.
-
-
-
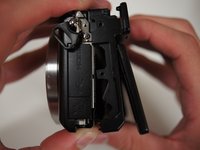
Remove the two 3/32" #00 screws located next to the viewfinder using the Phillips #00 screwdriver.
-
-
-
Use a Phillips #00 screwdriver to remove the two screws from the right side of the camera below the D ring:
-
The 5/32" upper screw
-
The 3/32" lower screw
-
-
-
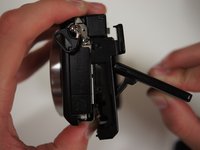
Remove two more 3/32" #00 screws from the bottom of the camera using the Phillips #00 screwdriver.
-
-
-
Remove two more 3/32" #00 screws from the metal bracket on the left side of the camera using the Phillips #00 screwdriver.
-
-
この手順で使用する道具:Tweezers$4.99
-
Unplug the orange ribbon cable on the top right of the camera next to the metal bracket by applying tweezers to the tabs on either side of the plug.
-
-
-
Before pulling off the assembly, fold the rightmost tab of the flexible circuit board away from the metal bracket.
-
-
-
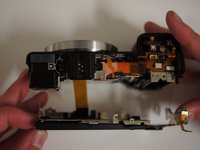
Pull on the D rings on either side of the camera to start removing the assembly.
-
Once the brackets are cleared from black shell, take them off and set them aside.
-
Continue to remove the screen assembly.
-
-
-
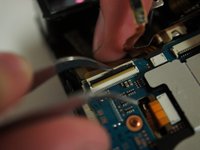
With the camera face down, move the assembly away from you to get a clear view of the wide ribbon cable.
-
Unplug the cable by applying tweezers to the tabs on either side of the plug.
-
Set the LCD assembly aside.
-
-
この手順で使用する道具:Tweezers$4.99
-
Using the tweezers, unhook the flexible circuit board from the metal tab on the right of the viewfinder by rotating it to the left.
-
-
-
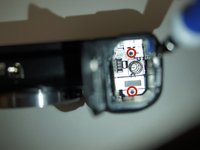
Remove the 5/32" #00 screw next to the back right of the viewfinder using the Phillips #00 screwdriver.
-
-
-
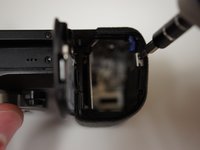
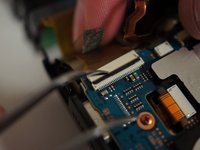
Using the tweezers lift the black piece of tape from the circuit board below the viewfinder.
-
-
-
Use the tweezers to lift the black switch on the white receptacle just below the viewfinder. If properly opened, the ribbon cable will remove with very little force.
-


To reassemble your device, follow these instructions in reverse order.
9 の人々がこのガイドを完成させました。
チーム

Cal Poly, Team 10-55, Amido Spring 2014 Cal Poly, Team 10-55, Amido Spring 2014人のメンバー
CPSU-AMIDO-S14S10G55
4 メンバー
46のガイドは作成済み
4件のガイドコメント
A very handy set of instructions to have for working on an Next. Someone forced the top cover off the flash/strobe assembly of my Nex7 with their fingernail instead of using the push button. Consequently they damaged the black plastic top cover and broke the small coil spring that keeps the flash/strobe lense pointing forward. Are there any guides to help me remove the damaged assembly in order to fit an OEM replacement assembly? I reside in the UK, and the main Sony repair centre informs me that they can't obtain a new strobe/flash assembly. Does anybody know where I could obtain an OEM black top assembly? Are there any high quality direct replacement aftermarket compatible ones (I'm sure the Sony part is manufactured by a supplier to Sony for assembly of the camera) that can be recommended to fit the Nex 7?
Regards,
Sam Ellis
(Scotland, UK)
Hi, i want to buy nex7 viewfinder. Where can i find it? Sorry by me english
Nano Lopez - 返信 共有