メインコンテンツにスキップ
リペアコミュニティに参加 - アカウントの作成

Sony NEX-5R Rear Case Replacement

必要な工具と部品

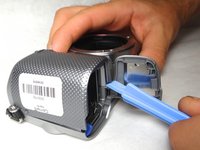
    1. Sony NEX-5R Rear Case Replacement, Front Case: 手順 1、 2の画像 1 Sony NEX-5R Rear Case Replacement, Front Case: 手順 1、 2の画像 2
      • Open the battery pack door by moving the slider to "OPEN".

      • Remove the 3.25 mm silver screw inside the battery pack with a Phillips screwdriver.

      FixBotに聞いてみる

      コメントを追加

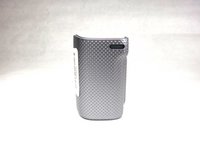
    2. Sony NEX-5R Rear Case Replacement: 手順 2、 1の画像 1
      • Remove the 3.25 mm exterior screw with a Phillips screwdriver.

      FixBotに聞いてみる

      コメントを追加

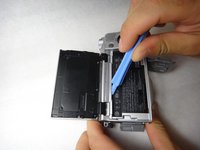
    3. Sony NEX-5R Rear Case Replacement: 手順 3、 2の画像 1 Sony NEX-5R Rear Case Replacement: 手順 3、 2の画像 2
      • Use the spudger to raise the corner of the case from the camera.

      • One component of the front case should now be separate from the camera.

      FixBotに聞いてみる

      コメントを追加

    1. Sony NEX-5R Rear Case Replacement, Rear Case: 手順 4、 1の画像 1
      • Remove the three (3.5 mm) screws from the bottom of the camera with the Phillips screwdriver.

      FixBotに聞いてみる

      コメントを追加

    2. Sony NEX-5R Rear Case Replacement: 手順 5、 1の画像 1
      • Open the HDMI port, and remove the the two (3.5 mm) Phillips screws exposed on that side.

      FixBotに聞いてみる

      コメントを追加

    3. Sony NEX-5R Rear Case Replacement: 手順 6、 1の画像 1
      • Remove the two 4mm screws from the interior of the battery pack, and one 3.5mm screw from beside it.

      FixBotに聞いてみる

      コメントを追加

    4. Sony NEX-5R Rear Case Replacement: 手順 7、 1の画像 1
      • Looking at the bottom of the camera, use the spudger to lift the rear case away from the camera body.

      FixBotに聞いてみる

      コメントを追加

    5. Sony NEX-5R Rear Case Replacement: 手順 8、 2の画像 1 Sony NEX-5R Rear Case Replacement: 手順 8、 2の画像 2
      • Using the spudger again, carefully pry from the top of the camera to remove the back frame.

      • The back frame is fragile, so use the spudger gently.

      FixBotに聞いてみる

      コメントを追加

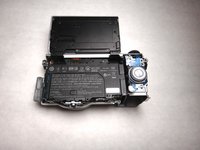
    6. Sony NEX-5R Rear Case Replacement: 手順 9、 1の画像 1
      • The back case should now be removed and look like this.

      FixBotに聞いてみる

      コメントを追加

終わりに

To reassemble your device, follow these instructions in reverse order.

キャンセル: このガイドを終了できませんでした。

ある他の人がこのガイドを完成しました。

作成者

6人の作成者と共同で作成されました。

Emily Trujillo

メンバー登録日: 04/08/14

1,153 ポイント

6のガイドは作成済み

チーム

Cal Poly, Team 8-9, Regan Spring 2014 Cal Poly, Team 8-9, Regan Spring 2014人のメンバー

CPSU-REGAN-S14S8G9

4 メンバー

14のガイドは作成済み

0件のガイドコメント

コメントを追加

統計データ:

過去 24時間: 3

過去 7 日: 18

過去 30 日: 68

今までの合計 3,519