メインコンテンツにスキップ
リペアコミュニティに参加 - アカウントの作成
Shark ION Robot R75 Side Sensor Replacement

必要な工具と部品

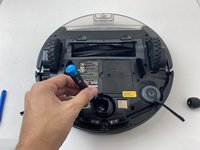
    1. Shark ION Robot R75 Side Sensor Replacement, Battery: 手順 1、 3の画像 1 Shark ION Robot R75 Side Sensor Replacement, Battery: 手順 1、 3の画像 2 Shark ION Robot R75 Side Sensor Replacement, Battery: 手順 1、 3の画像 3
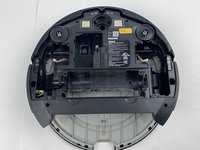
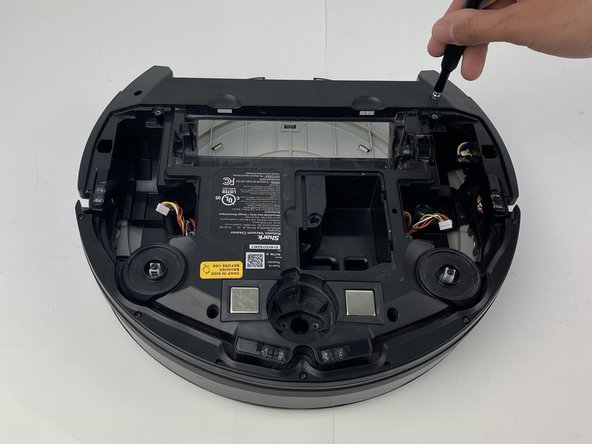
      • Make sure the robot is shut off by pressing the power button on top.

      • Flip the R75 over so that the underside is facing up.

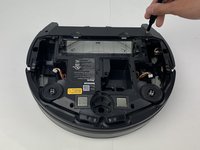
      • Using a Phillips #1 screwdriver, remove the 4mm screw in the battery cover.

      • Remove the battery cover.

      FixBotに聞いてみる

      コメントを追加

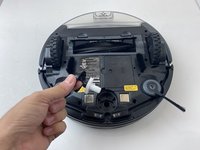
    2. Shark ION Robot R75 Side Sensor Replacement: 手順 2、 3の画像 1 Shark ION Robot R75 Side Sensor Replacement: 手順 2、 3の画像 2 Shark ION Robot R75 Side Sensor Replacement: 手順 2、 3の画像 3
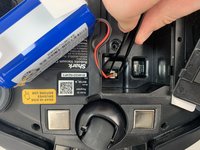
      • Be careful when removing the battery, as it will still be connected to a wire.

      • Slowly pull the white tabs outward to remove the battery.

      FixBotに聞いてみる

      コメントを追加

    3. Shark ION Robot R75 Side Sensor Replacement: 手順 3、 2の画像 1 Shark ION Robot R75 Side Sensor Replacement: 手順 3、 2の画像 2
      この手順で使用する道具:
      Tweezers
      $4.99
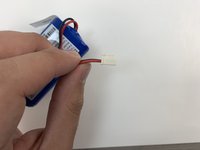
      • Be careful when removing the connector, as the part can break if too much force is used.

      • Push down on the tab of the battery connector using a set of tweezers and pull the connector away from the robot to free the wire.

      • Remove the battery from the device.

      FixBotに聞いてみる

      コメントを追加

    1. Shark ION Robot R75 Side Sensor Replacement, Main Brush: 手順 4、 1の画像 1
      • Push on the two tabs on the edge of the main brush cover and pull up to remove the cover.

      FixBotに聞いてみる

      コメントを追加

    2. Shark ION Robot R75 Side Sensor Replacement: 手順 5、 1の画像 1
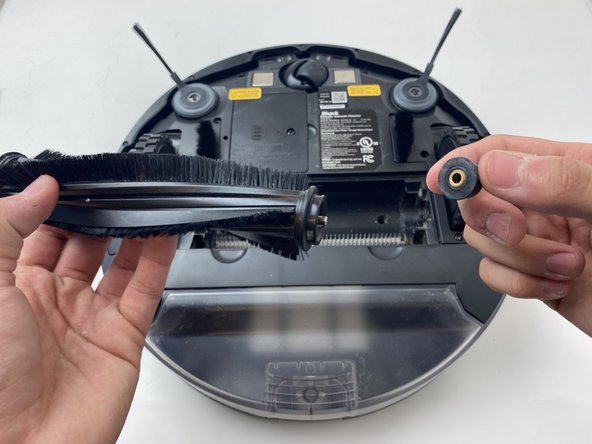
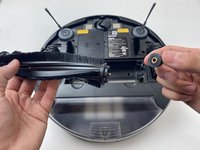
      • Pull the main brush slightly to the right to remove it from the compartment.

      FixBotに聞いてみる

      コメントを追加

    3. Shark ION Robot R75 Side Sensor Replacement: 手順 6、 2の画像 1 Shark ION Robot R75 Side Sensor Replacement: 手順 6、 2の画像 2
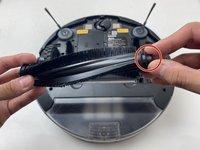
      • Remove the rubber end cap indicated by the red circle.

      • This step is not needed for a replacement. However, it is important for maintenance. Hair will build up in this area over time, and will cause error messages to pop up, as well as stopping the R75 from cleaning and moving.

      • Inspect this component at least every six months. This time may be less if you have animals.

      FixBotに聞いてみる

      コメントを追加

    1. Shark ION Robot R75 Side Sensor Replacement, Side Brush: 手順 7、 3の画像 1 Shark ION Robot R75 Side Sensor Replacement, Side Brush: 手順 7、 3の画像 2 Shark ION Robot R75 Side Sensor Replacement, Side Brush: 手順 7、 3の画像 3
      • Grab the side brushes by the plastic tab at the base of the bristles, and gently lift up.

      • It's recommended to clean the area with a dry microfiber cloth during replacement, as debris can collect beneath the brush during use.

      FixBotに聞いてみる

      コメントを追加

    1. Shark ION Robot R75 Side Sensor Replacement, Drive Wheel Assembly: 手順 8、 1の画像 1
      • Flip the R75 to its underside.

      • Make sure the R75 is shut off.

      • For extra security, disconnect the battery by following the prerequisite guide.

      FixBotに聞いてみる

      コメントを追加

    2. Shark ION Robot R75 Side Sensor Replacement: 手順 9、 3の画像 1 Shark ION Robot R75 Side Sensor Replacement: 手順 9、 3の画像 2 Shark ION Robot R75 Side Sensor Replacement: 手順 9、 3の画像 3
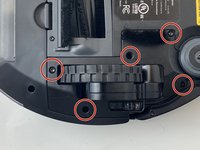
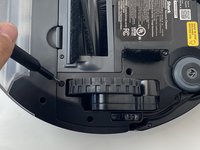
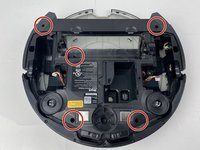
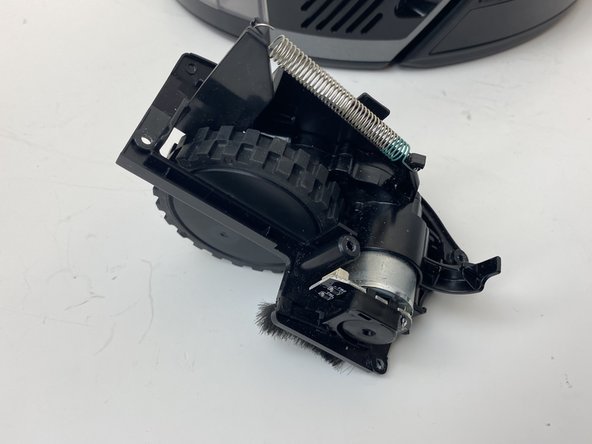
      • Using a Torx T15 screwdriver, remove the five screws from the drive wheel assembly.

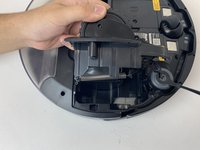
      • Carefully lift the drive wheel assembly from the wheel well by gently pulling up on the wheel.

      • The assembly will still be connected to the motherboard via a cable, so be sure not to pull so hard that the cable rips.

      FixBotに聞いてみる

      コメントを追加

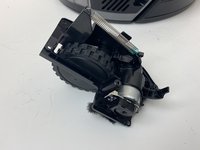
    3. Shark ION Robot R75 Side Sensor Replacement: 手順 10、 3の画像 1 Shark ION Robot R75 Side Sensor Replacement: 手順 10、 3の画像 2 Shark ION Robot R75 Side Sensor Replacement: 手順 10、 3の画像 3
      • Flip the wheel assembly over and disconnect the cable connector on its underside.

      • Remove the drive wheel assembly.

      • Repeat this process for the other side if necessary.

      FixBotに聞いてみる

      コメントを追加

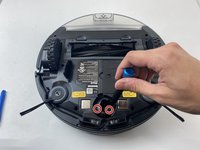
    1. Shark ION Robot R75 Side Sensor Replacement, Shark ION Robot R75 Caster Wheel: 手順 11、 1の画像 1
      • Orient the device with the bottom facing up.

      FixBotに聞いてみる

      コメントを追加

    2. Shark ION Robot R75 Side Sensor Replacement: 手順 12、 3の画像 1 Shark ION Robot R75 Side Sensor Replacement: 手順 12、 3の画像 2 Shark ION Robot R75 Side Sensor Replacement: 手順 12、 3の画像 3
      • Using a plastic opening tool, pry first one side of the wheel, then the other out of the caster.

      • Remove the wheel.

      FixBotに聞いてみる

      コメントを追加

    3. Shark ION Robot R75 Side Sensor Replacement: 手順 13、 3の画像 1 Shark ION Robot R75 Side Sensor Replacement: 手順 13、 3の画像 2 Shark ION Robot R75 Side Sensor Replacement: 手順 13、 3の画像 3
      • Using a Torx TR9 screwdriver, remove both screws from the caster assembly beneath the wheel.

      • Pull the caster assembly up from its slot in the device.

      FixBotに聞いてみる

      コメントを追加

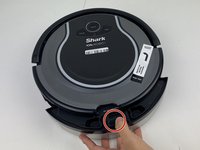
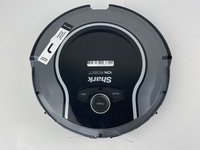
    1. Shark ION Robot R75 Side Sensor Replacement, Top Cover: 手順 14、 3の画像 1 Shark ION Robot R75 Side Sensor Replacement, Top Cover: 手順 14、 3の画像 2 Shark ION Robot R75 Side Sensor Replacement, Top Cover: 手順 14、 3の画像 3
      • Push down on the black tab and remove the dust bin

      FixBotに聞いてみる

      コメントを追加

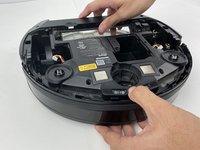
    2. Shark ION Robot R75 Side Sensor Replacement: 手順 15、 2の画像 1 Shark ION Robot R75 Side Sensor Replacement: 手順 15、 2の画像 2
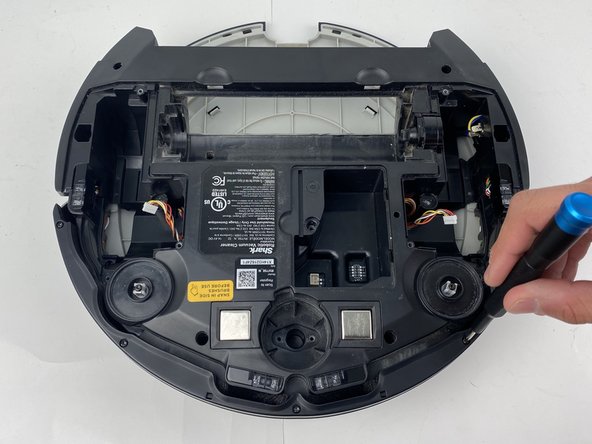
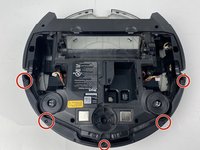
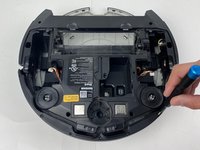
      • Using a Torx TR15 screwdriver, remove the five screws from the bottom cover.

      FixBotに聞いてみる

      コメントを追加

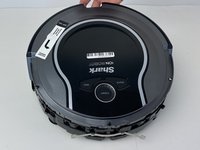
    3. Shark ION Robot R75 Side Sensor Replacement: 手順 16、 3の画像 1 Shark ION Robot R75 Side Sensor Replacement: 手順 16、 3の画像 2 Shark ION Robot R75 Side Sensor Replacement: 手順 16、 3の画像 3
      • Make sure the robot is facing rearward

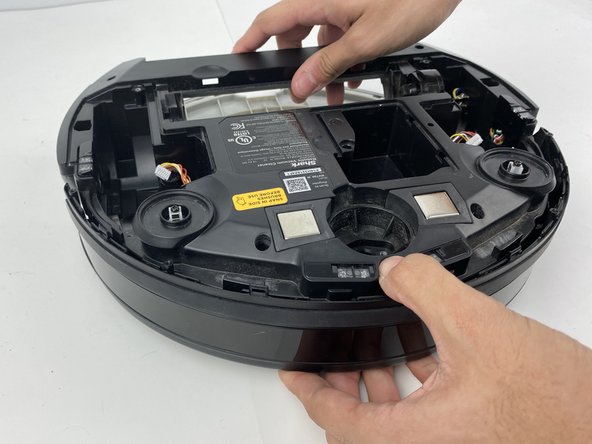
      • Using a Torx TR15 screwdriver, remove the five screws along the front edge of the device.

      • Pull the bottom part of the bump guard away from the body of the device.

      FixBotに聞いてみる

      コメントを追加

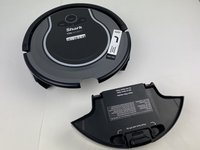
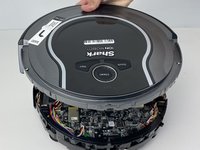
    4. Shark ION Robot R75 Side Sensor Replacement: 手順 17、 3の画像 1 Shark ION Robot R75 Side Sensor Replacement: 手順 17、 3の画像 2 Shark ION Robot R75 Side Sensor Replacement: 手順 17、 3の画像 3
      • Lift the top cover up from the rear of the robot to separate the top cover from the rest of the robot.

      • Be careful when separating the top from the rest of the robot, as the plastic clips can break if excessive force is applied.

      • From here, easy access to all sensors, the main brush motor, and the fan are all granted.

      FixBotに聞いてみる

      コメントを追加

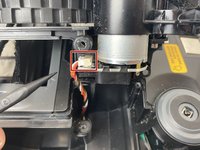
    1. Shark ION Robot R75 Side Sensor Replacement, Side Sensor: 手順 18、 2の画像 1 Shark ION Robot R75 Side Sensor Replacement, Side Sensor: 手順 18、 2の画像 2
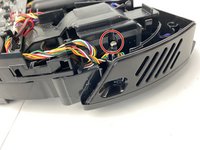
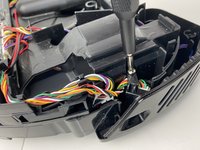
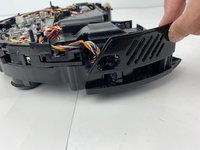
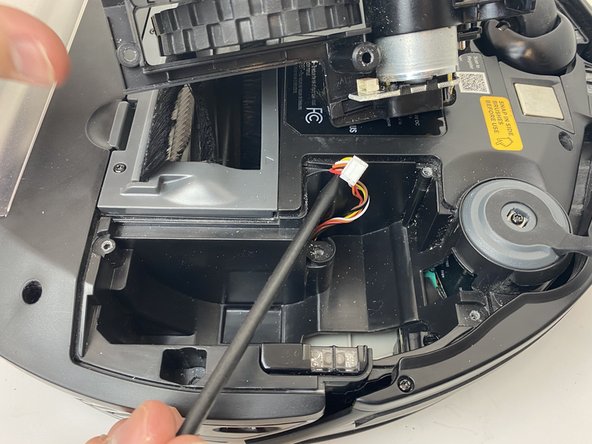
      • Using a Phillips #00 screwdriver, remove the screw holding down the diagonally vented side cover.

      • Slide the sensor out from the base of the robot

      FixBotに聞いてみる

      コメントを追加

    2. Shark ION Robot R75 Side Sensor Replacement: 手順 19、 2の画像 1 Shark ION Robot R75 Side Sensor Replacement: 手順 19、 2の画像 2
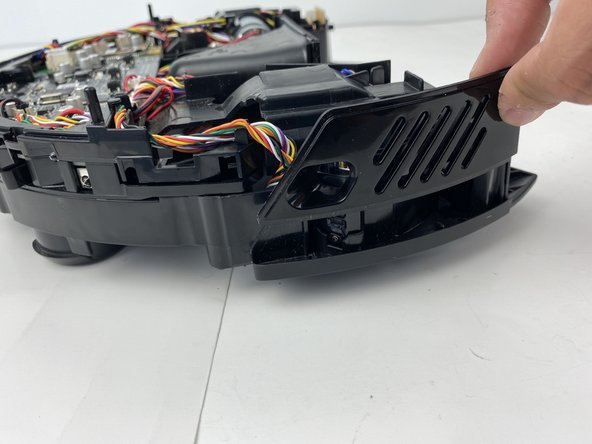
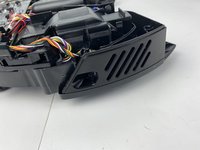
      • Lift up the diagonally vented cover on the side of the robot containing the side sensor.

      FixBotに聞いてみる

      コメントを追加

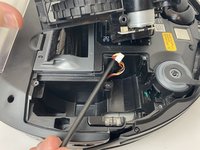
    3. Shark ION Robot R75 Side Sensor Replacement: 手順 20、 2の画像 1 Shark ION Robot R75 Side Sensor Replacement: 手順 20、 2の画像 2
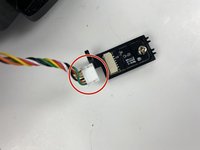
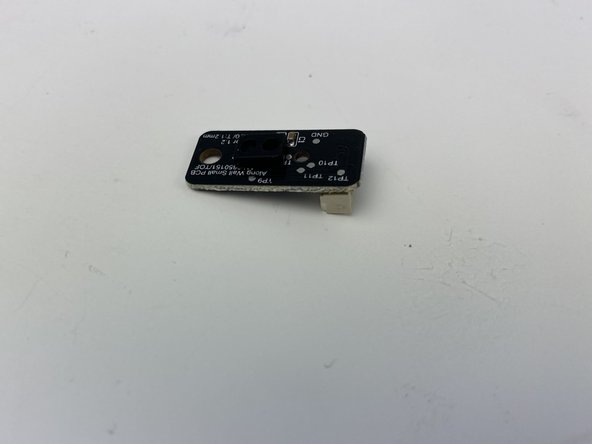
      • Disconnect the white connector from the sensor.

      FixBotに聞いてみる

      コメントを追加

    4. Shark ION Robot R75 Side Sensor Replacement: 手順 21、 2の画像 1 Shark ION Robot R75 Side Sensor Replacement: 手順 21、 2の画像 2
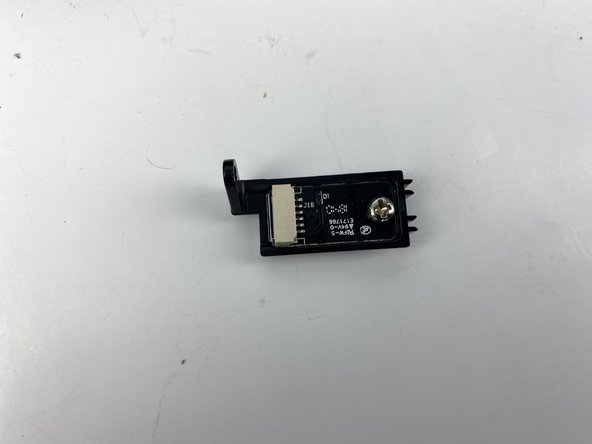
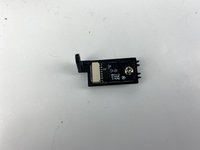
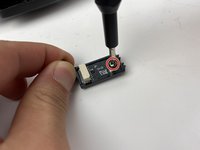
      • Using a Phillips #00 screwdriver, remove the screw on the sensor.

      • Remove the sensor from its mount.

      FixBotに聞いてみる

      コメントを追加

終わりに

To reassemble your device, follow these instructions in reverse order.

キャンセル: このガイドを終了できませんでした。

ある他の人がこのガイドを完成しました。

作成者

3人の作成者と共同で作成されました。

Andrew Lowy

メンバー登録日: 01/25/20

599 ポイント

4のガイドは作成済み

チーム

1件のガイドコメント

Curious if anyone ever saw the WiFi die in these? I cannot get the shark WiFi to show so I can add it to the network. I press both the bottoms and the icon flashes but shark WiFi never shows so the app can continue.

Shawn Winters - 返信 共有
コメントを追加

統計データ:

過去 24時間: 2

過去 7 日: 18

過去 30 日: 47

今までの合計 20,091