はじめに
Use this guide to replace a cracked or broken screen assembly on your Samsung Galaxy Watch Active.
Note: Some replacement screens come as screen-only without a new frame. That's a different procedure from what's shown in this guide. If you're replacing the screen only, follow this guide instead.
必要な工具と部品
-
-
Turn off the Galaxy Watch Active by pushing and holding the bottom button for approximately 3 seconds. You should feel a short vibration.
-
When the "Power off" symbol appears tap the center of the screen to make it shut down. You should feel a longer vibration for confirmation.
-
-
-
Use a Tri-point Y00 screwdriver to remove the four 4 mm-long screws on the back of the watch.
-
-
-
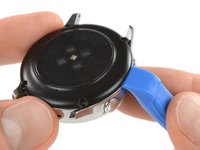
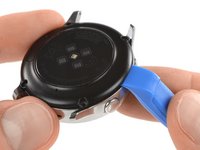
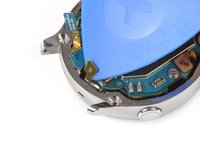
Use an opening tool and place it between the plastic back cover and the metal housing near the buttons.
-
Push the tip of the opening tool into the gap to separate the back cover from the housing.
-
-
-
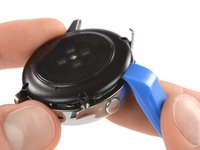
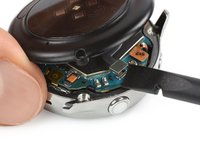
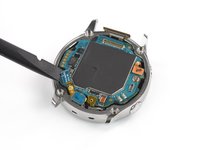
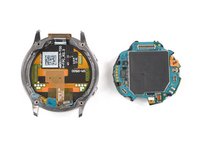
Carefully lift the back cover approximately 2 cm to access the sensor array connector near the two buttons.
-
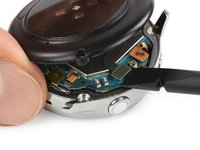
Use a spudger to disconnect the sensor array from the motherboard.
-
-
-
-
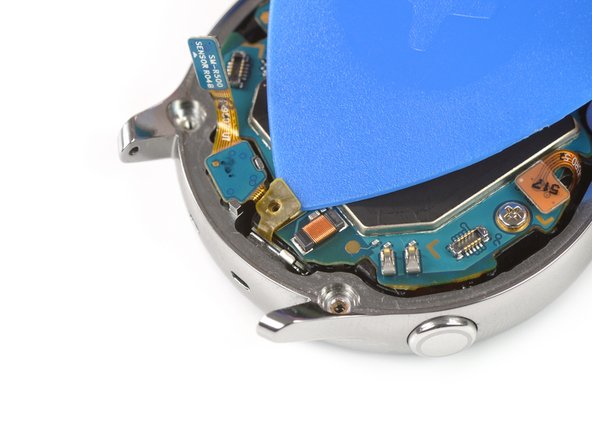
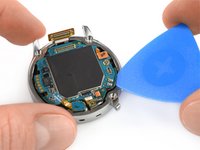
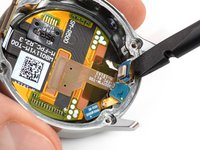
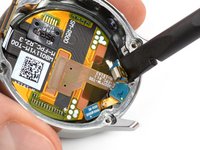
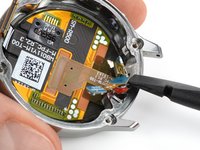
Use a spudger to disconnect the display assembly and the microphone and pressure sensor array.
-
-
-
Use an opening pick to peel back the thin tape belonging to the microphone array.
-
-
-
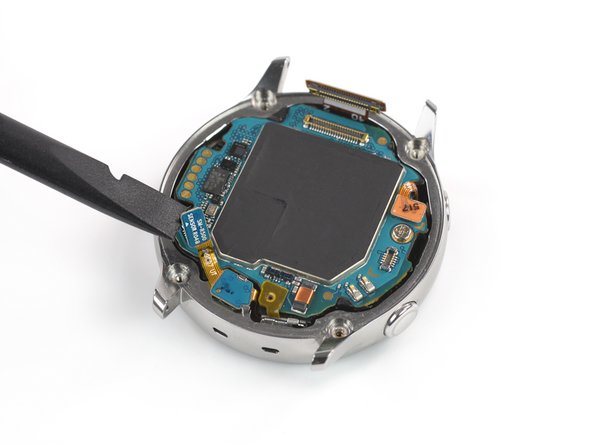
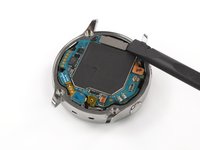
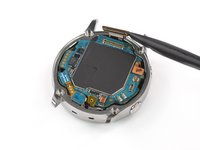
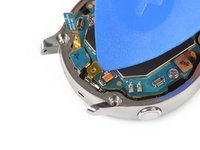
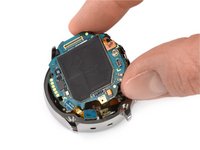
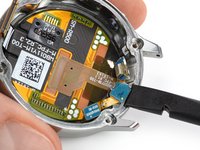
Insert an opening pick at the bottom right between the motherboard and the frame to lift up the core assembly.
-
-
-
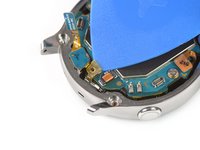
Use a spudger to loosen the microphone which is fixed to the frame with mild adhesive.
-
-
-
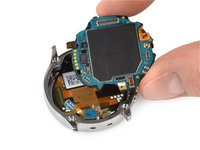
Use a spudger to lift the pressure sensor up and out of its recess in the frame.
-
-
-
Carefully remove the microphone and barometric sensor array from the frame.
-


Compare your new replacement part to the original part—you may need to transfer remaining components or remove adhesive backings from the new part before installing.
To reassemble your device, follow these instructions in reverse order.
Take your e-waste to an R2 or e-Stewards certified recycler.
Repair didn’t go as planned? Try some basic troubleshooting, or ask our Answers community for help.
15 の人々がこのガイドを完成させました。

チーム

Tobias Isakeit - Repairability Engineer Tobias Isakeit - Repairability Engineer人のメンバー
Business
1 メンバー
1,132のガイドは作成済み
12 件のコメント
These instructions look very good! My screen has several cracks and I want to replace the front module. Do you have any idea where I can order one?
Yes there s one on eBay for $31.76 https://www.google.com/aclk?sa=l&ai=DChc...
My screen was black or showing static. I disassembled and reassembled and now it's back to normal. Might have been a bad internal connection.
Think I have the same issue may have to try opening it. Do you still have it? Is it still good?
this is a rather silly question, but which model is that diode on the LCD panel? I couldn't find the schematics for the screen