メインコンテンツにスキップ
リペアコミュニティに参加 - アカウントの作成

Samsung Rogue Camera Replacement

必要な工具と部品

    1. Samsung Rogue Camera Replacement, Battery: 手順 1、 2の画像 1 Samsung Rogue Camera Replacement, Battery: 手順 1、 2の画像 2
      • Before disassembling your Samsung Rogue, make sure it is powered off.

      • With your thumbs, push down on the back cover of your phone and slide it away from the camera.

      FixBotに聞いてみる

      コメントを追加

    2. Samsung Rogue Camera Replacement: 手順 2、 2の画像 1 Samsung Rogue Camera Replacement: 手順 2、 2の画像 2
      • You can now remove the battery by prying it up with your finger.

      FixBotに聞いてみる

      コメントを追加

    1. Samsung Rogue Camera Replacement, Motherboard: 手順 3、 1の画像 1
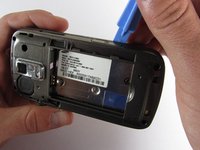
      • Use a plastic opening tool to carefully pry the back cover surrounding the camera up from the phone.

      FixBotに聞いてみる

      コメントを追加

    2. Samsung Rogue Camera Replacement: 手順 4、 1の画像 1
      • Remove the five 3.4mm Philips screws securing the backing of the phone.

      FixBotに聞いてみる

      コメントを追加

    3. Samsung Rogue Camera Replacement: 手順 5、 3の画像 1 Samsung Rogue Camera Replacement: 手順 5、 3の画像 2 Samsung Rogue Camera Replacement: 手順 5、 3の画像 3
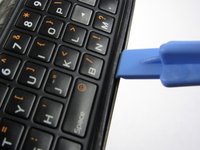
      • Use a plastic opening tool to carefully pry off the back cover.

      • Make sure you are prying along the edge and not between the two halves of the phone that slide away from each other.

      • Be careful to not drop the volume changing piece, for it can easily slip out.

      FixBotに聞いてみる

      コメントを追加

    4. Samsung Rogue Camera Replacement: 手順 6、 1の画像 1
      • Remove the two 3.45 mm Philips screws below the white sticker.

      FixBotに聞いてみる

      コメントを追加

    5. Samsung Rogue Camera Replacement: 手順 7、 2の画像 1 Samsung Rogue Camera Replacement: 手順 7、 2の画像 2
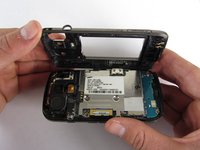
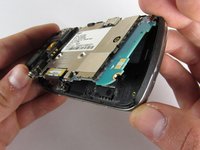
      • Carefully lift the motherboard up from the bottom edge.

      • The film of wires is still attached to the motherboard, so do not completely remove the motherboard just yet or you may damage it.

      FixBotに聞いてみる

      コメントを追加

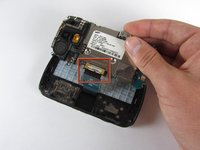
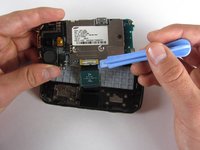
    6. Samsung Rogue Camera Replacement: 手順 8、 2の画像 1 Samsung Rogue Camera Replacement: 手順 8、 2の画像 2
      • Use a plastic opening tool to disconnect the film from the motherboard.

      FixBotに聞いてみる

      コメントを追加

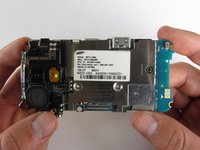
    1. Samsung Rogue Camera Replacement, Speaker/Antenna: 手順 9、 1の画像 1
      • On the underside of the motherboard, remove the single 3.3mm Philips screw.

      FixBotに聞いてみる

      コメントを追加

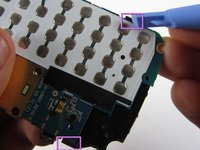
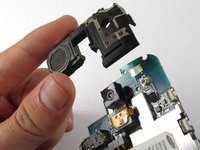
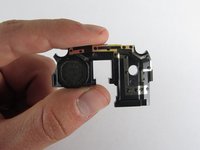
    2. Samsung Rogue Camera Replacement: 手順 10、 3の画像 1 Samsung Rogue Camera Replacement: 手順 10、 3の画像 2 Samsung Rogue Camera Replacement: 手順 10、 3の画像 3
      • The speaker and the antenna are both connected on the same black piece.

      • Use a plastic opening tool to pop off the edges of the speaker/antenna piece from the motherboard.

      • Turn over the motherboard and carefully lift the speaker/antenna piece straight up.

      • The camera is held in the middle of the speaker/antenna piece. Make sure to lift directly up when lifting the speaker/antenna piece, otherwise you can risk damaging the camera.

      FixBotに聞いてみる

      コメントを追加

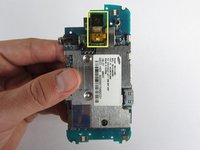
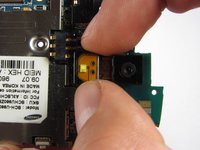
    1. Samsung Rogue Camera Replacement, Camera: 手順 11、 3の画像 1 Samsung Rogue Camera Replacement, Camera: 手順 11、 3の画像 2 Samsung Rogue Camera Replacement, Camera: 手順 11、 3の画像 3
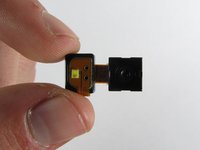
      • With two fingers carefully detach the camera from the motherboard by lifting straight up.

      • Do not pick it up by the camera itself. Handle the little black box it is attached to instead.

      FixBotに聞いてみる

      コメントを追加

終わりに

To reassemble your device, follow these instructions in reverse order.

キャンセル: このガイドを終了できませんでした。

作成者

5人の作成者と共同で作成されました。

Viktoria Mikoultchik

メンバー登録日: 04/15/12

25 ポイント

7のガイドは作成済み

チーム

Cal Poly, Team 7-32, Maness Spring 2012 Cal Poly, Team 7-32, Maness Spring 2012人のメンバー

CPSU-MANESS-S12S7G32

4 メンバー

96のガイドは作成済み

0件のガイドコメント

コメントを追加

統計データ:

過去 24時間: 0

過去 7 日: 6

過去 30 日: 26

今までの合計 557