メインコンテンツにスキップ

Samsung P241 Front Panel Button replacement

必要な工具と部品

  1. Samsung P241 Front Panel Button replacement, Top Case: 手順 1、 2の画像 1 Samsung P241 Front Panel Button replacement, Top Case: 手順 1、 2の画像 2
    • You will need to be near a power source for this guide.

    • With the back of the DVD player facing you, remove the three 1 cm black screws on the right, left, and top sides using a Phillips #1 screwdriver.

  2. Samsung P241 Front Panel Button replacement: 手順 2、 2の画像 1 Samsung P241 Front Panel Button replacement: 手順 2、 2の画像 2
    • Pull the top cover towards you until you can lift it up and off.

  3. Samsung P241 Front Panel Button replacement, Front Panel: 手順 3、 2の画像 1 Samsung P241 Front Panel Button replacement, Front Panel: 手順 3、 2の画像 2
    • With the front of the DVD player facing you, turn the power on and eject the disc tray.

    • Press down on the disc tray with your thumbs while also pressing up with your pointer finger on the left and right edges of the silver cover. The cover should easily pop up and off the disc tray.

    • Be careful not to crack or bend the disc tray by pulling too hard.

  4. Samsung P241 Front Panel Button replacement: 手順 4、 3の画像 1 Samsung P241 Front Panel Button replacement: 手順 4、 3の画像 2 Samsung P241 Front Panel Button replacement: 手順 4、 3の画像 3
    • To remove the front panel, lift up the clips on the bottom, left and right sides of the DVD player.

    • Be sure to have all clips lifted up at the same time otherwise it will be difficult to get the panel off.

    • If you are having trouble removing the panel, try wedging an object underneath the two clips on the bottom to keep them from falling back into place.

  5. Samsung P241 Front Panel Button replacement: 手順 5、 1の画像 1
    • Gently remove the front panel by pulling it forward.

  6. Samsung P241 Front Panel Button replacement: 手順 6、 1の画像 1
    • Press the eject button again to make the disc tray slide back into place.

    • Turn off the DVD player and unplug it from the wall before proceeding to further steps.

  7. Samsung P241 Front Panel Button replacement, Front Panel Buttons: 手順 7、 2の画像 1 Samsung P241 Front Panel Button replacement, Front Panel Buttons: 手順 7、 2の画像 2
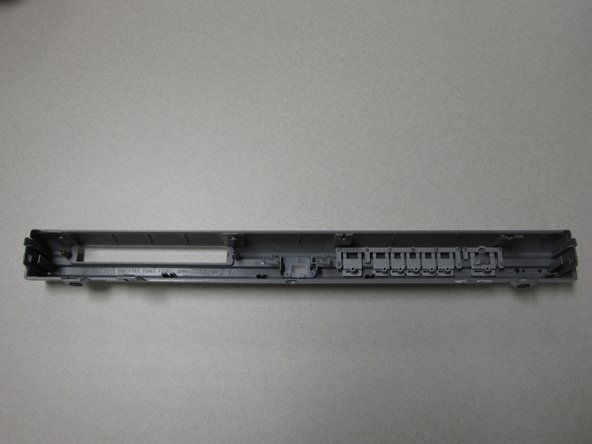
    • Holding the front panel so the Samsung logo is visible, rotate the panel to view the opposite side.

  8. Samsung P241 Front Panel Button replacement: 手順 8、 2の画像 1 Samsung P241 Front Panel Button replacement: 手順 8、 2の画像 2
    • Locate the button panel on the inside towards what is now the right of the front panel.

  9. Samsung P241 Front Panel Button replacement: 手順 9、 1の画像 1
    • To unjam a button, use a finger or flathead screwdriver, and firmly press against the jammed portion of the button panel.

    • Press until the button slides back into it's designated button slot.

  10. Samsung P241 Front Panel Button replacement: 手順 10、 1の画像 1
    • If the button panel is broken, use a flathead screwdriver to pry the button panel from the back of the front panel.

    • With strong plastic adhesive, glue the new button panel into place with each button in it's designated button slot.

    • Allow the adhesive time to properly dry before pressing buttons.

  11. Samsung P241 Front Panel Button replacement: 手順 11、 1の画像 1
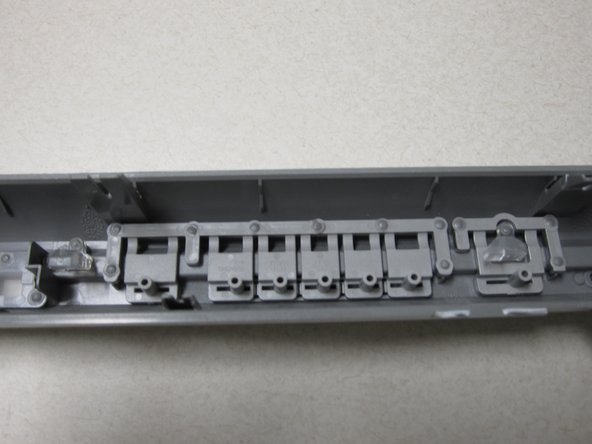
    • If the button panel is not the cause of the problem, the button sensors on the motherboard need to be replaced.

    • You can refer to this guide for directions on how to solder new sensors on your motherboard if you don't want to replace the entire motherboard.

終わりに

To reassemble your device, follow these instructions in reverse order.

ある他の人がこのガイドを完成しました。

作成者

3人の作成者と共同で作成されました。

Matt Russell

メンバー登録日: 01/14/11

116 ポイント

1ガイドが承認済み

チーム

Cal Poly, Team 14-7, Forte Winter 2011 Cal Poly, Team 14-7, Forte Winter 2011人のメンバー

CPSU-FORTE-W11S14G7

5 メンバー

7のガイドは作成済み

0 件のコメント

コメントを追加

統計データ:

過去 24時間: 0

過去 7 日: 0

過去 30 日: 1

今までの合計 1,131