メインコンテンツにスキップ
リペアコミュニティに参加 - アカウントの作成

Samsung Impression Keyboard Replacement

必要な工具と部品

    1. Samsung Impression Keyboard Replacement, Battery: 手順 1、 1の画像 1
      • Orient the phone with the screen facing downward.

      • Slide the panel away from the camera using your thumb. This will expose the battery.

      FixBotに聞いてみる

      コメントを追加

    2. Samsung Impression Keyboard Replacement: 手順 2、 2の画像 1 Samsung Impression Keyboard Replacement: 手順 2、 2の画像 2
      • Insert the tip of the spudger on the left side of the battery.

      • Pry the battery out. It will pivot in the direction of the white arrow.

      FixBotに聞いてみる

      コメントを追加

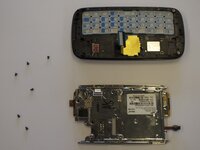
    1. Samsung Impression Keyboard Replacement, Back Cover: 手順 3、 1の画像 1
      • Remove the six 3.5 mm screws using a Phillips #000 screwdriver. Unscrew in a counterclockwise direction.

      FixBotに聞いてみる

      コメントを追加

    2. Samsung Impression Keyboard Replacement: 手順 4、 1の画像 1
      • Gently pry around the edges with the spudger to remove back panel.

      • It may help to slide the touchscreen upwards when removing the back panel.

      • The side buttons will become loose and will fall out, so put these in a safe place.

      FixBotに聞いてみる

      コメントを追加

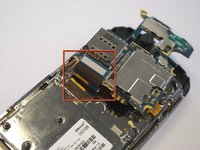
    1. Samsung Impression Keyboard Replacement, Circuit Board: 手順 5、 1の画像 1
      • Gently remove the black wire to free the circuit board.

      • Remove the wire by gently prying up the gold terminator attached to the green circuit board.

      FixBotに聞いてみる

      コメントを追加

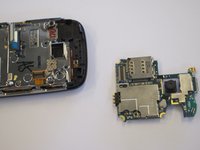
    2. Samsung Impression Keyboard Replacement: 手順 6、 2の画像 1 Samsung Impression Keyboard Replacement: 手順 6、 2の画像 2
      • Gently tug the black and blue ribbon upwards to release the circuit board.

      FixBotに聞いてみる

      コメントを追加

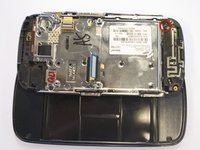
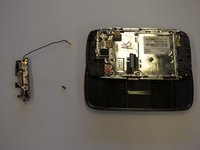
    1. Samsung Impression Keyboard Replacement, Antenna: 手順 7、 2の画像 1 Samsung Impression Keyboard Replacement, Antenna: 手順 7、 2の画像 2
      • Use a Phillips screwdriver to remove the six 3.5 mm screws by rotating.

      • The antenna assembly will snap off.

      FixBotに聞いてみる

      コメントを追加

    1. Samsung Impression Keyboard Replacement, Keyboard: 手順 8、 1の画像 1
      • Remove the two base screws along the edge of the silver piece, where you just removed the black end piece.

      • The screws are 2.7mm in length.

      • The bottom black end cap will snap out.

      FixBotに聞いてみる

      コメントを追加

    2. Samsung Impression Keyboard Replacement: 手順 9、 2の画像 1 Samsung Impression Keyboard Replacement: 手順 9、 2の画像 2
      • Remove the six 2.7 mm screws holding the silver plate on and set aside (fig. 1).

      • Separate the silver plate and phone frame (fig. 2).

      FixBotに聞いてみる

      コメントを追加

    3. Samsung Impression Keyboard Replacement: 手順 10、 1の画像 1
      • The silver piece you are left with is the physical keyboard assembly.

      FixBotに聞いてみる

      コメントを追加

終わりに

To reassemble your device, follow these instructions in reverse order.

キャンセル: このガイドを終了できませんでした。

作成者

9人の作成者と共同で作成されました。

Ross McKelvie

メンバー登録日: 04/18/11

196 ポイント

4のガイドは作成済み

チーム

Cal Poly, Team 8-10, Regan Spring 2011 Cal Poly, Team 8-10, Regan Spring 2011人のメンバー

CPSU-REGAN-S11S8G10

4 メンバー

132のガイドは作成済み

0件のガイドコメント

コメントを追加

統計データ:

過去 24時間: 2

過去 7 日: 8

過去 30 日: 26

今までの合計 2,717