メインコンテンツにスキップ

Samsung Galaxy A50 Back Cover Replacement

必要な工具と部品

  1. Samsung Galaxy A50 Back Cover Replacement, Back Cover: 手順 1、 1の画像 1
    • Start by switching off your phone.

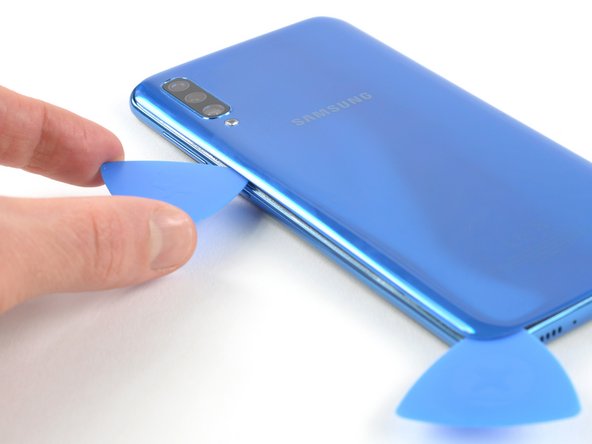
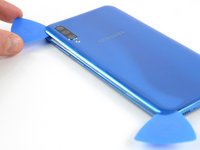
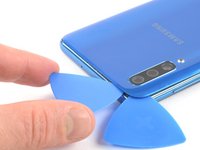
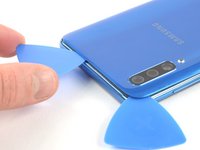
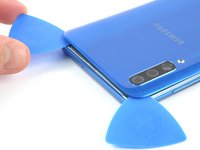
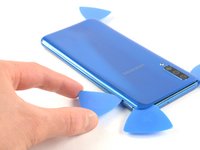
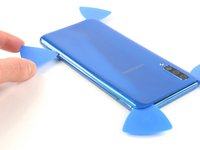
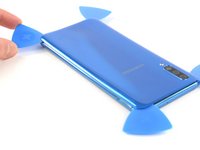
    • Heat an iOpener and apply it to the back cover to soften the adhesive.

    • The adhesive of the Samsung Galaxy A50 is very strong. A hair dryer, heat gun, or hot plate may also be used if you aren't able to open the device with the iOpener. Be careful not to overheat the phone—the AMOLED display and internal battery are both susceptible to heat damage.

  2. Samsung Galaxy A50 Back Cover Replacement: 手順 2、 3の画像 1 Samsung Galaxy A50 Back Cover Replacement: 手順 2、 3の画像 2 Samsung Galaxy A50 Back Cover Replacement: 手順 2、 3の画像 3
    • Insert an opening pick at the bottom of your phone near the USB-C port.

    • If you can't get between the back cover and midframe with your opening pick, you can use a suction handle or strong tape to pull up the back cover to create a gap.

    • Slide the opening pick to the bottom left corner.

  3. Samsung Galaxy A50 Back Cover Replacement: 手順 3、 2の画像 1 Samsung Galaxy A50 Back Cover Replacement: 手順 3、 2の画像 2
    • Insert a second opening pick and slide it from the bottom to the top left corner to cut the adhesive.

    • If you have trouble, apply more heat to further soften the adhesive. Follow the iOpener instructions to avoid overheating.

    • Leave the opening picks in place to prevent the adhesive from resealing.

  4. Samsung Galaxy A50 Back Cover Replacement: 手順 4、 3の画像 1 Samsung Galaxy A50 Back Cover Replacement: 手順 4、 3の画像 2 Samsung Galaxy A50 Back Cover Replacement: 手順 4、 3の画像 3
    • Insert a third opening pick under the top left corner of the back cover.

    • Slide the opening pick along the top edge of the phone.

    • Leave the opening pick in the top right corner to prevent the adhesive from resealing.

  5. Samsung Galaxy A50 Back Cover Replacement: 手順 5、 3の画像 1 Samsung Galaxy A50 Back Cover Replacement: 手順 5、 3の画像 2 Samsung Galaxy A50 Back Cover Replacement: 手順 5、 3の画像 3
    • Insert a fourth opening pick under the top right corner of the back cover.

    • Slide the tip of the opening pick along the side of the phone to the bottom right corner to cut the adhesive.

    • Leave the opening pick in the bottom right corner to prevent the adhesive from resealing.

  6. Samsung Galaxy A50 Back Cover Replacement: 手順 6、 1の画像 1
    • Remove the back cover.

    • After installing the back cover, apply strong, steady pressure to your phone for several minutes to help the adhesive form a good bond—a stack of heavy books works well.

終わりに

To reassemble your device, follow these instructions in reverse order.
Apply new adhesive where necessary after cleaning the relevant areas with isopropyl alcohol (>90%). Secure the new back cover with pre-cut adhesive or double-sided adhesive tape.

15 の人々がこのガイドを完成させました。

作成者

1人の作成者と共同作成されました。

Adriana Zwink

メンバー登録日: 12/18/19

47,656 ポイント

167のガイドは作成済み

チーム

iFixit iFixit人のメンバー

Staff

136 メンバー

16,562のガイドは作成済み

コメント 1 件

Thank you for this write up, I wanted to insure there were no connections and overall it's just something I practice to make sure to double check rather a back cover has any hidden surprises, Trust me I've learned from experience not to Assume anything, lol. Take care, and thanks

Matthew Newton - 返信

コメントを追加

統計データ:

過去 24時間: 4

過去 7 日: 49

過去 30 日: 189

今までの合計 19,256