はじめに
The Samsung Epix may be an older device, but if you're still holding onto yours and it's acting up, the motherboard could be the issue. Whether it's freezing, glitching, or refusing to power on, this guide will walk you through how to replace the motherboard yourself.
Before you get started, power off the device and ensure you're working in a clean, static-free environment.
必要な工具と部品
-
-
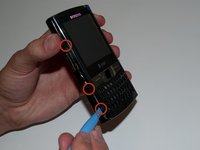
Just below the phone's camera, press the button and hold it
-
While the button is held down, slide the back panel off to remove it completely.
 FixBotに聞いてみる
-
-
-
Grasp the bottom corners of the battery with two fingers and gently lift.
-
Gently lift the battery and remove it from the phone.
-
-
-
Using an iPod opening tool, remove the screw cover in the top left corner by lifting it up.
-
-
-
Use a Phillips #00 screwdriver to remove the six screws on the back of the phone. Three are evenly spaced on each side.
-
-
-
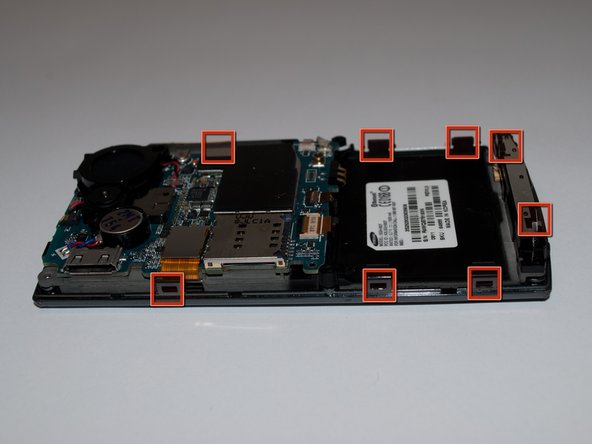
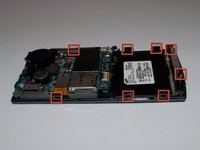
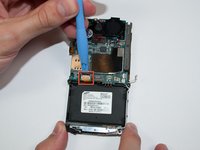
Slide the iPod opening tool into the seam on the side of the phone and turn it slightly to unhook the eight clips.
-
-
-
Once all eight of the clips have been unhooked, lift the back panel off of the phone.
-
-
-
-
Remove the circular battery from the plastic holder by inserting a 1 mm flat head screwdriver under the battery where the red and blue wires connect and lifting gently.
-
-
-
Using a Phillips #00 screwdriver, unscrew the two 3.5mm screws that connect the speaker to the motherboard.
-
-
-
With the iPod opening tool, unclip the red and black wires connecting the speaker to the motherboard.
-
Lift the speaker off of the motherboard.
-
-
-
Using an iFixit opening tool, unlatch and disconnect the camera ribbon cable.
-
-
-
Unlatch the LCD ribbon cable on the left side of the motherboard using the opening tool.
-
-
-
Unlatch and disconnect the two ribbon cables at the bottom center of the motherboard.
-
-
-
Unlatch and remove the front panel ribbon cable located at the bottom right of the motherboard.
-
-
-
Use the opening tool to gently disconnect the microphone cable, also located at the bottom right of the motherboard.
-
-
-
Using a Phillips #00 screwdriver, remove the 3.5 mm screw at the bottom center of the motherboard.
-
-
-
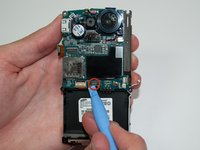
Carefully lift the motherboard from the left side to begin removing it from the phone chassis.
-
-
-
Flip the motherboard slightly to access the back, then use the opening tool to unlatch and disconnect the remaining ribbon cable.
-
Remove the motherboard.
-


To reassemble your device, follow these instructions in reverse order.
2 の人々がこのガイドを完成させました。
チーム

Cal Poly, Team 15-15, Regan Spring 2011 Cal Poly, Team 15-15, Regan Spring 2011人のメンバー
CPSU-REGAN-S11S15G15
5 メンバー
10のガイドは作成済み