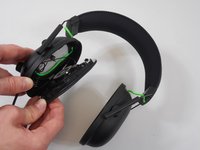
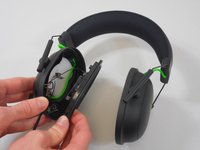
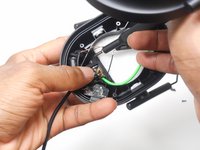
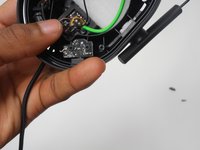
メインコンテンツにスキップ
リペアコミュニティに参加 - アカウントの作成

Razer BlackShark V2 Cable Replacement

必要な工具と部品

  1. Razer BlackShark V2 Cable Replacement, Ear Cushion: 手順 1、 1の画像 1
    • Place the headset so that the left side is facing you.

    • The left side of the headset has the cable attachment and the volume control knob.

  2. Razer BlackShark V2 Cable Replacement: 手順 2、 1の画像 1
    • Scoop your middle and ring finger underneath the top or bottom inner portion of the ear cushion.

    • You should feel a hard plastic ridge.

    • Pull from the hard plastic ridge, being sure not to pull from the soft cushion.

    • Slowly apply pressure to prevent damage.

  3. Razer BlackShark V2 Cable Replacement: 手順 3、 1の画像 1
    • Pull from the hard plastic ridge, being sure not to pull from the soft cushion.

    • Slowly apply pressure to prevent damage.

  4. Razer BlackShark V2 Cable Replacement: 手順 4、 2の画像 1 Razer BlackShark V2 Cable Replacement: 手順 4、 2の画像 2
    • Once the cushion is removed, make sure the hard plastic base with the clips is attached to it.

    • If you are replacing both ear cushions, repeat Steps 1-4 for the other side. Then, insert the new ear cushions by lining up the clips in their respective holes and applying even pressure until they audibly click.

  5. Razer BlackShark V2 Cable Replacement, Speaker: 手順 5、 2の画像 1 Razer BlackShark V2 Cable Replacement, Speaker: 手順 5、 2の画像 2
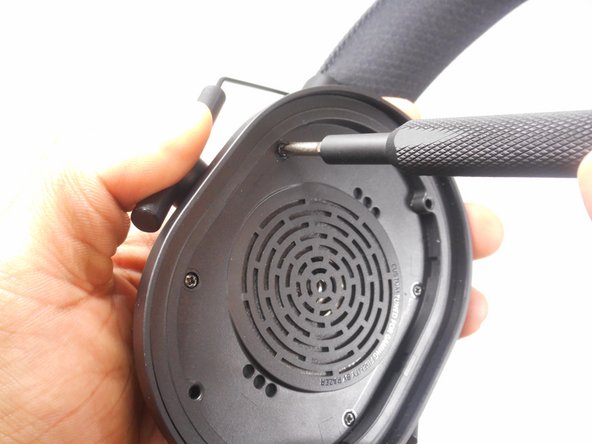
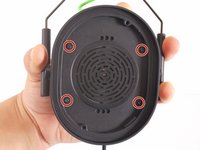
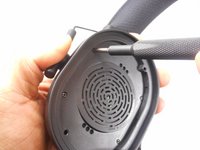
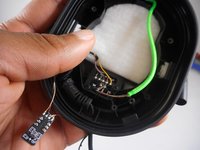
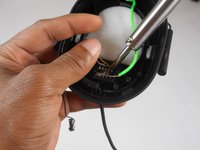
    • Remove the four screws holding the speaker in the headset using a Phillips #1 screwdriver.

  6. Razer BlackShark V2 Cable Replacement: 手順 6、 2の画像 1 Razer BlackShark V2 Cable Replacement: 手順 6、 2の画像 2
    • Gently grab the headset and slowly apply pressure to the speaker cover; it will come off.

    • Be careful of the wires that are attached to the back of the speaker to ensure they won't be damaged when removing the speaker and its cover.

  7. Razer BlackShark V2 Cable Replacement: 手順 7、 3の画像 1 Razer BlackShark V2 Cable Replacement: 手順 7、 3の画像 2 Razer BlackShark V2 Cable Replacement: 手順 7、 3の画像 3
    • After disconnecting the speaker from the headset, it is still connected by the wires that power the speaker itself.

    • With heat or with a sharp tool, remove the glue around the wires that connect the speaker to the headset.

    • Using the new speaker, you can reattach the wires soldering them in with existing glue.

    • If replacing internal components and NOT the speaker, you can do so without severing any wire connections; operate carefully to not sever them unnecessarily!

  8. Razer BlackShark V2 Cable Replacement, Cable: 手順 8、 2の画像 1 Razer BlackShark V2 Cable Replacement, Cable: 手順 8、 2の画像 2
    • Locate the main cable after it protrudes through the opening in the headset and where the cable is attached to the motherboard.

  9. Razer BlackShark V2 Cable Replacement: 手順 9、 1の画像 1
    • Remove the connecting glue attaching the wires to the motherboard with a sharp object or heat.

    • Be careful around the motherboard when removing the connected wires.

  10. Razer BlackShark V2 Cable Replacement: 手順 10、 2の画像 1 Razer BlackShark V2 Cable Replacement: 手順 10、 2の画像 2
    • Reattach the new cable with the soldering iron.

    • Be sure not to damage the motherboard when resoldering the new cable.

終わりに

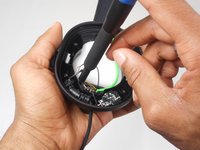
To reassemble your device, follow these instructions in reverse order.

5 の人々がこのガイドを完成させました。

作成者

2人の作成者と共同で作成されました。

BlakeB

メンバー登録日: 03/08/23

611 ポイント

3のガイドは作成済み

チーム

University of New Orleans, Team 4-3, McDonald Spring 2023 University of New Orleans, Team 4-3, McDonald Spring 2023人のメンバー

UNO-MCDONALD-S23S4G3

4 メンバー

10のガイドは作成済み

3件のガイドコメント

any chance you have a guide to replacing the battery?

Bradix Thresher - 返信 共有

Never mind figured it out, battery is on the right earpiece... Love all your guides though!!

Bradix Thresher - 共有

Cuál es el orden del cableado en el plug 3.5 porfavoor! No lo encuentro por ningún lado :(

Panerukk M. - 返信 共有

コメントを追加

統計データ:

過去 24時間: 5

過去 7 日: 57

過去 30 日: 261

今までの合計 10,418