メインコンテンツにスキップ

ProScan PLT7050 Battery Replacement

必要な工具と部品

  1. ProScan PLT7050 Battery Replacement, Open Device: 手順 1、 1の画像 1
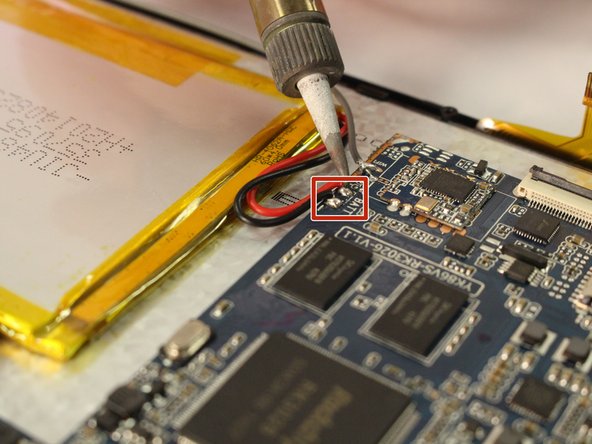
    • Make sure device is unplugged and turned off while working on the device.

    • Remove 2 Phillips head, 4.3 mm screws from the bottom side of the tablet with a PH00 screwdriver.

  2. ProScan PLT7050 Battery Replacement: 手順 2、 1の画像 1
    • Use the plastic opening tools to pry the back of the tablet open.

    • You may need to slide the tool along the sides of the device to get it to open. You might hear some popping noises, it is okay.

    • May be helpful if you start by the microSD slot.

  3. ProScan PLT7050 Battery Replacement, Battery: 手順 3、 2の画像 1 ProScan PLT7050 Battery Replacement, Battery: 手順 3、 2の画像 2
    • Use the soldering tool to remove the wires from the motherboard. (Black and Red)

    • The soldering tool is hot.

    • Take note of where the wires are located.

  4. ProScan PLT7050 Battery Replacement: 手順 4、 2の画像 1 ProScan PLT7050 Battery Replacement: 手順 4、 2の画像 2
    • Remove the black tape from the battery.

    • Remove the three pieces of yellow tape from the battery.

  5. ProScan PLT7050 Battery Replacement: 手順 5、 1の画像 1
    • Use the plastic opening tool to pry the battery from the device as it is attached by an adhesive.

    • Do not proceed if corrosion and/or swelling of the battery is visible.

終わりに

To reassemble your device, follow these instructions in reverse order.

4 の人々がこのガイドを完成させました。

作成者

4人の作成者と共同で作成されました。

Jazmine Jackson

メンバー登録日: 01/19/17

284 ポイント

2のガイドは作成済み

チーム

Eastern Washington University, Team 1-4, Mathisen Winter 2017 Eastern Washington University, Team 1-4, Mathisen Winter 2017人のメンバー

EWU-MATHISEN-W17S1G4

5 メンバー

12のガイドは作成済み

0件のガイドコメント

コメントを追加

統計データ:

過去 24時間: 0

過去 7 日: 1

過去 30 日: 15

今までの合計 1,162