メインコンテンツにスキップ
リペアコミュニティに参加 - アカウントの作成

PowerLead Puto PLD003 Back Buttons Replacement

必要な工具と部品

    1. PowerLead Puto PLD003 Back Buttons Replacement, Side Panel: 手順 1、 1の画像 1
      • Slide the battery eject button open to release the battery door.

      FixBotに聞いてみる

      コメントを追加

    2. PowerLead Puto PLD003 Back Buttons Replacement: 手順 2、 1の画像 1
      • With the battery door open, carefully remove all four 5 mm Phillips #1 screws.

      FixBotに聞いてみる

      コメントを追加

    3. PowerLead Puto PLD003 Back Buttons Replacement: 手順 3、 1の画像 1
      • Rotate the camera so that the underside is facing up.

      • Remove the four 5 mm Phillips #1 screws.

      FixBotに聞いてみる

      コメントを追加

    4. PowerLead Puto PLD003 Back Buttons Replacement: 手順 4、 1の画像 1
      • Place the camera on a flat surface, with its underside facing you.

      • Gently pull up on the side panel to remove it from the camera.

      FixBotに聞いてみる

      コメントを追加

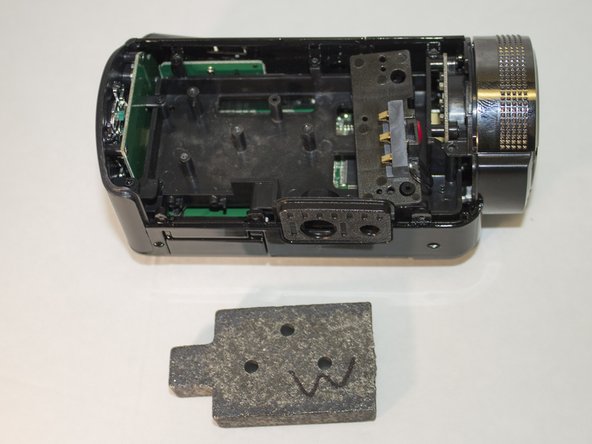
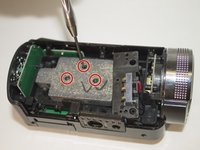
    1. PowerLead Puto PLD003 Back Buttons Replacement, Back Buttons: 手順 5、 2の画像 1 PowerLead Puto PLD003 Back Buttons Replacement, Back Buttons: 手順 5、 2の画像 2
      • Remove the three 4 mm Phillips #1 screws holding the weight.

      • Remove the weight.

      FixBotに聞いてみる

      コメントを追加

    2. PowerLead Puto PLD003 Back Buttons Replacement: 手順 6、 1の画像 1
      • Remove the two 4 mm Phillips #1 screws holding the back panel in place.

      FixBotに聞いてみる

      コメントを追加

    3. PowerLead Puto PLD003 Back Buttons Replacement: 手順 7、 1の画像 1
      • Apply pressure to the back panel, away from the camera to remove.

      FixBotに聞いてみる

      コメントを追加

    4. PowerLead Puto PLD003 Back Buttons Replacement: 手順 8、 2の画像 1 PowerLead Puto PLD003 Back Buttons Replacement: 手順 8、 2の画像 2
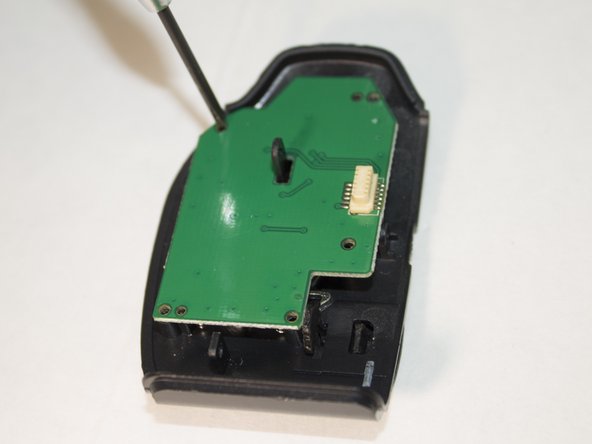
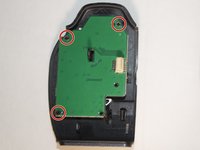
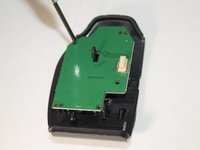
      • Place the back panel so the buttons are facing down and the circuit board is facing up.

      • Remove the three 4 mm Phillips #1 screws holding the circuit board in place.

      FixBotに聞いてみる

      コメントを追加

    5. PowerLead Puto PLD003 Back Buttons Replacement: 手順 9、 1の画像 1
      • Set aside the circuit board.

      • These nubs are what is currently holding the buttons in place.

      • Carefully apply pressure and remove the set of buttons from the nubs.

      FixBotに聞いてみる

      コメントを追加

終わりに

To reassemble your device, follow these instructions in reverse order.

キャンセル: このガイドを終了できませんでした。

ある他の人がこのガイドを完成しました。

作成者

2人の作成者と共同で作成されました。

Justin Tew

メンバー登録日: 03/31/16

791 ポイント

7のガイドは作成済み

チーム

Eastern Washington University, Team 1-2, Giguere Spring 2016 Eastern Washington University, Team 1-2, Giguere Spring 2016人のメンバー

EWU-GIGUERE-S16S1G2

4 メンバー

7のガイドは作成済み

0件のガイドコメント

コメントを追加

統計データ:

過去 24時間: 0

過去 7 日: 6

過去 30 日: 20

今までの合計 453