Power Mac G5 PRAM Battery Replacement

Replace the PRAM battery.

  • 作成者: Nolan
  • 予想時間: 2分
  • 難易度: とても簡単

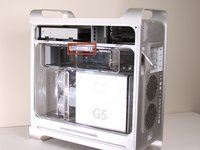
Learn how to replace the PRAM battery in your Power Mac G5. The time and date, as well as other settings, are kept by the PRAM battery when your machine is off.

セクション

手順 1 Side Panel  ¶ 

Image 1/1: To avoid being shocked, wait at least 10 minutes to allow the computer's internal components to cool.

手順 1 Side Panel  ¶ 

  • To avoid electrocution, shut down the computer. Do not open the computer or attempt to install any items inside it while the computer is on.

  • To avoid being shocked, wait at least 10 minutes to allow the computer's internal components to cool.

手順 2  ¶ 

Image 1/1:

手順 2  ¶ 

  • Remove all the cables, including the power cables before opening the unit.

手順 3  ¶ 

Image 1/2: The panel should fall out. If the panel does not fall out by itself pull a little from the edges.

手順 3  ¶ 

  • Lift the tab to unlock the side panel.

  • The panel should fall out. If the panel does not fall out by itself pull a little from the edges.

手順 4  ¶ 

Image 1/3:

手順 4  ¶ 

  • Remove the air deflector (the clear plastic cover) by pulling on the handle.

手順 5 PRAM Battery  ¶ 

Image 1/1:

手順 5 PRAM Battery  ¶ 

  • Locate the battery inside the desktop.

手順 6  ¶ 

Image 1/3: Be careful to note which end is positive and which is negative. The positive end should be facing away from the PCI slots.

手順 6  ¶ 

  • Remove the battery by lifting the battery from the battery terminal.

  • Be careful to note which end is positive and which is negative. The positive end should be facing away from the PCI slots.

  • It is important to lift the battery as straight up as possible to avoid damage to battery or terminal.

  • The first photo shows the correct battery position. The last two photos show the battery facing the WRONG WAY! Remember, the positive end should be facing AWAY from the PCI slots, NOT towards them.

手順 7  ¶ 

Image 1/1: Be sure to properly dispose of the old battery after removal (take it to the nearest hazardous waste center).

手順 7  ¶ 

  • The area should look like this after the battery is removed.

  • Be sure to properly dispose of the old battery after removal (take it to the nearest hazardous waste center).

  • Only insert LS1425OC 3.6V battery to prevent damage to the logic board.

まとめ

To reassemble your device, follow these instructions in reverse order.

それが終わった今、あなたのリペアストーリーを他の人に共有しましょう。

ストーリーを書く

plz advise the type of battery, thx !

adrianchan - 返信

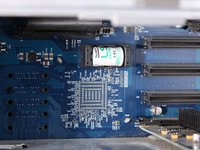
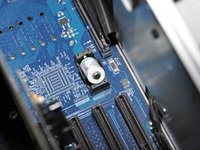
Thank you, very very instructive - but why on Earth

does Apple not mark the battry holder on this model

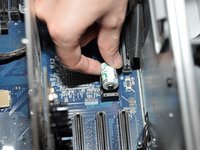
with + and - ? ? Now, thanks to your close-up photo

I found out which way to turn the battery. (I hope)

Best regards

Torben, Denmark

Torben Hellborn -