メインコンテンツにスキップ
リペアコミュニティに参加 - アカウントの作成

Pentax PZ-10 Back Cover Locking Switch Spring Replacement

必要な工具と部品

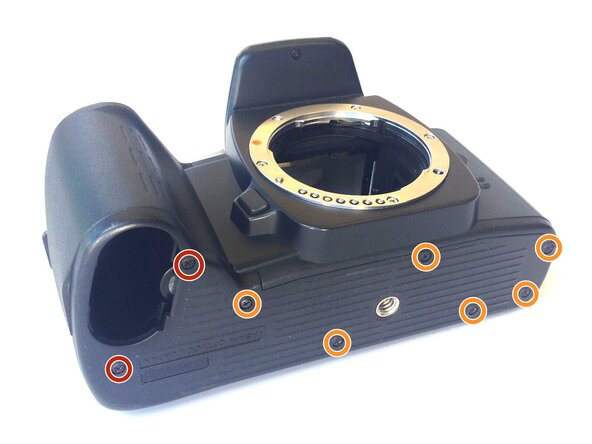
    1. Pentax PZ-10 Back Cover Locking Switch Spring Replacement, Removing the Bottom Cover: 手順 1、 1の画像 1
      • With the lens face up and the bottom panel of the camera facing you, remove the two 7mm screws on the left using the J0 screwdriver.

      • Remove the six 4.3mm screws in the middle and right of the panel using the J0 screwdriver.

      • Pull off the bottom casing to remove.

      FixBotに聞いてみる

      コメントを追加

    2. Pentax PZ-10 Back Cover Locking Switch Spring Replacement, Removing Bottom Casing: 手順 2、 1の画像 1
      • With the screws removed, the bottom casing should come off very easily by pulling on the casing.

      FixBotに聞いてみる

      コメントを追加

    3. Pentax PZ-10 Back Cover Locking Switch Spring Replacement, Removing the Back Cover: 手順 3、 1の画像 1
      • Place the camera on its side so the lens is facing left.

      • Press down on the locking switch on the side panel facing you.

      FixBotに聞いてみる

      コメントを追加

    4. Pentax PZ-10 Back Cover Locking Switch Spring Replacement: 手順 4、 1の画像 1
      • With the door unlocked, rotate the device to access the bottom.

      FixBotに聞いてみる

      コメントを追加

    5. Pentax PZ-10 Back Cover Locking Switch Spring Replacement: 手順 5、 1の画像 1
      この手順で使用する道具:
      Tweezers
      $4.99
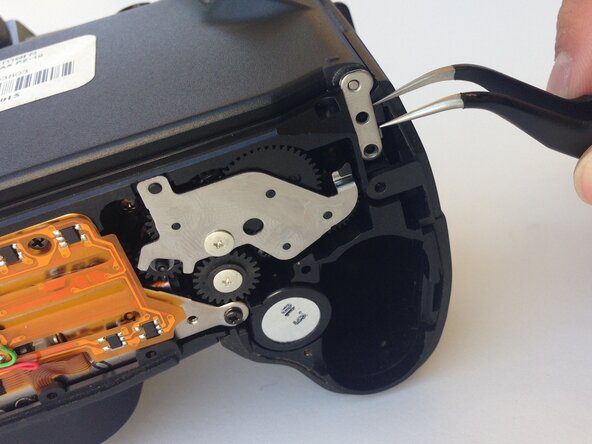
      • Using a pair of tweezers, gently remove the metal tab securing the back door axle.

      • The door will come loose at this point, watch for any loose parts that may also come out.

      FixBotに聞いてみる

      コメントを追加

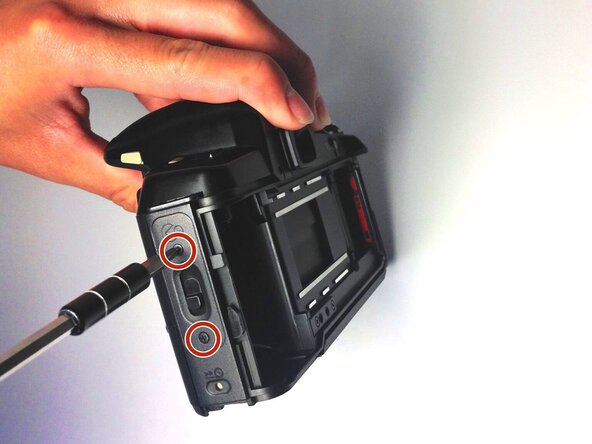
    6. Pentax PZ-10 Back Cover Locking Switch Spring Replacement, Removing the Side Panel: 手順 6、 1の画像 1
      • Once the back cover is fully removed, remove the two 4.35mm screws attaching the cover of the unlocking switch, and remove the plate.

      FixBotに聞いてみる

      コメントを追加

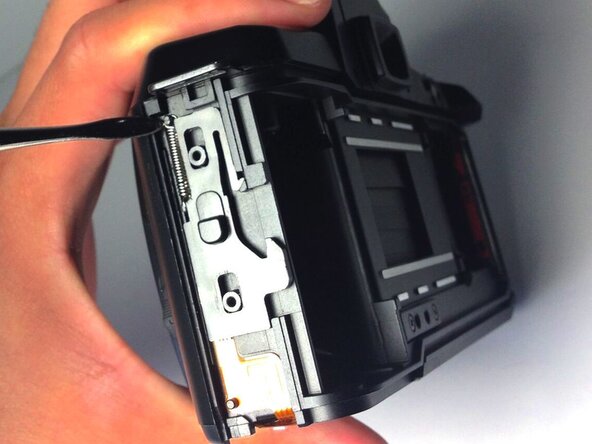
    7. Pentax PZ-10 Back Cover Locking Switch Spring Replacement, Removing the Spring: 手順 7、 1の画像 1
      • Locate the spring at the upper left corner of the face, and pull the rings of the spring off of the pins to remove it using plastic opening tools.

      • You are now ready to replace the spring.

      FixBotに聞いてみる

      コメントを追加

終わりに

To reassemble your device, follow these instructions in reverse order.

キャンセル: このガイドを終了できませんでした。

ある他の人がこのガイドを完成しました。

作成者

8人の作成者と共同で作成されました。

Ryan Su

メンバー登録日: 04/20/15

107 ポイント

1ガイドが承認済み

0件のガイドコメント

コメントを追加

統計データ:

過去 24時間: 2

過去 7 日: 6

過去 30 日: 20

今までの合計 744