メインコンテンツにスキップ
リペアコミュニティに参加 - アカウントの作成

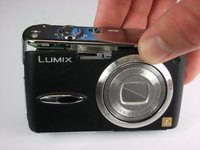
Panasonic Lumix DMC-FX01 Front Casing Replacement

必要な工具と部品

    1. Panasonic Lumix DMC-FX01 Front Casing Replacement, Battery: 手順 1、 1の画像 1
      • Locate the memory card and battery card latch on the bottom of the camera.

      • Slide the latch to the open position.

      FixBotに聞いてみる

      コメントを追加

    2. Panasonic Lumix DMC-FX01 Front Casing Replacement: 手順 2、 1の画像 1
      • Open the battery latch, and slide the battery release lever to the right.

      FixBotに聞いてみる

      コメントを追加

    3. Panasonic Lumix DMC-FX01 Front Casing Replacement: 手順 3、 1の画像 1
      • Remove the battery from the camera.

      FixBotに聞いてみる

      コメントを追加

    1. Panasonic Lumix DMC-FX01 Front Casing Replacement, Rear Casing: 手順 4、 1の画像 1
      • Remove the three 4.6 mm screws on the bottom of the camera using a Phillips #00 screwdriver.

      FixBotに聞いてみる

      コメントを追加

    2. Panasonic Lumix DMC-FX01 Front Casing Replacement: 手順 5、 1の画像 1
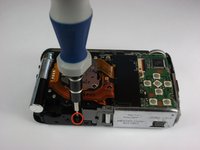
      • Remove the single 3.2 mm screw on the left side of the camera using a Phillips #00 screwdriver.

      FixBotに聞いてみる

      コメントを追加

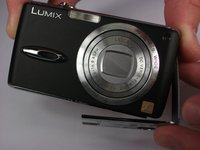
    3. Panasonic Lumix DMC-FX01 Front Casing Replacement: 手順 6、 2の画像 1 Panasonic Lumix DMC-FX01 Front Casing Replacement: 手順 6、 2の画像 2
      • Remove the left side casing.

      FixBotに聞いてみる

      コメントを追加

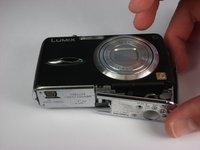
    4. Panasonic Lumix DMC-FX01 Front Casing Replacement: 手順 7、 1の画像 1
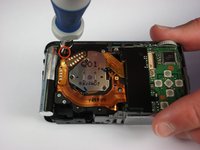
      • Remove the two 3.2 mm screws on the right side of the camera using a Phillips #00 screwdriver.

      FixBotに聞いてみる

      コメントを追加

    5. Panasonic Lumix DMC-FX01 Front Casing Replacement: 手順 8、 1の画像 1
      • Remove the bottom right panel.

      FixBotに聞いてみる

      コメントを追加

    6. Panasonic Lumix DMC-FX01 Front Casing Replacement: 手順 9、 2の画像 1 Panasonic Lumix DMC-FX01 Front Casing Replacement: 手順 9、 2の画像 2
      • Gently remove the back casing.

      • Start at the bottom and carefully pry towards the top to get this piece free.

      FixBotに聞いてみる

      コメントを追加

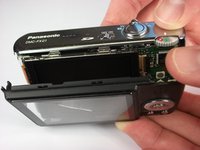
    1. Panasonic Lumix DMC-FX01 Front Casing Replacement, LCD Screen: 手順 10、 1の画像 1
      • Gently lift up the LCD screen.

      • Using a plastic prying tool, flip up the latch that holds the thin ribbon in place.

      • It should fall out on its own or with a gentle tug.

      FixBotに聞いてみる

      コメントを追加

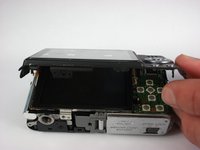
    2. Panasonic Lumix DMC-FX01 Front Casing Replacement: 手順 11、 1の画像 1
      • Gently tug the thicker ribbon to remove it from its housing.

      FixBotに聞いてみる

      コメントを追加

    1. Panasonic Lumix DMC-FX01 Front Casing Replacement, Front Casing: 手順 12、 2の画像 1 Panasonic Lumix DMC-FX01 Front Casing Replacement, Front Casing: 手順 12、 2の画像 2
      • Remove the two black 5.4 mm screws that hold in the front faceplate using a Phillips #00 screwdriver.

      • There may be a third screw the the right of the lens assembly.

      FixBotに聞いてみる

      コメントを追加

    2. Panasonic Lumix DMC-FX01 Front Casing Replacement: 手順 13、 3の画像 1 Panasonic Lumix DMC-FX01 Front Casing Replacement: 手順 13、 3の画像 2 Panasonic Lumix DMC-FX01 Front Casing Replacement: 手順 13、 3の画像 3
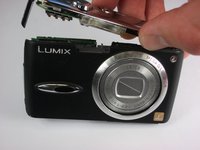
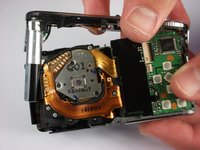
      • Carefully remove the upper assembly, which houses the buttons and the flash battery.

      FixBotに聞いてみる

      コメントを追加

    3. Panasonic Lumix DMC-FX01 Front Casing Replacement: 手順 14、 1の画像 1
      • Carefully remove the front casing after verifying that the thin plastic around the lens is not still attached.

      FixBotに聞いてみる

      コメントを追加

終わりに

To reassemble your device, follow these instructions in reverse order.

キャンセル: このガイドを終了できませんでした。

2 の人々がこのガイドを完成させました。

作成者

7人の作成者と共同で作成されました。

Andrew

メンバー登録日: 10/11/10

396 ポイント

4のガイドは作成済み

チーム

Cal Poly, Team 9-22, Regan Fall 2010 Cal Poly, Team 9-22, Regan Fall 2010人のメンバー

CPSU-REGAN-F10S9G22

4 メンバー

24のガイドは作成済み

0件のガイドコメント

コメントを追加

統計データ:

過去 24時間: 3

過去 7 日: 9

過去 30 日: 33

今までの合計 4,732