必要な工具と部品
-
-
-
-
-
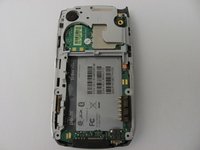
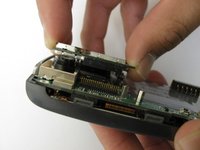
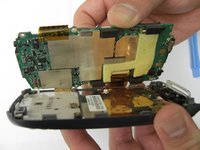
オープニングツールを使用して、キーボード接続部を固定しているタブのロックを解除します(画像1)。
-
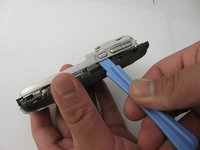
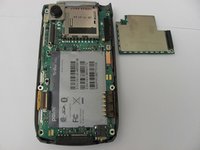
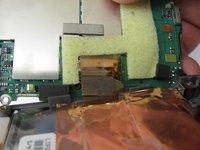
キーボード接続部が外れたら、手を使ってマザーボードをバックパネルからゆっくりと取り外します(画像2)。
-
-
-
マザーボードをバックパネルから完全に取り外すには、オープニングツールを使用して、マザーボードからLCDコネクタのロックを解除します(画像2)。
-
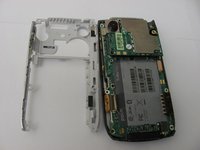
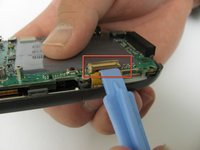
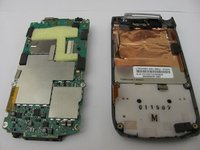
LCDコネクタのロックが解除されると、マザーボードはバックパネル、キーボード、およびLCDから完全に取り外された状態になります(画像3)。
-
-


終わりに
デバイスを再組み立てするには、これらのインストラクションを逆の順番に従って作業を進めてください。
以下の翻訳者の皆さんにお礼を申し上げます:
en jp
100%

Translation Botさんは世界中で修理する私たちを助けてくれています! あなたも貢献してみませんか?
翻訳を始める ›
チーム

Cal Poly, Team 12-37, Regan Spring 2012 Cal Poly, Team 12-37, Regan Spring 2012人のメンバー
CPSU-REGAN-S12S12G37
4 メンバー
49のガイドは作成済み