メインコンテンツにスキップ

Onkyo TX-800 Power fuse Replacement

必要な工具と部品

  1. Onkyo TX-800 Power fuse Replacement, Disassembling Onkyo TX-800 Top case: 手順 1、 3の画像 1 Onkyo TX-800 Power fuse Replacement, Disassembling Onkyo TX-800 Top case: 手順 1、 3の画像 2 Onkyo TX-800 Power fuse Replacement, Disassembling Onkyo TX-800 Top case: 手順 1、 3の画像 3
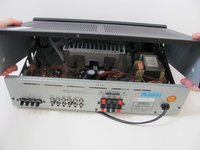
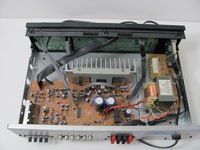
    • Remove the two screws on both sides of the receiver. Keep these and the rest of the screws in a safe place.

  2. Onkyo TX-800 Power fuse Replacement: 手順 2、 2の画像 1 Onkyo TX-800 Power fuse Replacement: 手順 2、 2の画像 2
    • Remove the top screw on the back panel.

  3. Onkyo TX-800 Power fuse Replacement: 手順 3、 2の画像 1 Onkyo TX-800 Power fuse Replacement: 手順 3、 2の画像 2
    • Slide off the case to expose the internal components of the receiver.

  4. Onkyo TX-800 Power fuse Replacement, Power fuse: 手順 4、 2の画像 1 Onkyo TX-800 Power fuse Replacement, Power fuse: 手順 4、 2の画像 2
    • Locate the fuse.

  5. Onkyo TX-800 Power fuse Replacement: 手順 5、 2の画像 1 Onkyo TX-800 Power fuse Replacement: 手順 5、 2の画像 2
    • Gently wedge a small screwdriver in between one side of the fuse and the contact.

    • Remove the fuse with your thumb and forefinger.

  6. Onkyo TX-800 Power fuse Replacement: 手順 6、 1の画像 1
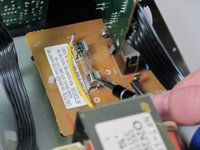
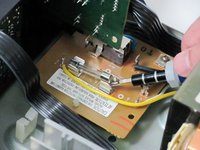
    • Examine the fuse. If the wire within it is broken, you will need to replace it with a new 125 Volt, 4 Amp fuse.

ゴール

5 の人々がこのガイドを完成させました。

作成者

7人の作成者と共同で作成されました。

Michael Lady

メンバー登録日: 04/09/10

271 ポイント

2のガイドは作成済み

チーム

Cal Poly, Team 27-92, Amido Spring 2010 Cal Poly, Team 27-92, Amido Spring 2010人のメンバー

CPSU-AMIDO-S10S27G92

4 メンバー

7のガイドは作成済み

2 件のコメント

Thanks for clear instructions!

Andy Dersch - 返信

Thank you!

There are no Onkyo repair centers to go to.

obobooks - 返信

コメントを追加

統計データ:

過去 24時間: 1

過去 7 日: 31

過去 30 日: 105

今までの合計 18,623