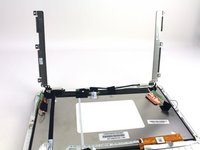
メインコンテンツにスキップ

One Education Infinity Upper Hinge Assembly Replacement

必要条件のみ
この修理ガイドは、他のガイドの前提条件として使用されます。それ自体は不完全で、単独で使用されることはありません。

必要な工具と部品

  1. One Education Infinity Upper Hinge Assembly Replacement, Back Case: 手順 1、 3の画像 1 One Education Infinity Upper Hinge Assembly Replacement, Back Case: 手順 1、 3の画像 2 One Education Infinity Upper Hinge Assembly Replacement, Back Case: 手順 1、 3の画像 3
    • Always power off your device before beginning disassembly.

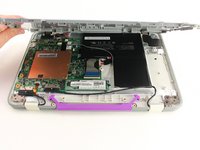
    • Remove the screw covers and rubber feet from the bottom of the laptop with a metal spudger.

  2. One Education Infinity Upper Hinge Assembly Replacement: 手順 2、 2の画像 1 One Education Infinity Upper Hinge Assembly Replacement: 手順 2、 2の画像 2
    • Using a Phillips #00 screwdriver, remove the sixteen 5.0 mm black screws from the back panel.

  3. One Education Infinity Upper Hinge Assembly Replacement: 手順 3、 3の画像 1 One Education Infinity Upper Hinge Assembly Replacement: 手順 3、 3の画像 2 One Education Infinity Upper Hinge Assembly Replacement: 手順 3、 3の画像 3
    • Using the iFixit plastic opening tool or spudger, start near the white hinge of the device and lift along the outer edges of the device until all clips are released.

    • Lift the back case off of the device.

    • Removing the back may create a loud snapping noise.

  4. One Education Infinity Upper Hinge Assembly Replacement, Battery: 手順 4、 3の画像 1 One Education Infinity Upper Hinge Assembly Replacement, Battery: 手順 4、 3の画像 2 One Education Infinity Upper Hinge Assembly Replacement, Battery: 手順 4、 3の画像 3
    • There may be black tape inside your device covering components or holding down wires. This tape is unimportant for the function of the device, and can be removed.

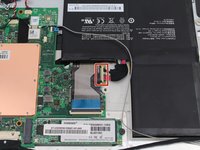
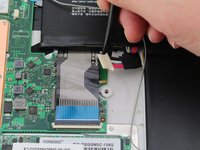
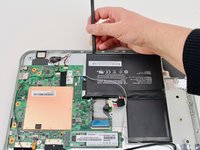
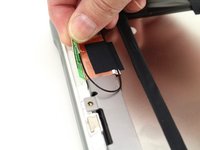
    • Carefully wiggle the battery cable to the right and out of the port with a plastic spudger.

  5. One Education Infinity Upper Hinge Assembly Replacement: 手順 5、 3の画像 1 One Education Infinity Upper Hinge Assembly Replacement: 手順 5、 3の画像 2 One Education Infinity Upper Hinge Assembly Replacement: 手順 5、 3の画像 3
    • Wedge a plastic spudger underneath the battery from the upper edge and slide it carefully along the length of the battery to separate it from the case.

    • There is a mild adhesive holding down the battery. Take care not to puncture or excessively bend the battery while freeing it from the adhesive.

    • Lift the battery out from the internal case.

  6. One Education Infinity Upper Hinge Assembly Replacement, Upper Case: 手順 6、 3の画像 1 One Education Infinity Upper Hinge Assembly Replacement, Upper Case: 手順 6、 3の画像 2 One Education Infinity Upper Hinge Assembly Replacement, Upper Case: 手順 6、 3の画像 3
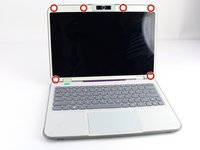
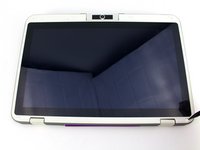
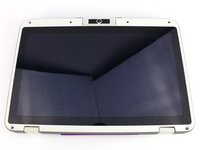
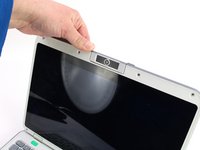
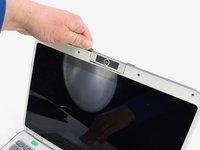
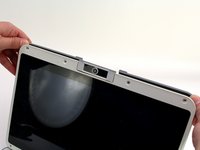
    • Flip open the laptop so that the screen is exposed.

    • We found it convenient to flip the laptop into tablet mode for added support.

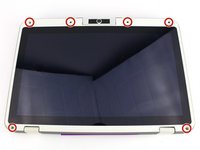
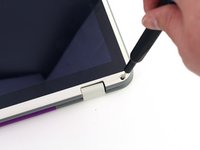
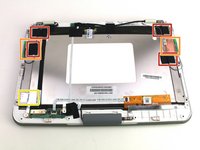
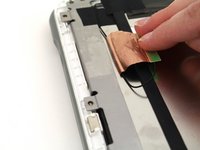
    • Using a spudger, remove the six screw covers along the bezel of the screen.

  7. One Education Infinity Upper Hinge Assembly Replacement: 手順 7、 2の画像 1 One Education Infinity Upper Hinge Assembly Replacement: 手順 7、 2の画像 2
    • Remove the six 2.8 mm Phillips #00 screws along the bezel.

  8. One Education Infinity Upper Hinge Assembly Replacement: 手順 8、 3の画像 1 One Education Infinity Upper Hinge Assembly Replacement: 手順 8、 3の画像 2 One Education Infinity Upper Hinge Assembly Replacement: 手順 8、 3の画像 3
    • Use the two tabs on the top edge of the screen to pry the case apart.

    • Once the two top clips have been disengaged, start to work your way around the rest of the screen.

  9. One Education Infinity Upper Hinge Assembly Replacement: 手順 9、 1の画像 1
    • Once all the clips have been popped off, remove the upper case from the back of the display assembly.

    • You may want to close the laptop while disconnecting the hinge-side edge, as it will give you extra clearance for the upper case.

  10. One Education Infinity Upper Hinge Assembly Replacement, Upper Hinge Assembly: 手順 10、 2の画像 1 One Education Infinity Upper Hinge Assembly Replacement, Upper Hinge Assembly: 手順 10、 2の画像 2
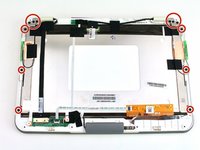
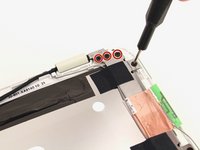
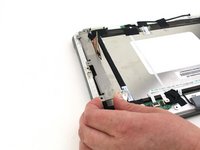
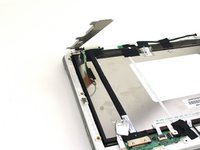
    • Remove the twelve 3.8 mm Phillips #00 screws from the hinge brackets extending along the height of the display.

  11. One Education Infinity Upper Hinge Assembly Replacement: 手順 11、 3の画像 1 One Education Infinity Upper Hinge Assembly Replacement: 手順 11、 3の画像 2 One Education Infinity Upper Hinge Assembly Replacement: 手順 11、 3の画像 3
    • Peel back the four pieces of black tape.

    • Peel back the antenna cable boards off of the display hinges.

    • Peel off the silver tape from the display hinges.

  12. One Education Infinity Upper Hinge Assembly Replacement: 手順 12、 3の画像 1 One Education Infinity Upper Hinge Assembly Replacement: 手順 12、 3の画像 2 One Education Infinity Upper Hinge Assembly Replacement: 手順 12、 3の画像 3
    • Lift up both hinges, ensuring that they clear all tape and wires.

終わりに

To reassemble your device, follow these instructions in reverse order.

作成者

1人の作成者と共同作成されました。

Austin Blakely

メンバー登録日: 03/11/19

19,649 ポイント

53のガイドは作成済み

チーム

iFixit iFixit人のメンバー

Staff

136 メンバー

17,430のガイドは作成済み

0 件のコメント

コメントを追加

統計データ:

過去 24時間: 1

過去 7 日: 2

過去 30 日: 2

今までの合計 13