メインコンテンツにスキップ
リペアコミュニティに参加 - アカウントの作成

Onda V701 Screen Replacement

必要な工具と部品

  1. Onda V701 Screen Replacement, Back Panel: 手順 1、 3の画像 1 Onda V701 Screen Replacement, Back Panel: 手順 1、 3の画像 2 Onda V701 Screen Replacement, Back Panel: 手順 1、 3の画像 3
    • Ensure device is powered off before disassembly.

    • Remove the 4 rubber screw plugs using a spudger.

    FixBotに聞いてみる

    コメントを追加

  2. Onda V701 Screen Replacement: 手順 2、 3の画像 1 Onda V701 Screen Replacement: 手順 2、 3の画像 2 Onda V701 Screen Replacement: 手順 2、 3の画像 3
    • Remove the four 4.8mm mounting screws using a PH00 screwdriver.

    FixBotに聞いてみる

    コメントを追加

  3. Onda V701 Screen Replacement: 手順 3、 2の画像 1 Onda V701 Screen Replacement: 手順 3、 2の画像 2
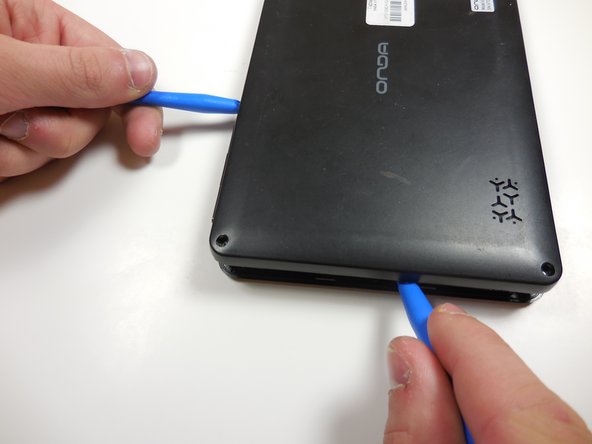
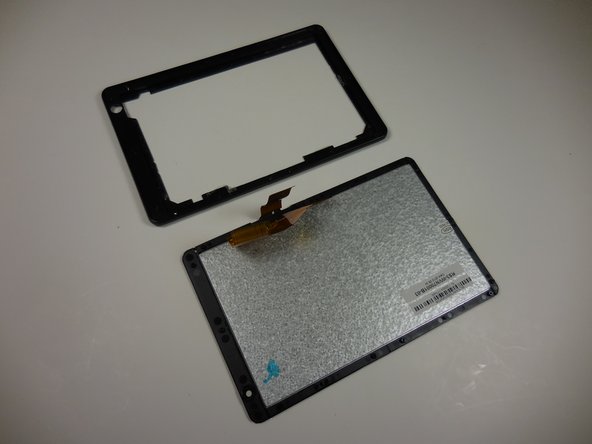
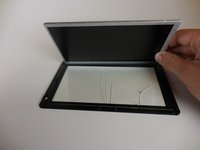
    • Starting at one corner, gently pry the back panel assembly from the screen assembly using two plastic opening tools.

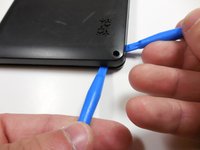
    • Slide the opening tools around the perimeter of the device to separate the back panel assembly from the screen assembly.

    FixBotに聞いてみる

    コメントを追加

  4. Onda V701 Screen Replacement: 手順 4、 2の画像 1 Onda V701 Screen Replacement: 手順 4、 2の画像 2
    • Gently lift the screen assembly away from the back cover assembly.

    • Be careful when separating the two pieces as the screen assembly is still connected to the mother board by two ribbon cables.

    FixBotに聞いてみる

    コメントを追加

  5. Onda V701 Screen Replacement: 手順 5、 3の画像 1 Onda V701 Screen Replacement: 手順 5、 3の画像 2 Onda V701 Screen Replacement: 手順 5、 3の画像 3
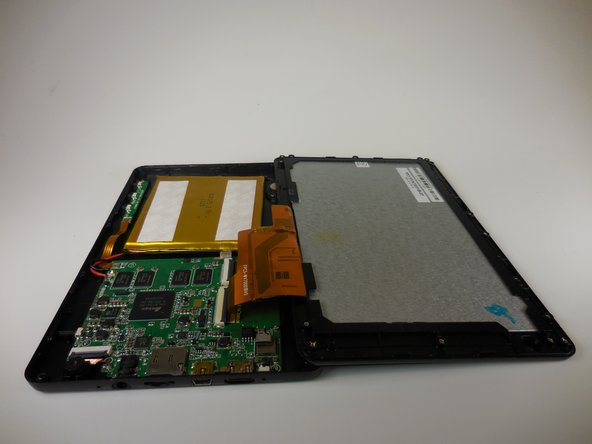
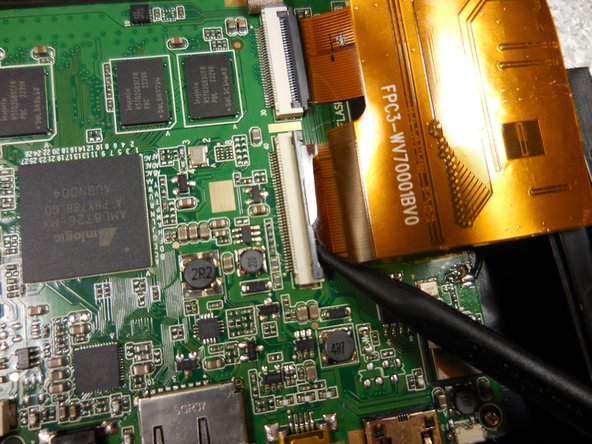
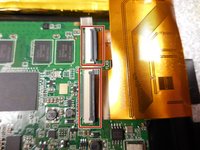
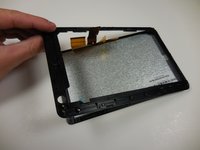
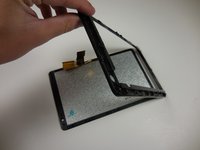
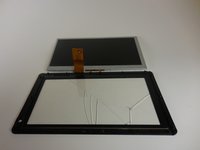
    • Disconnect the two ribbon connectors by flipping the gray tabs up with a fingernail or a spudger.

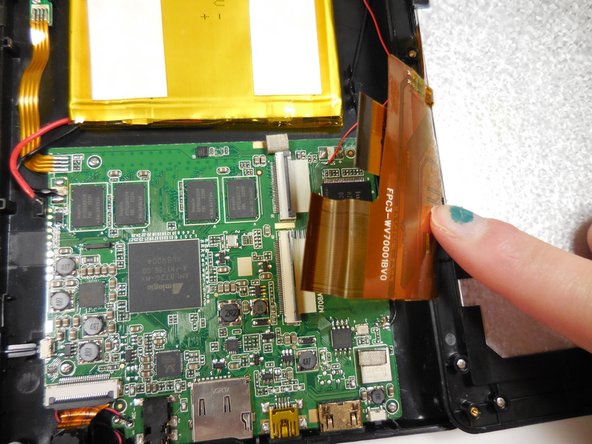
    • Remove the ribbon cables.

    FixBotに聞いてみる

    コメントを追加

  6. Onda V701 Screen Replacement, Screen: 手順 6、 3の画像 1 Onda V701 Screen Replacement, Screen: 手順 6、 3の画像 2 Onda V701 Screen Replacement, Screen: 手順 6、 3の画像 3
    • Remove all 14 of the 3.6mm screws using a PH00 screwdriver.

    FixBotに聞いてみる

    コメントを追加

  7. Onda V701 Screen Replacement: 手順 7、 3の画像 1 Onda V701 Screen Replacement: 手順 7、 3の画像 2 Onda V701 Screen Replacement: 手順 7、 3の画像 3
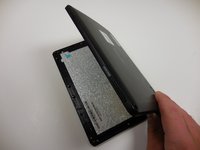
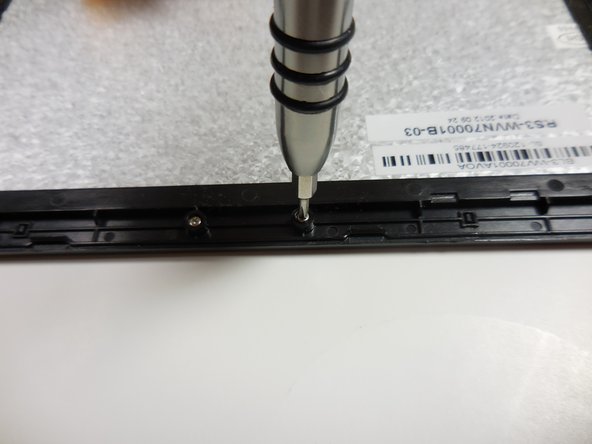
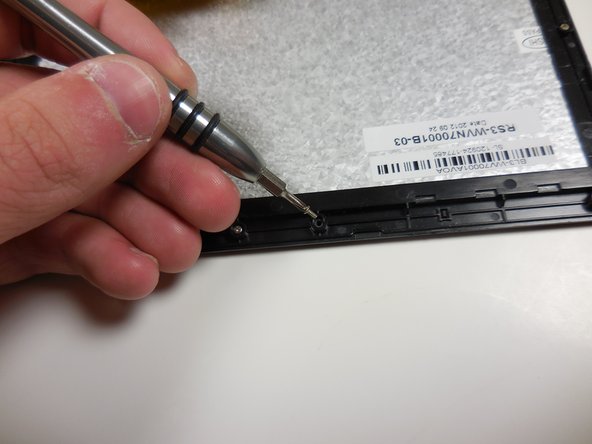
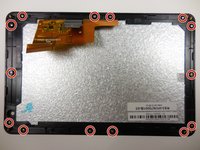
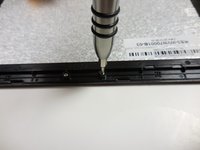
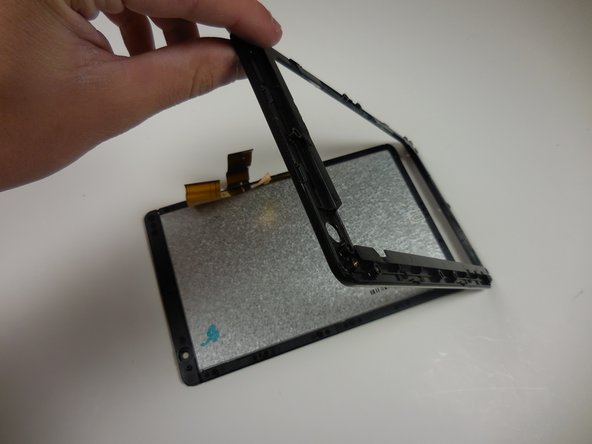
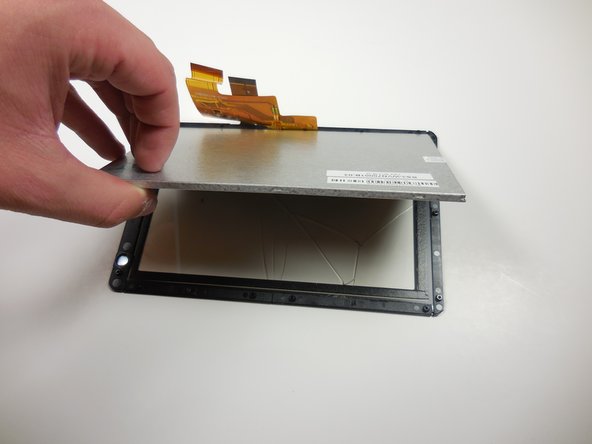
    • Gently separate the screen from the plastic border/screen holder by pulling it off with your hands.

    FixBotに聞いてみる

    コメントを追加

  8. Onda V701 Screen Replacement: 手順 8、 3の画像 1 Onda V701 Screen Replacement: 手順 8、 3の画像 2 Onda V701 Screen Replacement: 手順 8、 3の画像 3
    • Remove the grey monitor from the glass screen cover by gently lifting it up.

    FixBotに聞いてみる

    コメントを追加

終わりに

To reassemble your device, follow these instructions in reverse order.

キャンセル: このガイドを終了できませんでした。

ある他の人がこのガイドを完成しました。

作成者

4人の作成者と共同で作成されました。

William Sioholm

メンバー登録日: 03/11/15

104 ポイント

1ガイドが承認済み

チーム

Colorado Springs, Team 4-6, Panko Spring 2015 Colorado Springs, Team 4-6, Panko Spring 2015人のメンバー

UCCS-PANKO-S15S4G6

3 メンバー

10のガイドは作成済み

1件のガイドコメント

بدي من هي الشاشة وين بلاقي

abdurrhman khrrat - 返信 共有

コメントを追加

統計データ:

過去 24時間: 1

過去 7 日: 10

過去 30 日: 31

今までの合計 751