メインコンテンツにスキップ
リペアコミュニティに参加 - アカウントの作成

Olympus FE-170 Flash Assembly Replacement

必要な工具と部品

  1. Olympus FE-170 Flash Assembly Replacement, Casing: 手順 1、 2の画像 1 Olympus FE-170 Flash Assembly Replacement, Casing: 手順 1、 2の画像 2
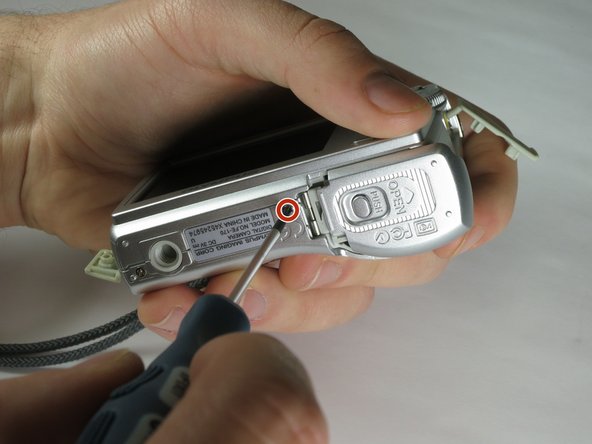
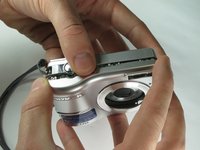
    • Remove the 2 exposed screws on opposite sides of the camera. Turn the screws counter-clockwise to remove.

    FixBotに聞いてみる

    コメントを追加

  2. Olympus FE-170 Flash Assembly Replacement: 手順 2、 2の画像 1 Olympus FE-170 Flash Assembly Replacement: 手順 2、 2の画像 2
    • Open the battery compartment and remove the 2 screws in the top of the opening.

    FixBotに聞いてみる

    コメントを追加

  3. Olympus FE-170 Flash Assembly Replacement: 手順 3、 2の画像 1 Olympus FE-170 Flash Assembly Replacement: 手順 3、 2の画像 2
    • Remove the 2 exposed screws on the bottom of the camera.

    FixBotに聞いてみる

    コメントを追加

  4. Olympus FE-170 Flash Assembly Replacement: 手順 4、 1の画像 1
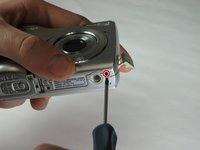
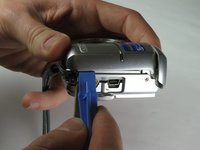
    • Uncover the mini-usb dock on the side of the camera and unscrew the screw next to the flap joint

    FixBotに聞いてみる

    コメントを追加

  5. Olympus FE-170 Flash Assembly Replacement: 手順 5、 1の画像 1
    • Uncover the video cable port on the side of the camera and remove the screw

    FixBotに聞いてみる

    コメントを追加

  6. Olympus FE-170 Flash Assembly Replacement: 手順 6、 2の画像 1 Olympus FE-170 Flash Assembly Replacement: 手順 6、 2の画像 2
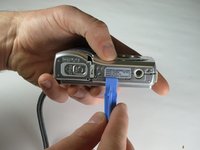
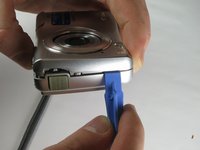
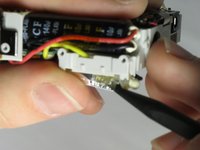
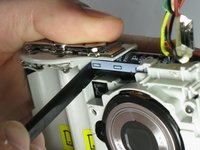
    • Carefully slip the head of the plastic opening tool under the panels by finding the crack between the panels. Lightly apply pressure in the shown places at the top and bottom of the camera.

    FixBotに聞いてみる

    コメントを追加

  7. Olympus FE-170 Flash Assembly Replacement: 手順 7、 2の画像 1 Olympus FE-170 Flash Assembly Replacement: 手順 7、 2の画像 2
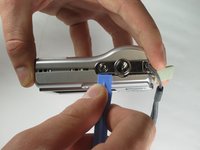
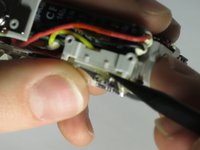
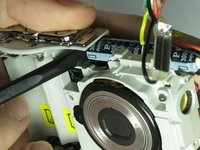
    • Loosen the panels on the sides of the camera in the shown places by slipping the plastic opening tool in the crack between the panels. Lightly apply pressure.

    FixBotに聞いてみる

    コメントを追加

  8. Olympus FE-170 Flash Assembly Replacement: 手順 8、 2の画像 1 Olympus FE-170 Flash Assembly Replacement: 手順 8、 2の画像 2
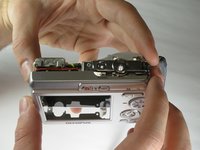
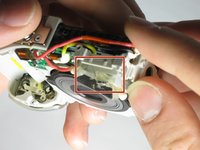
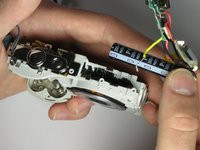
    • Ensure that the panels have been loosened. Carefully use hands to pull back and remove the panels.

    FixBotに聞いてみる

    コメントを追加

  9. Olympus FE-170 Flash Assembly Replacement, Flash Assembly: 手順 9、 3の画像 1 Olympus FE-170 Flash Assembly Replacement, Flash Assembly: 手順 9、 3の画像 2 Olympus FE-170 Flash Assembly Replacement, Flash Assembly: 手順 9、 3の画像 3
    • Remove the two small screws on the top of the flash itself.

    FixBotに聞いてみる

    コメントを追加

  10. Olympus FE-170 Flash Assembly Replacement: 手順 10、 2の画像 1 Olympus FE-170 Flash Assembly Replacement: 手順 10、 2の画像 2
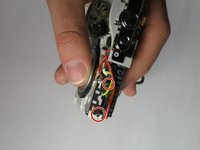
    • Use the spudger to gently pry the top of the thin metal casing around the flash loose.

    FixBotに聞いてみる

    コメントを追加

  11. Olympus FE-170 Flash Assembly Replacement: 手順 11、 1の画像 1
    • Use the spudger to gently pry the bottom of the thin metal casing around the flash loose.

    FixBotに聞いてみる

    コメントを追加

  12. Olympus FE-170 Flash Assembly Replacement: 手順 12、 2の画像 1 Olympus FE-170 Flash Assembly Replacement: 手順 12、 2の画像 2
    • Use your fingers to gently pull the metal casing off of the flash.

    • Remove the plastic flash diffuser by gently prying at the edges with your fingers.

    FixBotに聞いてみる

    コメントを追加

  13. Olympus FE-170 Flash Assembly Replacement: 手順 13、 2の画像 1 Olympus FE-170 Flash Assembly Replacement: 手順 13、 2の画像 2
    • Remove the screw holding the flash circuit board in place.

    FixBotに聞いてみる

    コメントを追加

  14. Olympus FE-170 Flash Assembly Replacement: 手順 14、 1の画像 1
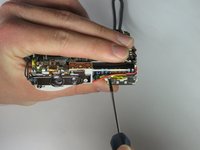
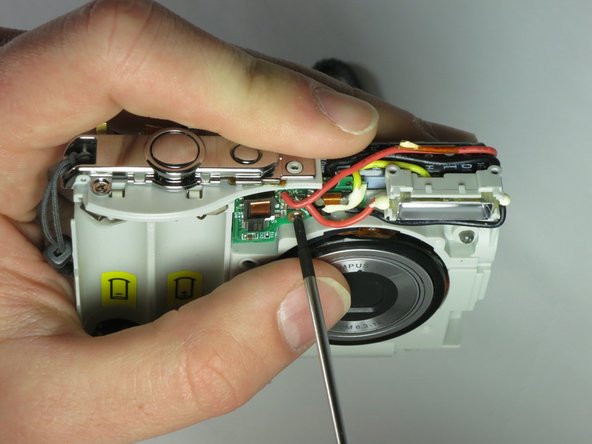
    • Pull the flash-bulb sub-assembly out of its place by using the pointed end of the spudger.

    FixBotに聞いてみる

    コメントを追加

  15. Olympus FE-170 Flash Assembly Replacement: 手順 15、 3の画像 1 Olympus FE-170 Flash Assembly Replacement: 手順 15、 3の画像 2 Olympus FE-170 Flash Assembly Replacement: 手順 15、 3の画像 3
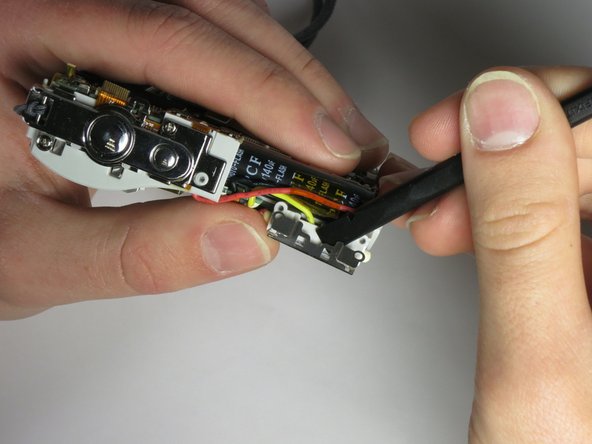
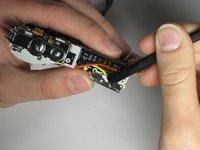
    • Use the pointed end of the spudger to pull up both layers of tape on top of the flash-bulb sub-assembly.

    • Remove the wire layered in between the two sections of tape from the flash-bulb sub-assembly.

    FixBotに聞いてみる

    コメントを追加

  16. Olympus FE-170 Flash Assembly Replacement: 手順 16、 1の画像 1
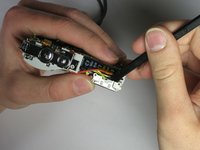
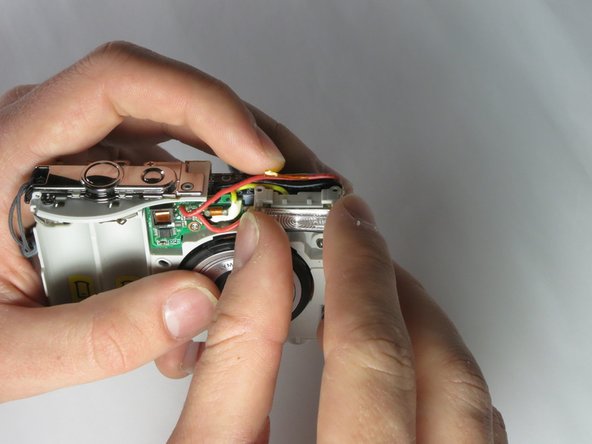
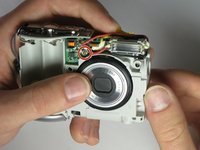
    • Pull the flash circuit board and flash-bulb sub-assembly off from the front of the camera.

    FixBotに聞いてみる

    コメントを追加

  17. Olympus FE-170 Flash Assembly Replacement: 手順 17、 3の画像 1 Olympus FE-170 Flash Assembly Replacement: 手順 17、 3の画像 2 Olympus FE-170 Flash Assembly Replacement: 手順 17、 3の画像 3
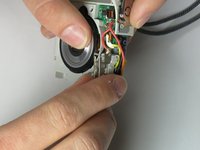
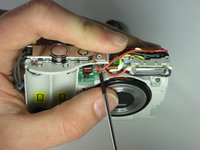
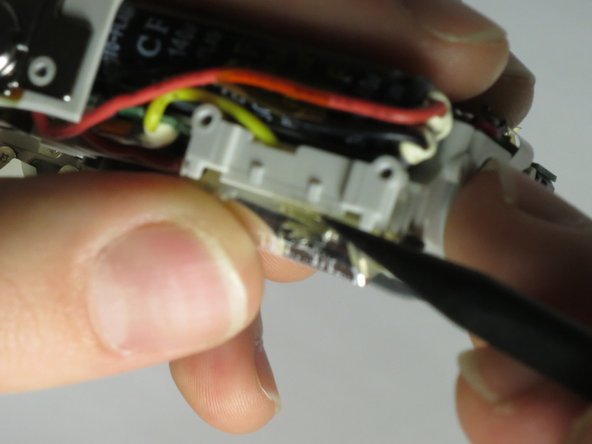
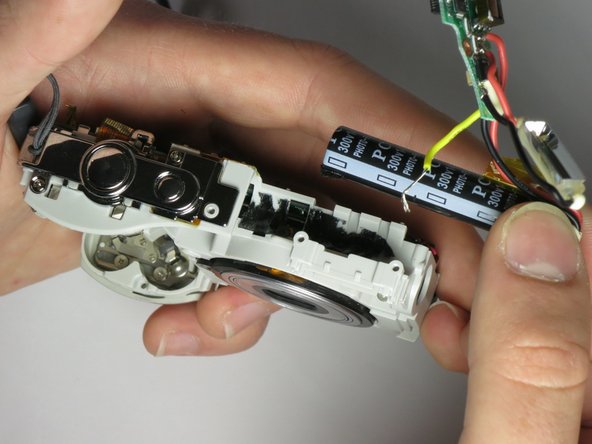
    • Use the spudger to push the black capacitor out from its slot.

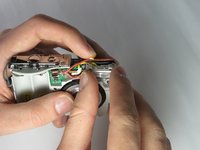
    • Remove the entire flash assembly by gently pulling outward and away from the camera.

    FixBotに聞いてみる

    コメントを追加

終わりに

To reassemble your device, follow these instructions in reverse order.

キャンセル: このガイドを終了できませんでした。

作成者

1人の作成者と共同作成されました。

Tyler Hartwig

メンバー登録日: 03/24/15

337 ポイント

3のガイドは作成済み

チーム

Baylor, Team 6-4, Shaver Spring 2015 Baylor, Team 6-4, Shaver Spring 2015人のメンバー

BU-SHAVER-S15S6G4

3 メンバー

12のガイドは作成済み

0件のガイドコメント

コメントを追加

統計データ:

過去 24時間: 2

過去 7 日: 4

過去 30 日: 33

今までの合計 689