はじめに
Note: this guide shows removing a ripped potion of the display cable, not a separate controller component. You may use the guide for disassembly, but be careful not to rip any cables as shown in this guide
Use this guide to replace the touchscreen controller in your Nvidia Shield Tablet.
必要な工具と部品
-
この手順で使用する道具:Anti-Static Wrist Strap$7.95
-
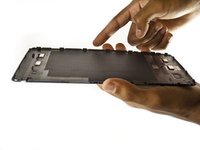
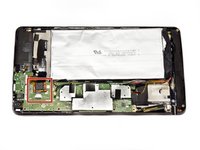
Set the tablet so the buttons, microSD, and stylus port are facing you.
-
Open the microSD slot.
-
Using the flat end of the spudger tool, carefully pry open the case starting from the microSD slot, slowly sliding the spudger along the inside edge of the case.
-
-
-
-
As you remove your case, be aware of small clips along the edges.
-
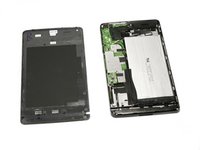
Finally, set the old casing aside.
-
-
この手順で使用する道具:Anti-Static Wrist Strap$7.95
-
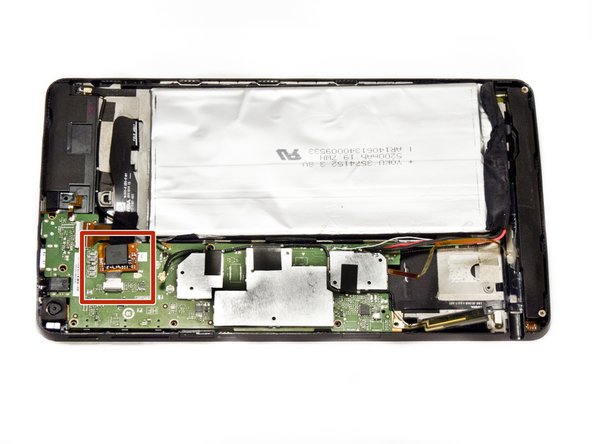
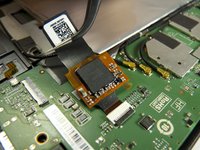
Peel away the tape covering the top right side of the motherboard. The plastic opening tools are useful in nudging the tape off.
-
-
この手順で使用する道具:Tweezers$4.99
-
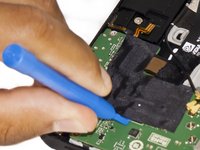
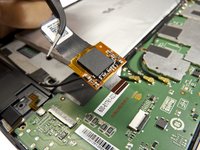
Using the precision tweezers, gently remove the touchscreen controller from its port.
-


To reassemble your device, follow these instructions in reverse order.
チーム

USF Tampa, Team 2-2, Blackwell Fall 2015 USF Tampa, Team 2-2, Blackwell Fall 2015人のメンバー
USFT-BLACKWELL-F15S2G2
3 メンバー
11のガイドは作成済み
4件のガイドコメント
How are you supposed to replace this part if it's connected to the Touchscreen panel by a flat ribbon cable. The pictures show the touchscreen controller that has been severed/cut by where the flat cable goes 90 degrees towards the touchscreen, you cannot just replace this part by itself as shown in the pictures. WTF????
My Thoughts exactly. Mine has one connector that is easily removed, the smaller end. The large wide end is up under a metal frame. I gave a gentle tug, but apparently its glued or sealed. Now to figure out how to remove it. Guessing a heat gun to the glass is the easiest way? No coming apart from the back/inside!
The Watson - 返信 共有
why is this still up. you can’t replace this part so the title is misleading. This part is torn easy you must remove the board from the tablet with the touch cable connector unlatched but the cable still in. if you try to bull it out first it rips.