メインコンテンツにスキップ

Nokia N70 Display Replacement

必要な工具と部品

  1. Nokia N70 Display Replacement, Battery: 手順 1、 1の画像 1
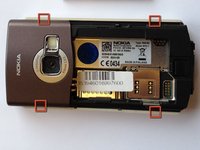
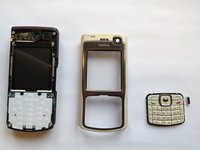
    • Orient the phone as shown.

    • Press the button with the plastic opening tool and slide the back case downward relative to the phone.

  2. Nokia N70 Display Replacement: 手順 2、 1の画像 1
    • Remove the battery cover by lifting it away from the phone.

  3. Nokia N70 Display Replacement: 手順 3、 1の画像 1
    • Insert the plastic opening tool into the marked space.

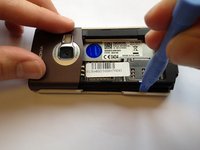
    • Lift up the side of the battery closest to the bottom edge of the phone using the plastic opening tool.

  4. Nokia N70 Display Replacement: 手順 4、 1の画像 1
    • Remove the battery from the phone.

  5. Nokia N70 Display Replacement, Keypad: 手順 5、 3の画像 1 Nokia N70 Display Replacement, Keypad: 手順 5、 3の画像 2 Nokia N70 Display Replacement, Keypad: 手順 5、 3の画像 3
    • Insert the plastic opening tool in the marked areas in between the front and back covers.

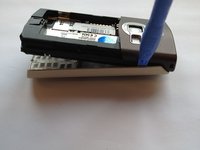
    • Pry each corner with the plastic opening tool until the front case completely detaches.

  6. Nokia N70 Display Replacement: 手順 6、 3の画像 1 Nokia N70 Display Replacement: 手順 6、 3の画像 2 Nokia N70 Display Replacement: 手順 6、 3の画像 3
    • Orient the phone so that the keypad is facing you.

    • Remove the keypad by lifting it away from the phone.

  7. Nokia N70 Display Replacement, Display: 手順 7、 1の画像 1
    • Using a torx T6 screwdriver remove the six 15 mm torx screws.

  8. Nokia N70 Display Replacement: 手順 8、 2の画像 1 Nokia N70 Display Replacement: 手順 8、 2の画像 2
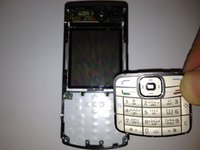
    • Separate the front panel of the phone by pulling the bottom of the panel at a 45 degree angle.

  9. Nokia N70 Display Replacement: 手順 9、 2の画像 1 Nokia N70 Display Replacement: 手順 9、 2の画像 2
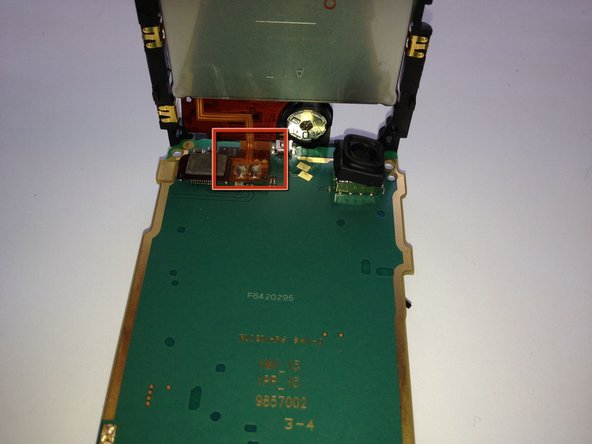
    • Lift the bottom of the display circuit board up and locate the ribbon connection located where the two circuit boards intersect.

    • Remove the ribbon connection that connects the two circuit boards.

  10. Nokia N70 Display Replacement: 手順 10、 3の画像 1 Nokia N70 Display Replacement: 手順 10、 3の画像 2 Nokia N70 Display Replacement: 手順 10、 3の画像 3
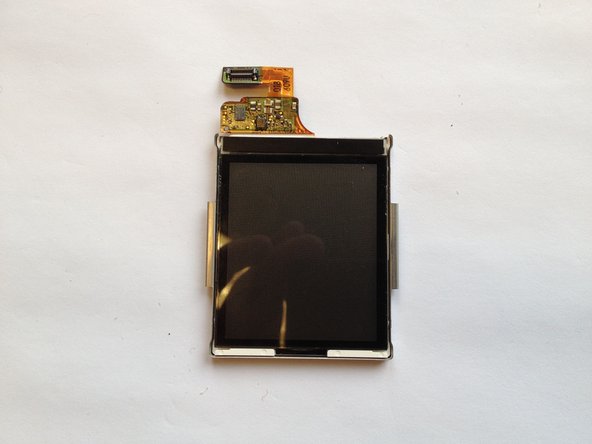
    • While pulling back each of the clamps marked in the image, lift out each side of the screen independently.

    • Be careful when using the plastic prying tool to not scratch the display.

終わりに

To reassemble your device, follow these instructions in reverse order.

8 の人々がこのガイドを完成させました。

作成者

5人の作成者と共同で作成されました。

Justin

メンバー登録日: 10/12/11

984 ポイント

5のガイドは作成済み

チーム

Cal Poly, Team 6-2, Regan Fall 2011 Cal Poly, Team 6-2, Regan Fall 2011人のメンバー

CPSU-REGAN-F11S6G2

4 メンバー

10のガイドは作成済み

0 件のコメント

コメントを追加

統計データ:

過去 24時間: 2

過去 7 日: 2

過去 30 日: 20

今までの合計 8,564