メインコンテンツにスキップ
リペアコミュニティに参加 - アカウントの作成

Nintendo Wii mini Motherboard Replacement

必要な工具と部品

  1. Nintendo Wii mini Motherboard Replacement, Unscrew the Bottom: 手順 1、 2の画像 1 Nintendo Wii mini Motherboard Replacement, Unscrew the Bottom: 手順 1、 2の画像 2
    • Remove the two rubber feet at the back of the console to reveal the hidden screws.

    • Remove the four 6mm Phillips #0 screws.

    FixBotに聞いてみる

    コメントを追加

  2. Nintendo Wii mini Motherboard Replacement, Remove the Cover: 手順 2、 3の画像 1 Nintendo Wii mini Motherboard Replacement, Remove the Cover: 手順 2、 3の画像 2 Nintendo Wii mini Motherboard Replacement, Remove the Cover: 手順 2、 3の画像 3
    • Turn the Wii mini right-side up. Then run a plastic opening tool around the middle edge of the console to loosen the top piece.

    • Gently lift the top piece of the console and set it aside.

    FixBotに聞いてみる

    コメントを追加

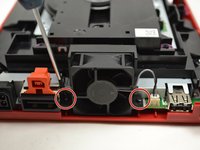
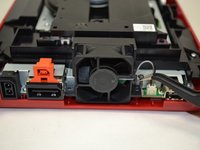
  3. Nintendo Wii mini Motherboard Replacement, Unscrew the Fan: 手順 3、 2の画像 1 Nintendo Wii mini Motherboard Replacement, Unscrew the Fan: 手順 3、 2の画像 2
    この手順で使用する道具:
    Tweezers
    $4.99
    • Turn the Wii mini around so that the back of the device is facing you.

    • Using a Phillips #0 Screwdriver, unscrew the two 6mm screws on either side of the fan piece.

    • You may need to use tweezers to pull out the screws once they are loosened.

    FixBotに聞いてみる
    コメントを追加

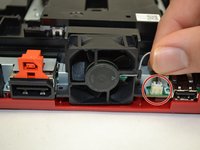
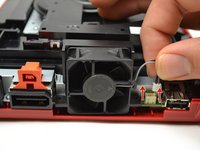
  4. Nintendo Wii mini Motherboard Replacement, Detach the Fan Connector: 手順 4、 3の画像 1 Nintendo Wii mini Motherboard Replacement, Detach the Fan Connector: 手順 4、 3の画像 2 Nintendo Wii mini Motherboard Replacement, Detach the Fan Connector: 手順 4、 3の画像 3
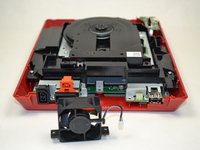
    • Using your fingers, gently pull the top of the pin connector straight up to detach the fan from the console.

    • Do not wiggle the connector or cable while removing. This may cause the connector to come loose

    • Remove the fan piece and set it aside.

    FixBotに聞いてみる
    コメントを追加

  5. Nintendo Wii mini Motherboard Replacement, Power Board: 手順 5、 3の画像 1 Nintendo Wii mini Motherboard Replacement, Power Board: 手順 5、 3の画像 2 Nintendo Wii mini Motherboard Replacement, Power Board: 手順 5、 3の画像 3
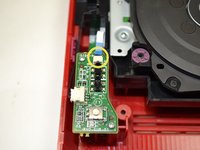
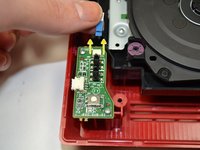
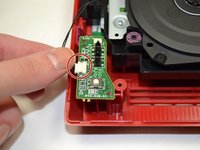
    • Using your fingers, slide out the blue ribbon cable from the the top of the power board.

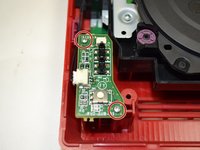
    • Using a Phillips #0 Screwdriver, unscrew the two 4mm screws at the top and bottom of the power board.

    FixBotに聞いてみる

    コメントを追加

  6. Nintendo Wii mini Motherboard Replacement: 手順 6、 2の画像 1 Nintendo Wii mini Motherboard Replacement: 手順 6、 2の画像 2
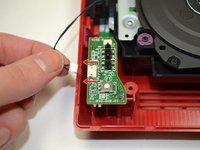
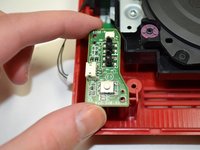
    • Using your fingers, gently pull the pin connector to disconnect the power board from the disc drive.

    FixBotに聞いてみる

    コメントを追加

  7. Nintendo Wii mini Motherboard Replacement: 手順 7、 2の画像 1 Nintendo Wii mini Motherboard Replacement: 手順 7、 2の画像 2
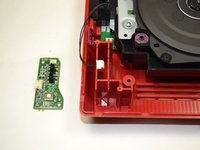
    • Lift the power board from the console and set it aside.

    FixBotに聞いてみる
    コメントを追加

  8. Nintendo Wii mini Motherboard Replacement, Disc Drive: 手順 8、 2の画像 1 Nintendo Wii mini Motherboard Replacement, Disc Drive: 手順 8、 2の画像 2
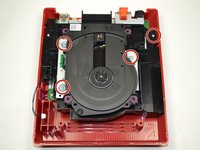
    • Using a Phillips #0 Screwdriver, unscrew the four 6mm screws.

    FixBotに聞いてみる
    コメントを追加

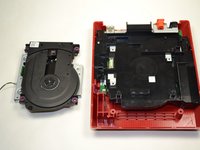
  9. Nintendo Wii mini Motherboard Replacement: 手順 9、 2の画像 1 Nintendo Wii mini Motherboard Replacement: 手順 9、 2の画像 2
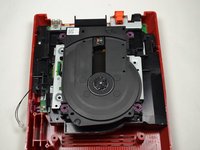
    • Lift the disc drive out of the console and set it aside.

    FixBotに聞いてみる

    コメントを追加

  10. Nintendo Wii mini Motherboard Replacement, Unscrew the Tray: 手順 10、 1の画像 1
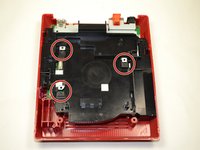
    • Using a Phillips #0 Screwdriver, unscrew the 6 mm screw at the top of the black tray.

    FixBotに聞いてみる

    コメントを追加

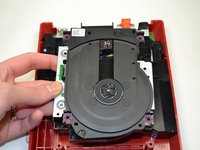
  11. Nintendo Wii mini Motherboard Replacement, Remove the Tray: 手順 11、 3の画像 1 Nintendo Wii mini Motherboard Replacement, Remove the Tray: 手順 11、 3の画像 2 Nintendo Wii mini Motherboard Replacement, Remove the Tray: 手順 11、 3の画像 3
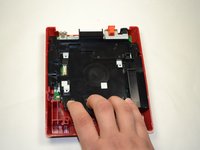
    • Using your fingers, pull the black plastic tray toward you to loosen it from the console.

    • Make sure the black square pieces are separated from the metal square pieces before trying to lift out the tray.

    • Once separated, lift the plastic tray out of the console and set it aside.

    • Trying to remove the tray before it is completely loosened may result in damage to the metal square pieces.

    FixBotに聞いてみる
    コメントを追加

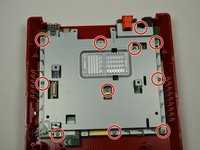
  12. Nintendo Wii mini Motherboard Replacement, Unscrew the Metal Casing: 手順 12、 2の画像 1 Nintendo Wii mini Motherboard Replacement, Unscrew the Metal Casing: 手順 12、 2の画像 2
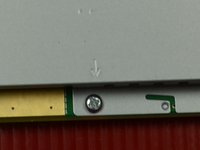
    • Using a Phillips #0 screwdriver, remove the eleven 5 mm screws holding the silver metal plate to the console.

    • These screws are indicated by small arrows on the metal plate. (See Photo #2)

    FixBotに聞いてみる
    コメントを追加

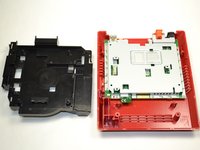
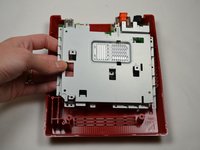
  13. Nintendo Wii mini Motherboard Replacement, Remove Metal Casing: 手順 13、 2の画像 1 Nintendo Wii mini Motherboard Replacement, Remove Metal Casing: 手順 13、 2の画像 2
    • Lift out the metal plate and set it aside.

    FixBotに聞いてみる

    コメントを追加

  14. Nintendo Wii mini Motherboard Replacement, Remove Motherboard: 手順 14、 2の画像 1 Nintendo Wii mini Motherboard Replacement, Remove Motherboard: 手順 14、 2の画像 2
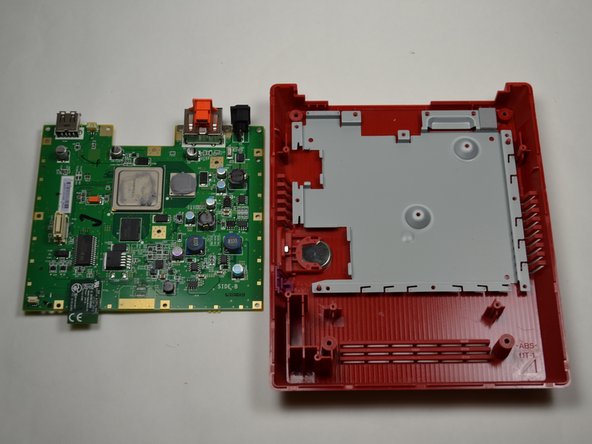
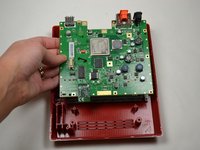
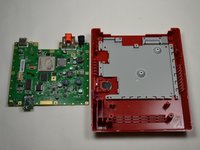
    • Lift out the motherboard and set it aside.

    FixBotに聞いてみる

    コメントを追加

終わりに

To reassemble your device, follow these instructions in reverse order.

キャンセル: このガイドを終了できませんでした。

11 の人々がこのガイドを完成させました。

作成者

6人の作成者と共同で作成されました。

Kristin Anderson

メンバー登録日: 01/23/15

1,029 ポイント

5のガイドは作成済み

チーム

UWT Liner: Group 5 UWT Liner: Group 5人のメンバー

Community

3 メンバー

11のガイドは作成済み

1件のガイドコメント

Can you fit a Wii Motherboard inside this casing, and use the dvd drive, if so I have a few wiis with broken DVD drives I would like to repair and this would be a cheap solution.

Christopher Wortman - 返信 共有

コメントを追加

統計データ:

過去 24時間: 2

過去 7 日: 17

過去 30 日: 93

今までの合計 7,036