メインコンテンツにスキップ
リペアコミュニティに参加 - アカウントの作成

Nintendo Wii Remote Shell Replacement

必要な工具と部品

  1. Nintendo Wii Remote Shell Replacement, Removing the strap (Optional, but recommended.): 手順 1、 1の画像 1
    • Remove the Safety strap to prevent it into getting in our way

    FixBotに聞いてみる

    コメントを追加

  2. Nintendo Wii Remote Shell Replacement, Removing the batteries: 手順 2、 2の画像 1 Nintendo Wii Remote Shell Replacement, Removing the batteries: 手順 2、 2の画像 2
    • Remove the battery using a fingernail.

    FixBotに聞いてみる

    コメントを追加

  3. Nintendo Wii Remote Shell Replacement, Removing the screws: 手順 3、 2の画像 1 Nintendo Wii Remote Shell Replacement, Removing the screws: 手順 3、 2の画像 2
    • This is where the disassembly begins, Grab your Y1 Screwdriver and unscrew the following screws

    FixBotに聞いてみる

    コメントを追加

    • Gently take out the front cover

    FixBotに聞いてみる

    コメントを追加

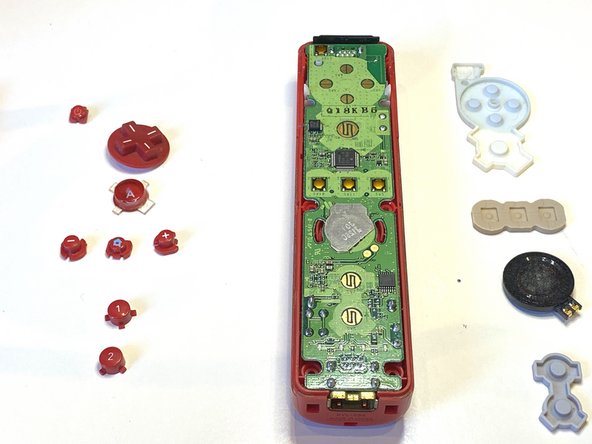
  4. Nintendo Wii Remote Shell Replacement, Removing the buttons: 手順 5、 2の画像 1 Nintendo Wii Remote Shell Replacement, Removing the buttons: 手順 5、 2の画像 2
    • Remove all of the buttons on the motherboard

    FixBotに聞いてみる

    コメントを追加

  5. Nintendo Wii Remote Shell Replacement, Removing Rubber: 手順 6、 2の画像 1 Nintendo Wii Remote Shell Replacement, Removing Rubber: 手順 6、 2の画像 2
    • Remove all of the rubber.

    FixBotに聞いてみる

    コメントを追加

  6. Nintendo Wii Remote Shell Replacement, Removing the Motherboard: 手順 7、 3の画像 1 Nintendo Wii Remote Shell Replacement, Removing the Motherboard: 手順 7、 3の画像 2 Nintendo Wii Remote Shell Replacement, Removing the Motherboard: 手順 7、 3の画像 3
    • Take out the motherboard

    FixBotに聞いてみる

    コメントを追加

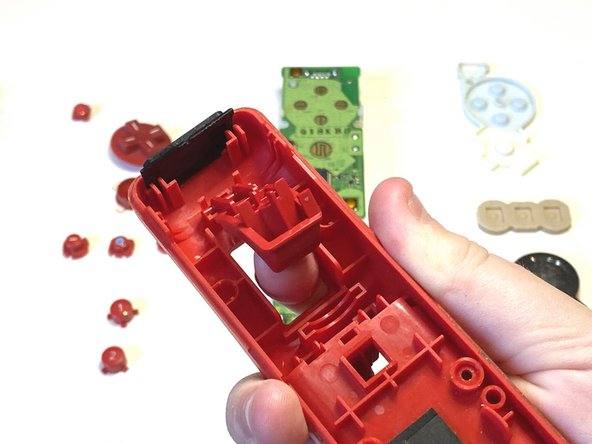
  7. Nintendo Wii Remote Shell Replacement, Taking out the B Button: 手順 8、 3の画像 1 Nintendo Wii Remote Shell Replacement, Taking out the B Button: 手順 8、 3の画像 2 Nintendo Wii Remote Shell Replacement, Taking out the B Button: 手順 8、 3の画像 3
    • Take out the B button

    FixBotに聞いてみる

    コメントを追加

  8. Nintendo Wii Remote Shell Replacement, Removing the B Button: 手順 9、 2の画像 1 Nintendo Wii Remote Shell Replacement, Removing the B Button: 手順 9、 2の画像 2
    • Remove the B Button

    FixBotに聞いてみる

    コメントを追加

  9. Nintendo Wii Remote Shell Replacement, Getting new shell: 手順 10、 1の画像 1
    • Grab your new shell

    FixBotに聞いてみる

    コメントを追加

  10. Nintendo Wii Remote Shell Replacement, Inserting the components: 手順 11、 2の画像 1 Nintendo Wii Remote Shell Replacement, Inserting the components: 手順 11、 2の画像 2
    • Insert all of the buttons

    • Make sure they fit in properly and are clickable.

    FixBotに聞いてみる

    コメントを追加

  11. Nintendo Wii Remote Shell Replacement, Inserting Rubber: 手順 12、 2の画像 1 Nintendo Wii Remote Shell Replacement, Inserting Rubber: 手順 12、 2の画像 2
    • Put on all of the rubber on the buttons

    FixBotに聞いてみる

    コメントを追加

    • Connect the B button

    FixBotに聞いてみる

    コメントを追加

    • Carfully place the back cover on your wii remote

    FixBotに聞いてみる

    コメントを追加

  12. Nintendo Wii Remote Shell Replacement, Screwing In: 手順 15、 1の画像 1
    • Screw in the Y1 Screws into the following places

    FixBotに聞いてみる

    コメントを追加

終わりに

Thats it!

キャンセル: このガイドを終了できませんでした。

5 の人々がこのガイドを完成させました。

作成者

1人の作成者と共同作成されました。

Artem Ivat

メンバー登録日: 02/05/20

3,900 ポイント

13のガイドは作成済み

チーム

Kid fixers Kid fixers人のメンバー

Community

218 メンバー

353のガイドは作成済み

1件のガイドコメント

muchas gracias

Aniki Panda - 返信 共有

コメントを追加

統計データ:

過去 24時間: 7

過去 7 日: 36

過去 30 日: 216

今までの合計 6,812