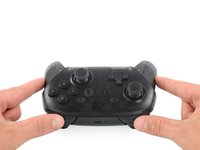
はじめに
この修理ガイドは、Nintendo Switch Proコントローラーの壊れたトリガーボタンを交換する方法を紹介しています。壊れたトリガーは、Nintendo Switch本体での最適なゲーム体験を制限します。コントローラーの壊れたトリガーを交換することで、コントローラーを最大限に活用することができます。このガイドでは、コントローラーの大部分を分解する必要があります。そのため解体の際には、コントローラ内部の回路やリボンコネクタを損傷しないように注意してください。
必要な工具と部品
-
-
-
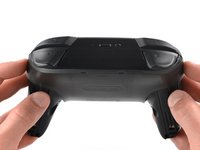
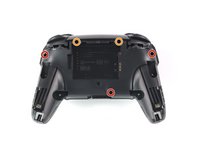
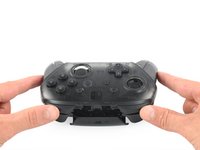
プラス#1ドライバーを使って、コントローラーの裏面から5mmネジを5本外します。
-
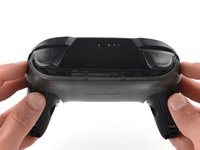
ハンドグリップの上にある2本のケースネジと、バッテリーベイの下にある1本のケースネジは、座面が浅くなっています。そのため、3本のネジは簡単に取り外すことができます。
-
ZRとZLのショルダーボタンに隣接する2つのケースネジは、座面が深くなっています。これらのネジに届くように、エクステンションまたは軸の長いプラスドライバーを使用してください。
Seconded. the screws are located too deep below the plastic slot, and the bit holding bulge is too wide for the small aperture (similarly with the flexible extension). the bit length is too shallow to reach.
An alternative driver with a much narrower & longer shaft is required, which will likely not come with interchangeable bits.
I would say it is possible to reach the top left screw, just not the top right - there is a gap in the top left that allows you to slightly bend the standard driver outward to turn it while still making adequate contact.
An update: I was actually able to remove the top right one in a really hacky way - inserting the Phillips #0 bit into the #4 hex bit, and then using that in the standard driver. This added just enough length to successfully reach and make full contact with the screw!
Using the #4 hex bit as an extension was the exact "hack" I needed to get rid of the drift finally. Thank you. You're a lifesaver.
Das #4 Hex Bit als Verlängerung für das Kreuzschlitz Bit zu nutzen ist zwar etwas eng, aber es erspart einem wirklich einen zusätzlichen Schraubendreher.
-
-
-
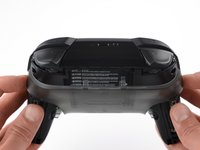
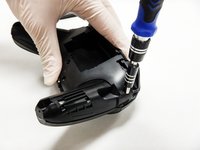
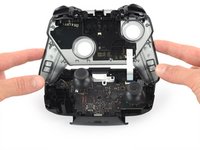
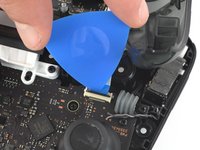
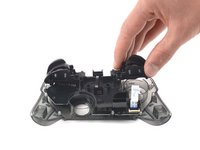
コントローラーからプラスチックカバーをゆっくりと外します。
Didn't realize there is adhesive holding the front cover onto the unit. It's located inside of the handles. Just a bit of force there helped, just be careful of the cable.
-
-
-
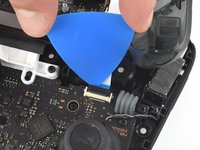
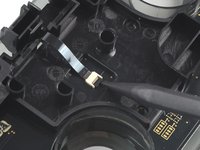
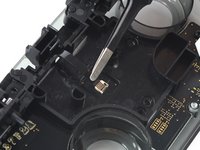
開口ピックの先端を使って、ZIFコネクタの黒いフラップを押し上げて開きます。
Having just completed this repair, I noted that this ribbon cable can disconnect on either side. It is easier to disconnect and reconnect from the other side than what is shown in my experience.
@acestronautical is right! much easier to remove the ribbon cable from the button board, connect to the base board and then connect back to the button board. Thank you @acestronautical
-
-
この手順で使用する道具:Tweezers$4.99
-
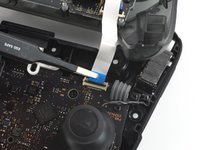
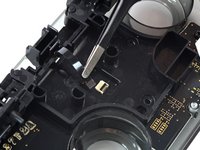
つめ先もしくは先が丸いピンセットを使って、コネクタから相互接続ケーブルの接続を外します。
You don't need to disconnect this as long as you are fine with keeping it close by so as not to rip the ribbon cable.
Caden Helm - 返信
-
-
-
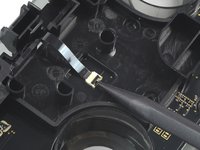
コネクタから黒いリボンケーブルを外します。
What do I do if the connector snaps off? Is it fixable with solder or electrical tape or should I give up hope?
Jack Frost - 返信
This ribbon cable is difficult to reconnect, quality tweezers are required. I was unable to slide the ribbon cable in to where I could no longer see the traces. Take note of how much ribbon cable is exposed before disconnecting so that you can have an easier time judging when the cable is fully inserted upon reconnecting.
-


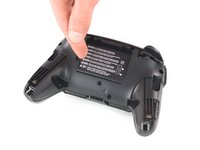


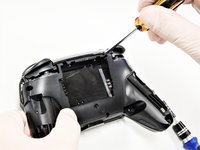


このデバイスを再組み立てするには、インストラクションを逆の順番に従って作業を進めてください。
このデバイスを再組み立てするには、インストラクションを逆の順番に従って作業を進めてください。
13 の人々がこのガイドを完成させました。
以下の翻訳者の皆さんにお礼を申し上げます:
100%

Midori Doiさんは世界中で修理する私たちを助けてくれています! あなたも貢献してみませんか?
翻訳を始める ›

チーム

Cal Poly, Team S11-G2, Regan Fall 2019 Cal Poly, Team S11-G2, Regan Fall 2019人のメンバー
CPSU-REGAN-F19S11G2
5 メンバー
43のガイドは作成済み
5 件のコメント
This guide does show how to remove the trigger/bumper casing and board from the controller but does not show how to remove the triggers/bumpers from the casing they are in.
Yeah, this is a pretty big point to be missing, especially with the Flex Cable for the shoulder button inputs being right beside the post you need to pull out to remove the ZL and ZR buttons. Guidance on how to remove the post safely without damaging the cable would be great.
After reinstalling the shoulder buttons I have found them to stop working, all four, I checked my ribbon cable from the buttons to the board and even replaced it. I also confirmed the ribbon cable connector on the main board is working as well. Can anyone make any further troubleshooting suggestions?
Be carefull, these screws are super easy to strip even with the right tools.
Lukas Eberharter - 返信
I tried editing these instructions after I had trouble with stripping screws, but it doesn't seem to take. The issue is that these are JIS and not Phillips screws. They are VERY similar looking but a Phillips head screwdriver will strip the screws.
Isaac Webb - 返信
I tried using a Philips #00 screwdriver but it didn’t work
vincent ingrassia - 返信
Don't even think about trying Phillips. There are some other guides online that say you'll be fine, but they're wrong. Even one attempt with Phillips WILL strip these, and you will never, ever get this controller open once that happens. Even with JIS they're really hard to get out and really easy to strip.
Luke T. Allen - 返信