はじめに
このガイドは、お持ちのDSiの上部LCDを交換する方法を紹介します。
必要な工具と部品
-
-
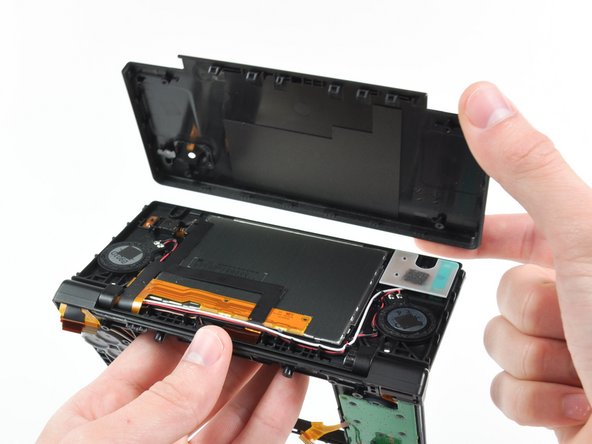
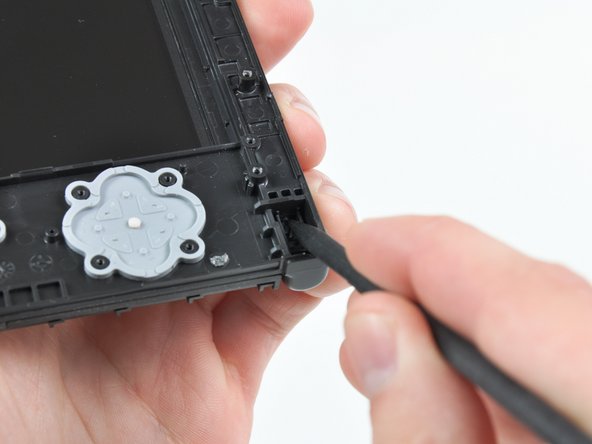
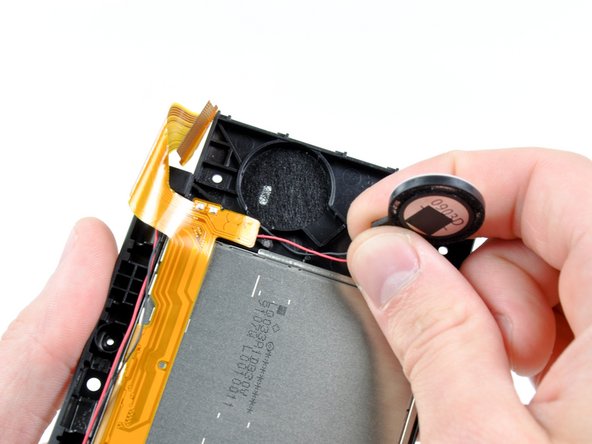
スパッジャー(もしくは指の爪)を使って、バッテリーを上側から持ち上げます。
-
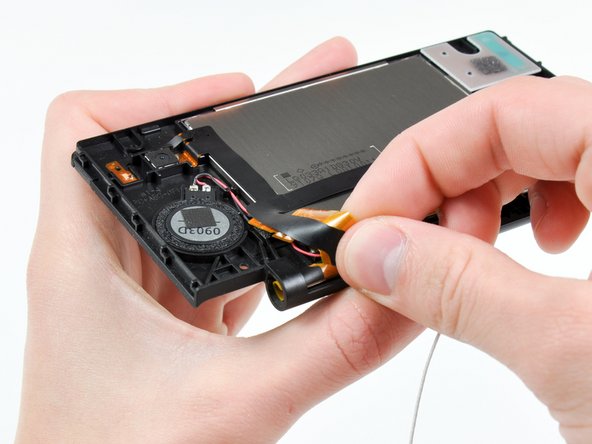
バッテリーを掴み、DSiから取り出します。
-
-
-
画像中の赤い円で囲まれた2つのゴム足の下に2本のネジが隠れています。
-
スパッジャーの先端を使って、下部ケースからゴム足を持ち上げます。
One of the feet did break on me, tweezers came in handy for picking it out
I unfolded and sharpened a paperclip. You can use that to stab and hook the rubber without tearing it, as the rubber is thick enough to reseal when reinserted.
-
-
-
下部ケースをDSi本体に固定している次のネジを外します:
-
5.2mmプラスネジ #00 6本
-
2.7mmプラスネジ #00 1本
Impossible d'enlever les vises… trop serré! comment faire?
evrobert03 - 返信
same problem here. maybe try a JIS?
-
-
-
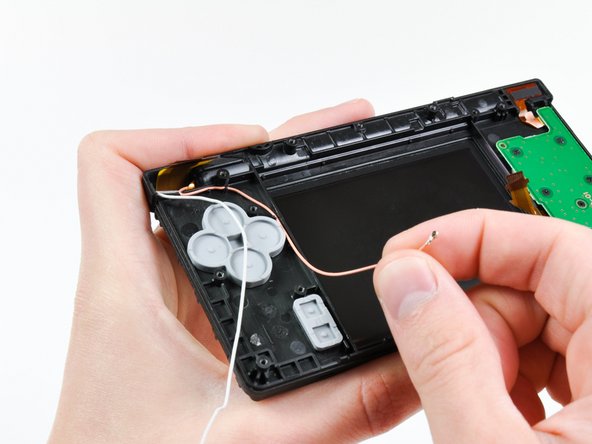
スパッジャーの先端を使って、マザーボード上のソケットから電源ボードコネクタを持ち上げます。
Actually Lisa, you are incorrect. If you pull to one side you WILL end up pulling the connector off the motherboard. It is designed so that you ARE MEANT TO pry it upwards out of the connector. All you need to do is use the point or corner of the flat edge of a spudger (or a small flat-headed screwdriver), push it ever so slightly under the middle of the small white plug where there is a small recess in the connector for just this purpose. Prying the plug up in this fashion you should clear the connector with the spudger by prying it up through the recess rather than catching the connector and pulling it off the board.
If the socket comes off the motherboard along with the connector, what’s the best way to fix it?
it has to be soldered back on, so if you can't do it yourself, find someone who can (maybe a local repair shop).
I already pull it off from board new i have to learn how to weld it back
Mussa Ding - 返信
-
-
-
指の爪やプラスチック製開口ツールの先端を使って、次の3つのZIFソケット上の固定フラップを跳ね上げます:
-
下部タッチスクリーンケーブル
-
下部LCDケーブル
-
電源ボードケーブル
-
3つ全てのソケット上のロッキングタブを跳ね上げた後、指やピンセットを使って、ソケットからケーブルを慎重にまっすぐ引き抜きます。
I accidentally broke the retaining flap off of the lower touchscreen’s socket. Is it possible to reattach it?
Mine broke off too. At first I thought it would just pop back in, but when I looked at it under magnification, I can see that a tiny piece of plastic actually snapped off the flap. I think we're farked. Looks like the only way to fix would be to solder on a new cable connector.
-
-
-
指の爪やプラスチック製開口ツールの先端を使って、タッチスクリーンリボンケーブルの固定フラップを注意深く跳ね上げます。
-
スパッジャーの先端を使って、ソケットからタッチスクリーンリボンケーブルをまっすぐ引き抜きます。
When I was putting mine back together, the flap popped off and when I tried to put it on with a tweezers, it snapped. Any suggestions other than scrap it or use it without the touchscreen? Pictures at https://sites.google.com/site/memesbyluc...
This little flap is a pain in the butt to get back in! If there is any way to bypass the removal of this, my advise is to do it!
Adding on: The cable actually ended up breaking as the tweezers I used to put it back in scraped part of the gold ribbon off. Be extremely careful!!!
-
-
-
-
指の爪やプラスチック製開口ツールの先端を使って、デュアルカメラリボンケーブルの固定フラップを注意深く跳ね上げます。
-
スパッジャーの先端を使って、ソケットからデュアルカメラリボンケーブルをまっすぐ引き抜きます。
-
-
-
マザーボードをわずかに上部に持ち上げ、ABXYボタンの上にある上部LCDリボンケーブルを露出させます。
-
指の爪やプラスチック製開口ツールの先端を使って、上部LCDリボンケーブルの固定フラップを注意深く跳ね上げます。
-
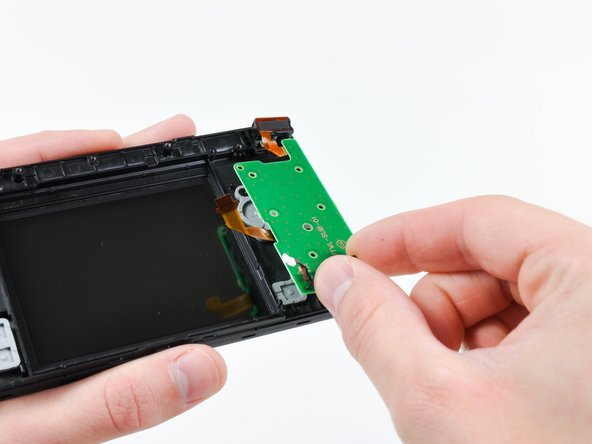
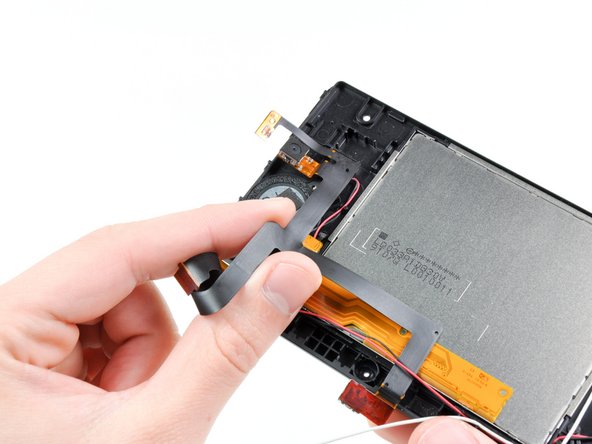
DSiからマザーボードを取り外します。
I actually chose to leave this ribbon cable connected, and had no issues completing the rest of the steps around this. Just be careful not to pull the cable!
-
-
-
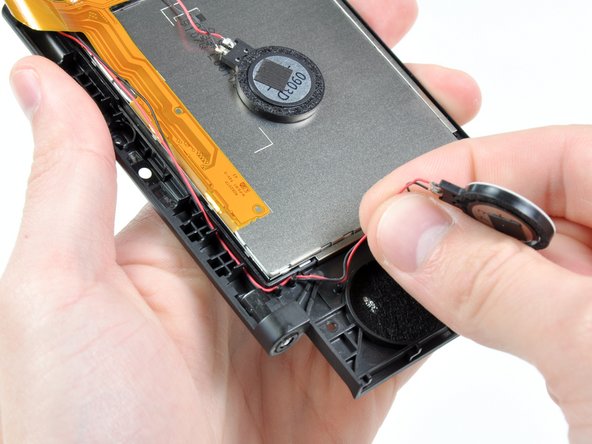
スパッジャーの先端を使って、DSiのフレームワークから下部LCDのメタル製バッキングを持ち上げます。
-
DSiから下部LCDアセンブリを持ち上げます。
-
-
-
押しピンを使って、フロントベゼルにある4つのプラスチック製ネジカバーを外します。
-
-
-
ディスプレイケーブルとデュアルカメラリボンケーブルをタイトに巻いて、スチール製のヒンジチューブにしっかりと押し込みます。
-
スチール製のヒンジチューブを取り出します。
-
巻いた2本のリボンケーブルを、フロント上部のパネルに型どられたチューブ内に慎重に押し込みます。
When reversing this after putting the new screen in, the larger of these two ribbon cables will be built into the new screen.
I found it easiest to spend some time coiling the new ribbon cable from the middle up to the end, similar to how the old screen’s ribbon cable is coiled.
This makes moving it back through the molded tube in the housing and then slipping the steel hinge tube a lot easier.
Surprisingly, these cables are pretty sturdy - I’ve kinked one or two and it still functions, however I’d still say take it slow and try to avoid anything like that.
-
-
-
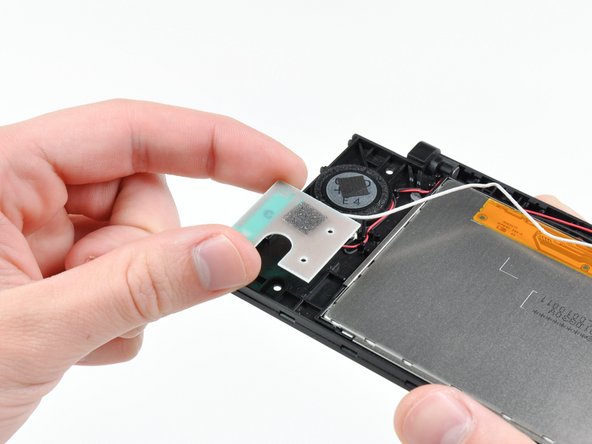
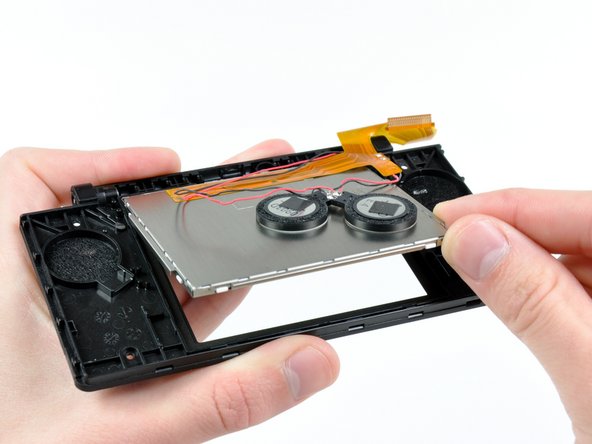
はんだごてで半田接合部を熱して、上部LCDからスピーカーの半田を除去しながら、ピンセットを使って、ロジックボードからスピーカーワイヤーを引き離します。
On step 10: I accidentally pried up the "Power Board Cable." (Be sure you are prying up on the hinged retaining flaps, not the sockets themselves.) Is there an easy way to make it reconnect? I can't get it to stay back on mother board. I've attempting to get my DSI repaired, but many local stores and including manufacture Nintendo aren't offering assistance so I figured I'd fix it myself. Please assist if you can.
-


デバイスを再度組み立てるには、この説明書の逆の順番で組み立ててください。
デバイスを再度組み立てるには、この説明書の逆の順番で組み立ててください。
30 の人々がこのガイドを完成させました。
以下の翻訳者の皆さんにお礼を申し上げます:
100%


これらの翻訳者の方々は世界を修理する私たちのサポートをしてくれています。 あなたも貢献してみませんか?
翻訳を始める ›

12 件のコメント
The tricky part is getting the upper screen and black ribbon through the hinge. I found that curling them and pushing them through a drinking straw that was cut short first and then pushing the straw through the hinge hole made it a whole lot easier.
So true. I just broke my second ribbon cable while replacing the case. While most repairs on the dsi are relatively easy, this ribbon cable makes any repairs that involve it a nightmare.
I curled the larger (new) cable the same way the smaller one was already curled. Just spend some time doing that until it was shaped that way and it was a lot easier to get both through the molded tube and ring.
Tplan -
While doing this I accident messed something up. When I power on the DSi, the bottom screen just flashes and the DS turns off. What did I do wrong?
I think you broke the ribbon cable, it also happened to me, sadly the ribbon cable is soldered into the top screen so you need to buy a new top screen
make sure you plugged in the screen correctly, it's a bit fiddly because of how there's another cable overlaid on top of it, but both need to be properly seated otherwise you won't get a boot
Hey guys, i have two problems....
I have ordered a replacement housing for my daughter, so i hat to completely and fully disassemble everything.
Now I put it back together and first off, i have two strange square washer left AND, the upper screen turns on fine, the lower too.. but after 1 second, the upper screen gets all strange... colors are wrong.. I close the Lid, open it up and again, 1 second perfect, after that it turns discolored...
Any idea where the two washer could come from as i cant find them in the Description here and also what could be wrong with the display now?
Why do you need to disassemble your DSi on the bottom? Why is that important on every DS/3DS console? I would never do something with "Very difficult" tasks.
Santi12008 - 返信
Great guide.
it was hard, i ripped the broken lcd flat cable and it was hard to put the new one through the hinge, but i did it.
Then, when putting everything back together, i broke the sd card flat cable, %#*@ you manufacturer.. why such a flimsy cable with strong glue to the case?
be careful, the sd card connector is hard to reconnect and when you try to release it from the case, it may break
"Just do it backwards" is NOT helpful reassembly instructions because the hinge doesn't work that way. To "do it backwards" would be somehow sucking it in via the area above the dpad which is physically impossible. In order to reinsert the hinge, you need to get all the ribbon cables threaded through and the wires on the other side, before putting the top front plate back on, then slide the hinge piece into the top inner shell from the outside until it is flush with the hole it goes into. Then line back up the bottom inner plate, and push it "out" towards the place the LEDs will be, from the gap below the top LCD. I had to look up a separate video of someone doing this, and I'm afraid that in trying to figure it out myself using this guide I might have deformed the hinge somehow because I cannot for the life of me get it to go back where it needs to go.
Your last comment is what I am literally struggling with right now. I cannot get the hinge to go back where it needs to go.