メインコンテンツにスキップ
リペアコミュニティに参加 - アカウントの作成

Nikon Coolpix L330 LCD Screen Replacement

必要な工具と部品

    1. Nikon Coolpix L330 LCD Screen Replacement, Back Housing: 手順 1、 3の画像 1 Nikon Coolpix L330 LCD Screen Replacement, Back Housing: 手順 1、 3の画像 2 Nikon Coolpix L330 LCD Screen Replacement, Back Housing: 手順 1、 3の画像 3
      • There are six screws attaching the back housing to the camera. Remove the screws from the body with a PH000 screw head.

      • Two 1.5x2.5mm screws on the right side.

      • Two 1.5x2.5mm screws on the underside.

      • Two 1.5x2.5mm screw on the left side.

      FixBotに聞いてみる

      コメントを追加

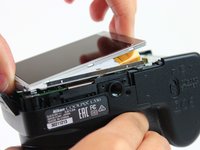
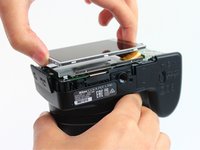
    2. Nikon Coolpix L330 LCD Screen Replacement: 手順 2、 2の画像 1 Nikon Coolpix L330 LCD Screen Replacement: 手順 2、 2の画像 2
      • After removing the screws, use a metal spudger or plastic opening tool to push the back cover out.

      • The metal spudger can damage the plastic housing, so use caution when applying any pressure to it. Use a plastic opening tool to reduce the risk of damage to the housing.

      • Remove the back housing of the camera by lifting it directly up.

      • The back cover may be slightly tight, therefore more force may be needed to lift it up.

      FixBotに聞いてみる

      コメントを追加

    1. Nikon Coolpix L330 LCD Screen Replacement, LCD Screen: 手順 3、 2の画像 1 Nikon Coolpix L330 LCD Screen Replacement, LCD Screen: 手順 3、 2の画像 2
      • Insert the tips of your fingers into the space between the screen and back-plate.

      • Gently lift the screen up and out of the frame.

      • The screen is still held by a flexible display cable, therefore only lift the screen 0.5'' out of the back-plate.

      FixBotに聞いてみる

      コメントを追加

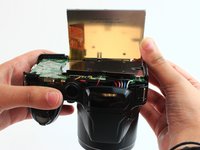
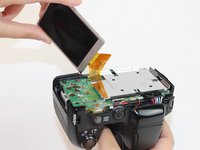
    2. Nikon Coolpix L330 LCD Screen Replacement: 手順 4、 2の画像 1 Nikon Coolpix L330 LCD Screen Replacement: 手順 4、 2の画像 2
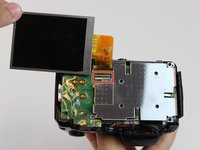
      • Tilt the screen so that the display cable forms a hinge with the backplate.

      • Rotate the display 180 degrees so that it faces you.

      FixBotに聞いてみる

      コメントを追加

    3. Nikon Coolpix L330 LCD Screen Replacement: 手順 5、 3の画像 1 Nikon Coolpix L330 LCD Screen Replacement: 手順 5、 3の画像 2 Nikon Coolpix L330 LCD Screen Replacement: 手順 5、 3の画像 3
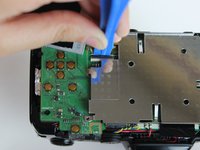
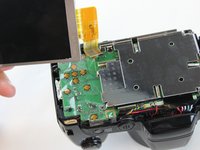
      • The display cable has a ZIF (zero insertion force) connector on the end. This has a tab that has to be pushed out before the cable can be safely removed.

      • Using a plastic opening tool or fingernail, pop up the black clip holding the display cable. This will release the cable.

      • Slide the display cable out of the connector.

      • The display cable can be damaged due to excessive bending, therefore avoid putting unnecessary strain on it.

      FixBotに聞いてみる

      コメントを追加

終わりに

To reassemble your device, follow these instructions in reverse order.

キャンセル: このガイドを終了できませんでした。

5 の人々がこのガイドを完成させました。

作成者

1人の作成者と共同作成されました。

Rajeev

メンバー登録日: 02/09/16

623 ポイント

4のガイドは作成済み

チーム

USF Tampa, Team 2-10, Cagle Spring 2016 USF Tampa, Team 2-10, Cagle Spring 2016人のメンバー

USFT-CAGLE-S16S2G10

4 メンバー

14のガイドは作成済み

1件のガイドコメント

Thank you, saved me money and time

Mihai Alexandru Fustos - 返信 共有

コメントを追加

統計データ:

過去 24時間: 1

過去 7 日: 13

過去 30 日: 38

今までの合計 2,460