メインコンテンツにスキップ
リペアコミュニティに参加 - アカウントの作成

Nikon 1 J5 LCD Module Replacement

必要な工具と部品

  1. Nikon 1 J5 LCD Module Replacement, Remove Micro SD card and Battery: 手順 1、 1の画像 1
    • Remove Micro SD card and Battery

    FixBotに聞いてみる
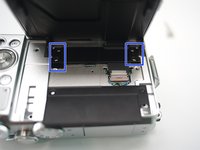
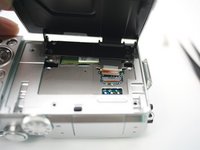
  2. Nikon 1 J5 LCD Module Replacement: 手順 2、 3の画像 1 Nikon 1 J5 LCD Module Replacement: 手順 2、 3の画像 2 Nikon 1 J5 LCD Module Replacement: 手順 2、 3の画像 3
    • Remove 2 screws

    • Open plastic LCD connector cover

    • Lift FPC connector latch

    • Detach LCD FPC

    FixBotに聞いてみる
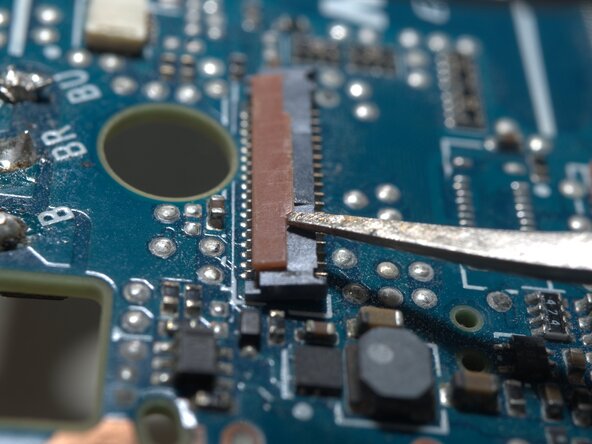
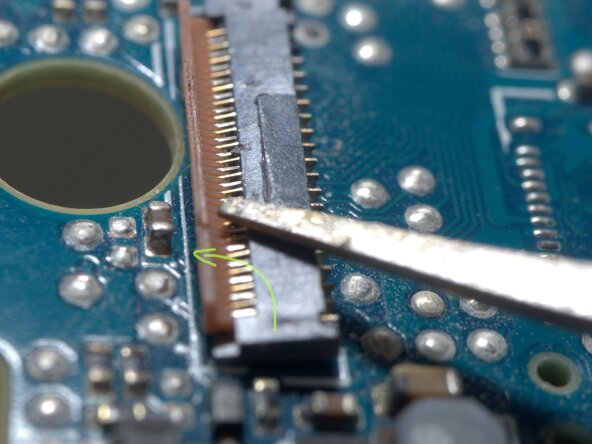
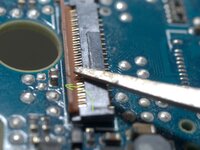
  3. Nikon 1 J5 LCD Module Replacement, Detail of the FPC connector: 手順 3、 3の画像 1 Nikon 1 J5 LCD Module Replacement, Detail of the FPC connector: 手順 3、 3の画像 2 Nikon 1 J5 LCD Module Replacement, Detail of the FPC connector: 手順 3、 3の画像 3
    • The FPC cable is inserted from right side of this photo.

    • Insert a fine tip tweezer or any thin flat tip tool under the latch, and gentally lift it.

    • The latch rotates CCW for about 90 degrees

    FixBotに聞いてみる
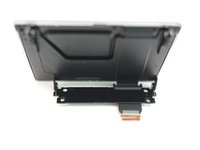
  4. Nikon 1 J5 LCD Module Replacement: 手順 4、 3の画像 1 Nikon 1 J5 LCD Module Replacement: 手順 4、 3の画像 2 Nikon 1 J5 LCD Module Replacement: 手順 4、 3の画像 3
    • Remove 4 screws

    • Remove LCD module

    FixBotに聞いてみる
終わりに

To reassemble your device, follow these instructions in reverse order.

ある他の人がこのガイドを完成しました。

作成者

1人の作成者と共同作成されました。

Terrance

メンバー登録日: 11/17/09

7,024 ポイント

19のガイドは作成済み

0件のガイドコメント

コメントを追加

統計データ:

過去 24時間: 3

過去 7 日: 17

過去 30 日: 79

今までの合計 1,078