必要な工具と部品
-
-
Remove the red rubber case from the device. This should come off with ease.
 FixBotに聞いてみる
-
-
-
Turn the device so the screen is facing away from you.
-
Using a philips head, size #00, screwdriver, remove the screws in each corner of the plastic casing.(total of 4 screws)
-
-
-
-
After loosening the back cover, remove it from the device so you can get at the innards.
-
-
-
Replace the old battery with the new one
-
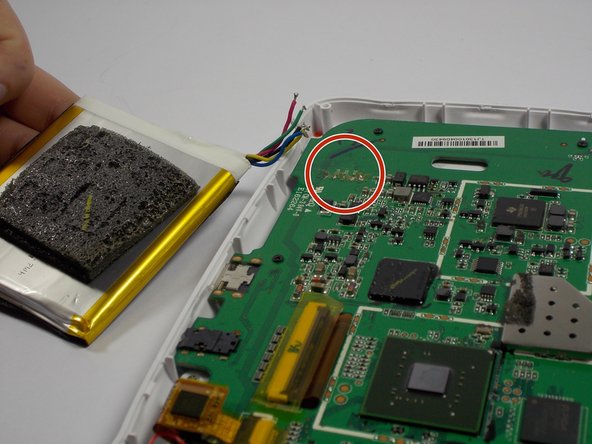
Solder the wires of the new battery into the pads on the motherboard
-
-
-
Once the wires are fully soldered, put the new battery back to the initial position
-
Close the case by putting the back cover back on the device
-
-
-
Once the back cover is on, screw in the four screws that you had taken off in the beginning
-
Put the red rubber casing back on.
-


If all the steps were followed correctly, the device should be fully closed and ready to go
4 の人々がこのガイドを完成させました。
チーム

UMass Dartmouth, Team 4-3, Vijaybhaskar Spring 2015 UMass Dartmouth, Team 4-3, Vijaybhaskar Spring 2015人のメンバー
UMASSD-VIJAYBHASKAR-S15S4G3
3 メンバー
12のガイドは作成済み
7件のガイドコメント
Thank you for sharing the idea ,but I need that NABI JR battery. So ,where from I can purchase it .
I have seen them on ebay but it's easier to find a Nabi 2 battery on ebay. The Nabi 2 battery is quite a bit larger but with a very minor mod to the Nabi Jr. the Nabi 2 battery will fit and give you a much longer run time from a single charge.
darcshadow - 返信 共有
My old Nabi jr battery is a plug in with 2 reds 1 white and 2 black wires. My new Cameron sino battery is blue green red yellow black. What is the order to resolder them.
Dennis Blixt - 返信 共有
I have the same problem with the problem of the replacement battery not having the same wiring configuration or plug. Did you ever get this resolved?
Delores Duke - 返信 共有