はじめに
If pulling the trigger of your Nerf Nite Finder doesn't cause it to fire, the trigger might need to be replaced. This guide shows how to do so.
==CAUTION==
Be aware of springs under compression. Take care so these small parts do not fly off the blaster and get lost.
必要な工具と部品
-
-
Place the blaster upside down on the table, and remove the screw in the bottom of the handle.
-
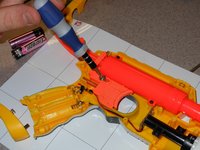
Remove the battery door and take the batteries out.
 FixBotに聞いてみる
-
-
-
Set the blaster on its side with the screws facing up (the blaster will be placed on its left side). Remove all 14 phillips head, 8.2 mm screws and set them aside.
-
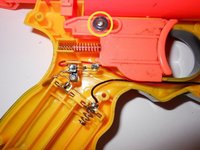
Lift the side of the blaster off exposing its internal parts.
-
-


To reassemble your device, follow these instructions in reverse order.
ある他の人がこのガイドを完成しました。

チーム

Michigan Tech, Team 5-8, Lauer Spring 2014 Michigan Tech, Team 5-8, Lauer Spring 2014人のメンバー
MTU-LAUER-S14S5G8
3 メンバー
13のガイドは作成済み