この翻訳は、ソースガイドの最新の更新を反映していない可能性があります。 翻訳の更新に協力してください。 または ソースガイドを参照してください。
はじめに
このガイドを使用して、Motorola Z2 Play のスピーカーを交換します。
作業を始める前に、Rescue and Smart Assistantアプリをダウンロードしてデバイスをバックアップし、問題がソフトウェアまたはハードウェアに関連しているかを診断してください。
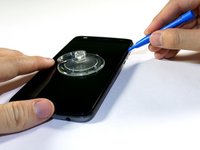
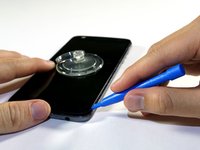
警告:ディスプレイは強力な接着剤で固定されており、ツールを挿入するための最小限の隙間を作るために、高熱を使って接着剤を柔らかくする必要があります。取り外す際に誤ってディスプレイを損傷する可能性が高くなります。ディスプレイを再利用する場合は、ディスプレイをデバイスの他の部分から分離する際、ゆっくりと慎重に作業を行なってください。
必要な工具と部品
-
-
-
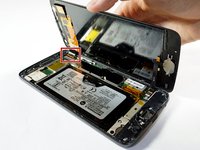
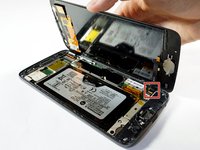
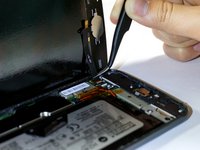
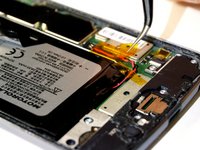
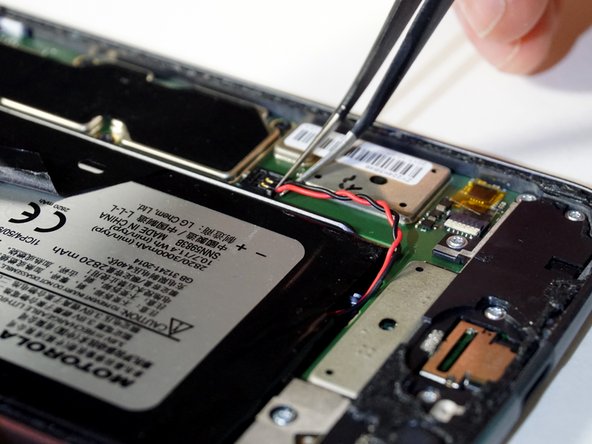
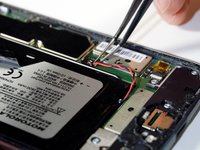
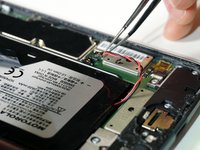
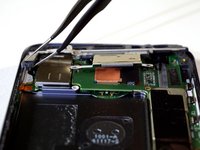
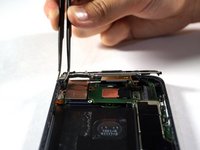
赤色と黒色のバッテリーワイヤを、ピンセットで持ち上げて外します。
-
-
-
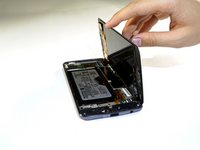
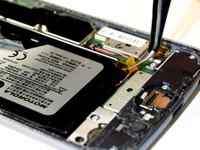
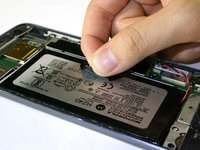
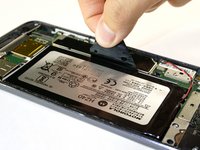
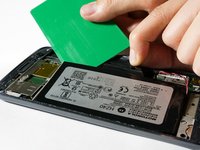
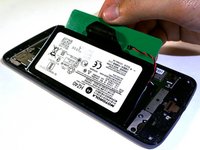
デバイスから完全にバッテリーを持ち上げて取り出します。
Why can't they just go back to the phones where you can snap off the back and simply replace the battery? I'm afraid to do it myself and Verizon won't do it for me. Now I have to find someone whom I will have to pay to replace a battery. This is ridiculous. It should not be so difficult to replace a battery and I should not have to jeopardize my phone to replace a battery. Why? Sorry, I just needed to vent. I miss simplicity.
I agree
I agree with both of you guys, but it’s the breaking point between performance, convenience, and safety. Older phones had batteries with hard protective casings that wouldn’t leave them vulnerable to pocket-fire if your keys jammed the battery.
Unfortunately, with phones getting more powerful(requiring a higher-capacity battery), AND slimmer, the protective casing for the battery is literally the casing on the phone. Look at the battery above; it could easily be pierced and dangerously vent.
I’m with you in wishing I could just pop a spare in, but those days have passed. =/
Mike Ponce - 返信
I suggest NOT to do this. Followed the directions exactly, with the slight deviation of my cable into the battery crumbling so I carefully pulled out the lose pieces with the tweezers and had NO problem putting it back together. My phone was WORKING with the exploded, puffy battery with NO deficits. Now? No charging (but checked it with the multi-meter so I know it is not the fault of the new battery). Only reaction I get is the phone making a vibrating sound when I plug it in to charge. Will NOT turn on. Will NOT react. F*CKED.
Without knowing what I was getting into I ordered a replacement battery, toolkit, and screen adhesive. Thanks to this guide I was actually able to remove the screen, replace the battery, and get it sealed back up relatively easily. Definitely nerve-wracking as I haven’t attempted anything like this before, but my phone was at the end of the battery life so I figured why not give it a shot.
Thank you for the easy instructions!
i followed the guide step by step, but unfortunately i touched the lcd in one place ... with the result that the screen went KO can i fix it somehow?
erryedelia - 返信
-
-
-
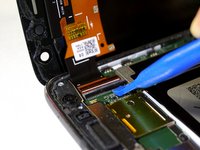
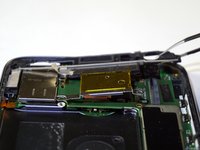
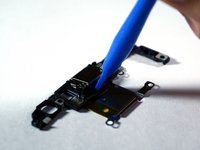
デバイス上部のスピーカー用筐体にある3本のシルバーの2.6mmT3トルクスネジをドライバーで反時計回りに回して外します。
-
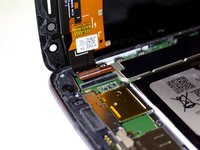
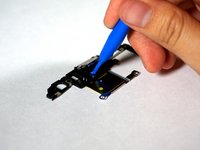
デバイス上部にあるスピーカー用筐体の黒い3.5mmT3トルクスネジ4本を、ドライバーで反時計回りに回して外します。
-


デバイスを再組み立てする際は、これらの手順を逆の順番に従って作業を進めてください。
デバイスを再組み立てする際は、これらの手順を逆の順番に従って作業を進めてください。
ある他の人がこのガイドを完成しました。
以下の翻訳者の皆さんにお礼を申し上げます:
87%

Midori Doiさんは世界中で修理する私たちを助けてくれています! あなたも貢献してみませんか?
翻訳を始める ›

チーム

Cal Poly, Team S19-G5, Livingston Winter 2018 Cal Poly, Team S19-G5, Livingston Winter 2018人のメンバー
CPSU-LIVINGSTON-W18S19G5
4 メンバー
30のガイドは作成済み
コメント 1 件
Hi,
The guide was very detailed, kudos to that. Recently My phone fell of from my hand into glass of whisky :( hopefully no physical damage and i speedily switched off and dried it off . I tried to find any fault i found that when I am trying to play music through google music, youtube, any app or trying to call i am not able to hear any sound, yet the phone ringtone works, absolutely fine. Bluetooth and headphone jack when used its fine.
first . when i am dialing someone i am not able to hear any sound through normal ear piece, but i am able to hear when sound speaker is put on.
secondly, I am not able to hear any sound while playing videos or music in any app be it any app, chrome, youtube, google music.
Can you suggest me that what can be the issue..?