メインコンテンツにスキップ

Moto C Screen Assembly Replacement

必要な工具と部品

  1. Moto C Screen Assembly Replacement, Back Cover: 手順 1、 3の画像 1 Moto C Screen Assembly Replacement, Back Cover: 手順 1、 3の画像 2 Moto C Screen Assembly Replacement, Back Cover: 手順 1、 3の画像 3
    • Power off your phone before beginning disassembly.

    • Insert a thumbnail, or spudger, into the notch on the bottom right corner to start separating the phone unit from the back cover.

    • Move it to the bottom left corner and pry the phone unit out of the back cover until you can get a good grip.

  2. Moto C Screen Assembly Replacement: 手順 2、 2の画像 1 Moto C Screen Assembly Replacement: 手順 2、 2の画像 2
    • Lift the phone out of the back cover.

  3. Moto C Screen Assembly Replacement, Battery: 手順 3、 3の画像 1 Moto C Screen Assembly Replacement, Battery: 手順 3、 3の画像 2 Moto C Screen Assembly Replacement, Battery: 手順 3、 3の画像 3
    • Use a finger or spudger to lever the battery out of its recess and remove it.

  4. Moto C Screen Assembly Replacement, Motherboard Cover: 手順 4、 1の画像 1
    • Remove the six 3.5 mm long Torx T5 screws.

  5. Moto C Screen Assembly Replacement: 手順 5、 2の画像 1 Moto C Screen Assembly Replacement: 手順 5、 2の画像 2
    • Insert an opening pick between the cover and the motherboard near the SIM 2 slot where the power buttons are located.

    • Slide and twist the opening pick to pry open the plastic clips securing the cover.

  6. Moto C Screen Assembly Replacement: 手順 6、 2の画像 1 Moto C Screen Assembly Replacement: 手順 6、 2の画像 2
    • Slide an opening pick between the cover and the motherboard on the opposite side next to the SD card slot.

    • Twist the opening pick to pry open the plastic clips securing the cover.

  7. Moto C Screen Assembly Replacement: 手順 7、 2の画像 1 Moto C Screen Assembly Replacement: 手順 7、 2の画像 2
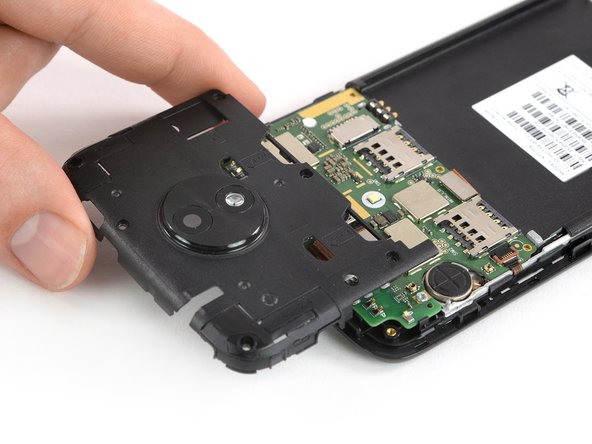
    • Remove the motherboard cover.

  8. Moto C Screen Assembly Replacement, Daughterboard Cover: 手順 8、 1の画像 1
    • Remove the four 3.5 mm long Torx T5 screws.

    • Some screws might be covered with stickers.

  9. Moto C Screen Assembly Replacement: 手順 9、 3の画像 1 Moto C Screen Assembly Replacement: 手順 9、 3の画像 2 Moto C Screen Assembly Replacement: 手順 9、 3の画像 3
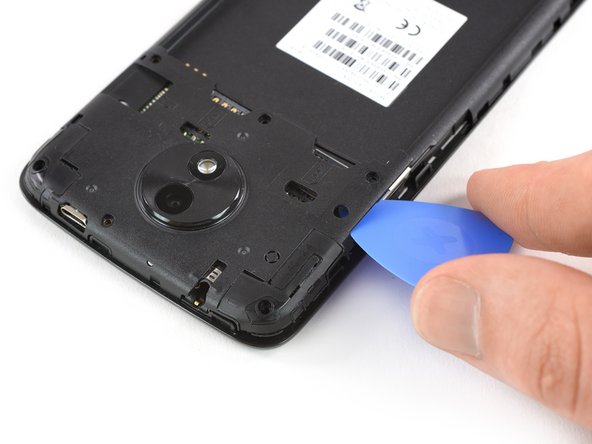
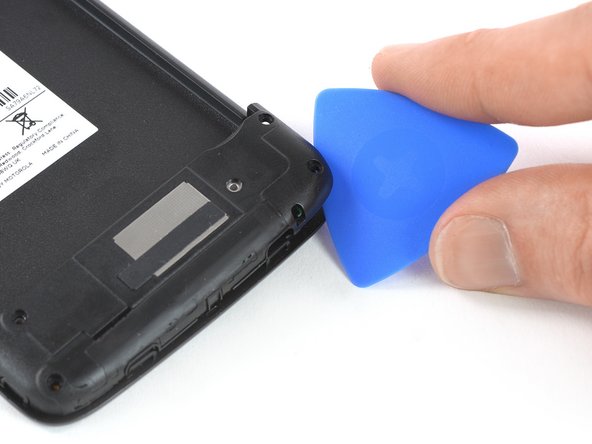
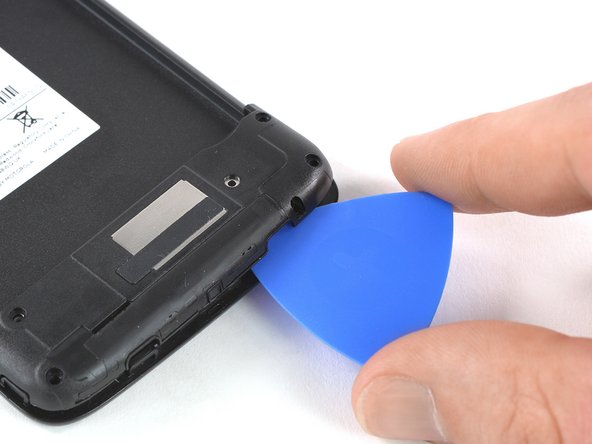
    • Apply the edge of an opening pick to the bottom right corner under the daughterboard cover.

    • Twist the opening pick to open the plastic clamps of the daughterboard cover.

    • Slide the opening pick to the left and pry it upwards until you can get a good grip on the daughterboard cover.

  10. Moto C Screen Assembly Replacement: 手順 10、 1の画像 1
    • Remove the daughterboard cover.

  11. Moto C Screen Assembly Replacement, Motherboard Assembly: 手順 11、 1の画像 1
    • Remove the three 2.5 mm long T5 Torx screws.

  12. Moto C Screen Assembly Replacement: 手順 12、 2の画像 1 Moto C Screen Assembly Replacement: 手順 12、 2の画像 2
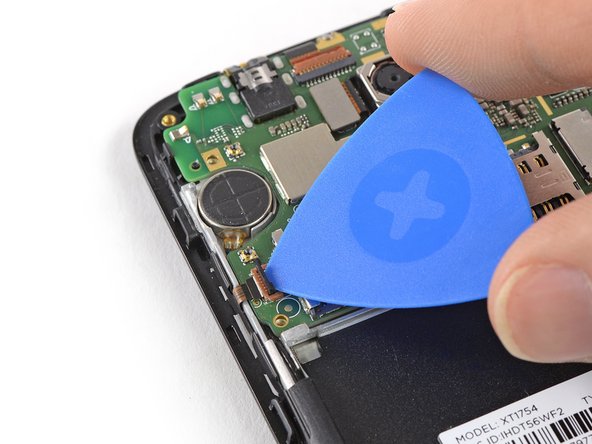
    • Use the tip of an opening pick to pry up and open the black lever of the ZIF connector located on the bottom left of the motherboard.

  13. Moto C Screen Assembly Replacement: 手順 13、 2の画像 1 Moto C Screen Assembly Replacement: 手順 13、 2の画像 2
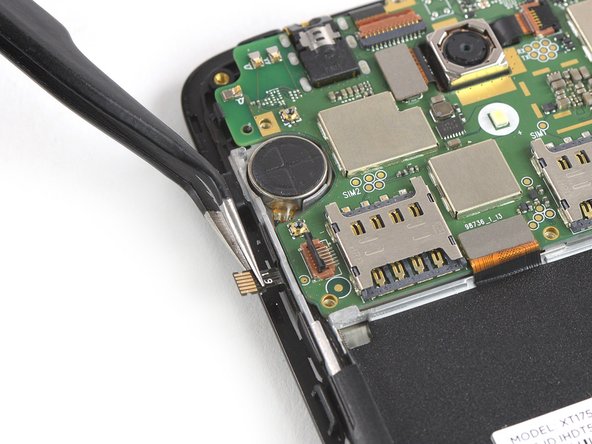
    • Use a pair of tweezers to pull the power and volume button flex cable out of the ZIF connector.

    • Fold the power and volume button flex cable out of the way.

  14. Moto C Screen Assembly Replacement: 手順 14、 2の画像 1 Moto C Screen Assembly Replacement: 手順 14、 2の画像 2
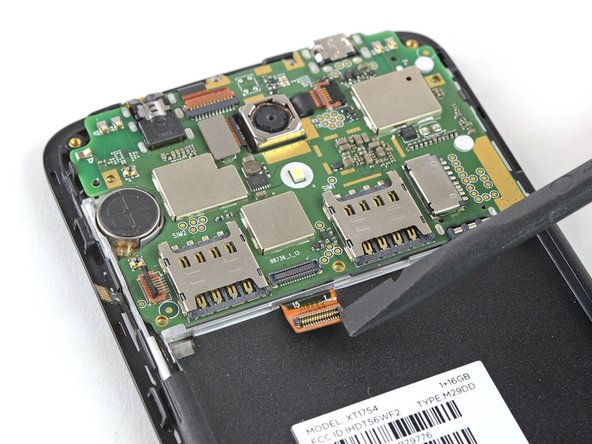
    • Use the flat end of a spudger to pry up and disconnect the display flex cable located at the bottom of the motherboard.

  15. Moto C Screen Assembly Replacement: 手順 15、 2の画像 1 Moto C Screen Assembly Replacement: 手順 15、 2の画像 2
    • Use the tip of an opening pick to pry up and open the black lever of the ZIF connector located at the top of the motherboard next to the rear camera.

  16. Moto C Screen Assembly Replacement: 手順 16、 2の画像 1 Moto C Screen Assembly Replacement: 手順 16、 2の画像 2
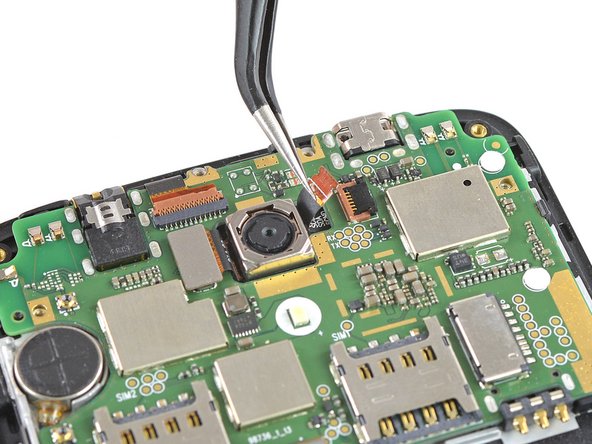
    • Use a pair of tweezers to pull the digitizer flex cable out of the ZIF connector.

  17. Moto C Screen Assembly Replacement: 手順 17、 1の画像 1
    • Prepare an iOpener and apply it to the upper half of the display for at least two minutes to loosen the adhesive beneath the vibration motor and the rear facing camera.

  18. Moto C Screen Assembly Replacement: 手順 18、 2の画像 1 Moto C Screen Assembly Replacement: 手順 18、 2の画像 2
    • Don't try to remove the motherboard all the way yet. The antenna cable is still connected to its rear side.

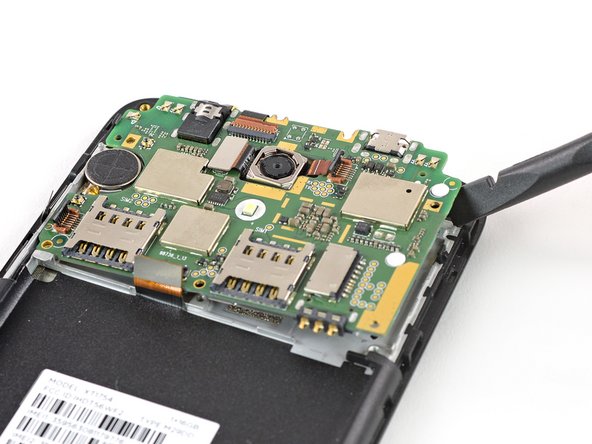
    • Use a spudger to carefully lift the motherboard until you can get a good grip. Avoid to damage the cables next to the motherboard.

  19. Moto C Screen Assembly Replacement: 手順 19、 3の画像 1 Moto C Screen Assembly Replacement: 手順 19、 3の画像 2 Moto C Screen Assembly Replacement: 手順 19、 3の画像 3
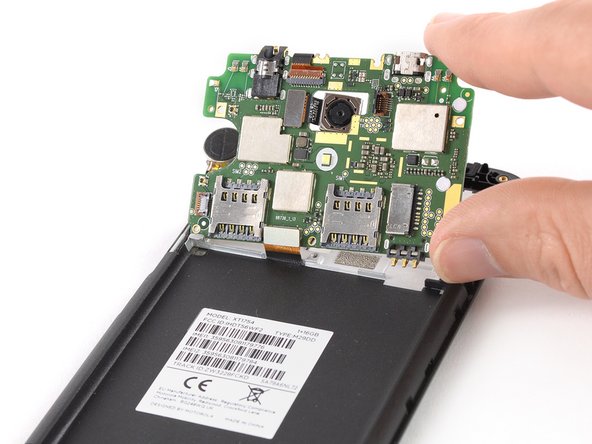
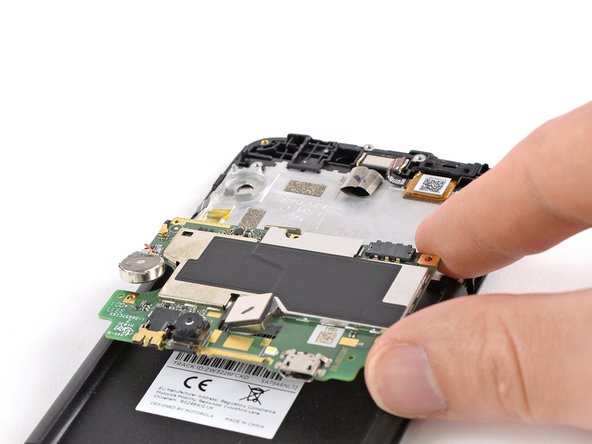
    • Fold the motherboard over the battery cavity to access the coaxial cable connectors.

  20. Moto C Screen Assembly Replacement: 手順 20、 2の画像 1 Moto C Screen Assembly Replacement: 手順 20、 2の画像 2
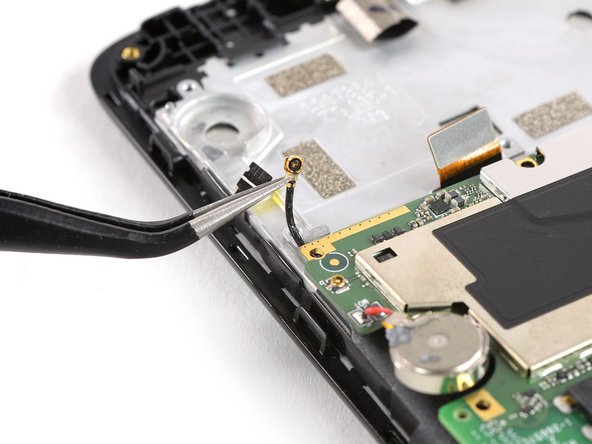
    • Use a pair of tweezers to pry up and disconnect the antenna cable from the back of the motherboard.

  21. Moto C Screen Assembly Replacement: 手順 21、 1の画像 1
    • Remove the motherboard.

  22. Moto C Screen Assembly Replacement, Daughterboard: 手順 22、 2の画像 1 Moto C Screen Assembly Replacement, Daughterboard: 手順 22、 2の画像 2
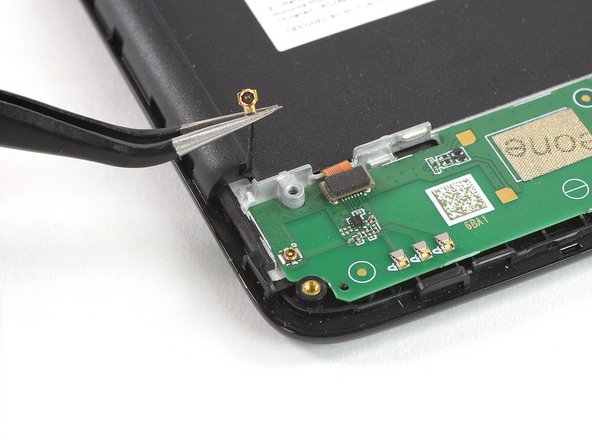
    • Use a pair of tweezers to disconnect the antenna cable on the left of the daughterboard.

  23. Moto C Screen Assembly Replacement: 手順 23、 2の画像 1 Moto C Screen Assembly Replacement: 手順 23、 2の画像 2
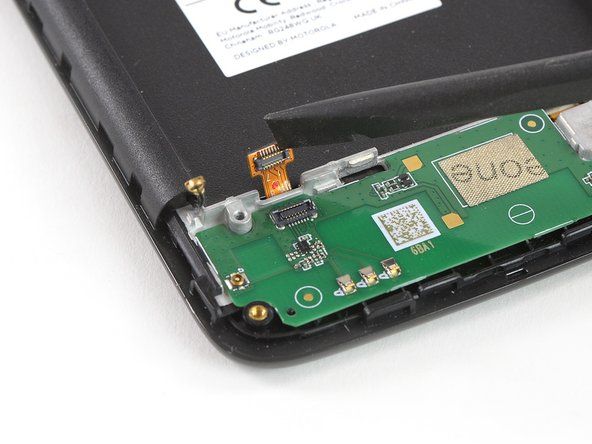
    • Use a spudger to disconnect the digitizer flex cable on the upper left of the daughterboard.

  24. Moto C Screen Assembly Replacement: 手順 24、 2の画像 1 Moto C Screen Assembly Replacement: 手順 24、 2の画像 2
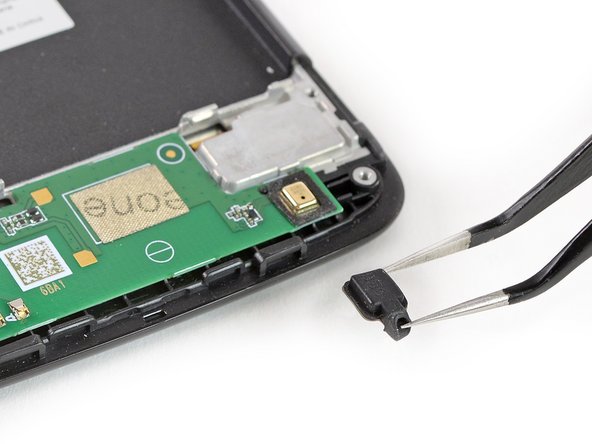
    • Use a pair of tweezers to remove the rubber gasket that covers the microphone on the bottom right of the daughterboard.

  25. Moto C Screen Assembly Replacement: 手順 25、 1の画像 1
    • Prepare an iOpener and apply it to the bottom part of the display for at least two minutes to loosen the adhesive beneath the daughterboard.

  26. Moto C Screen Assembly Replacement: 手順 26、 3の画像 1 Moto C Screen Assembly Replacement: 手順 26、 3の画像 2 Moto C Screen Assembly Replacement: 手順 26、 3の画像 3
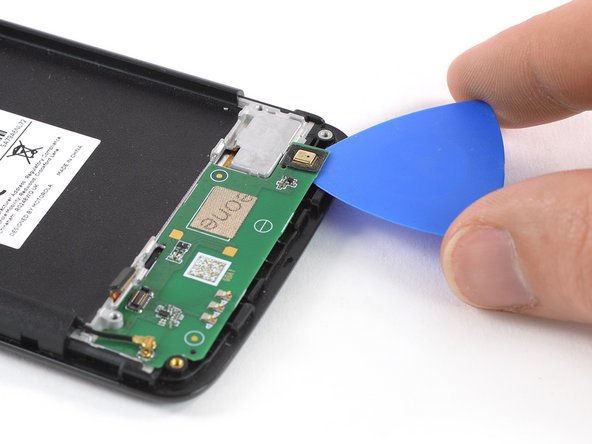
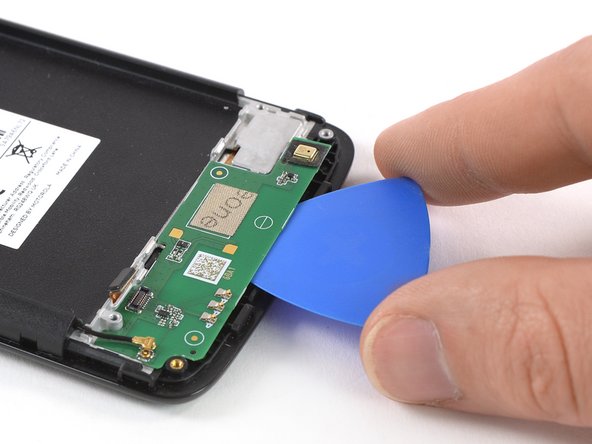
    • Apply an opening pick to the bottom right corner of the daughterboard.

    • Carefully slide the opening pick under the daughterboard to cut the adhesive underneath.

    • Slide the opening pick from right to left to cut all the adhesive.

  27. Moto C Screen Assembly Replacement: 手順 27、 2の画像 1 Moto C Screen Assembly Replacement: 手順 27、 2の画像 2
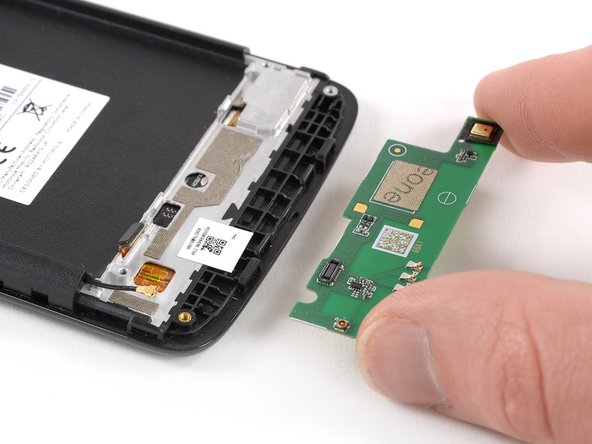
    • Twist the opening pick to lift the daughterboard until you can get a good grip.

    • Remove the daughterboard.

  28. Moto C Screen Assembly Replacement, Earpiece Speaker: 手順 28、 2の画像 1 Moto C Screen Assembly Replacement, Earpiece Speaker: 手順 28、 2の画像 2
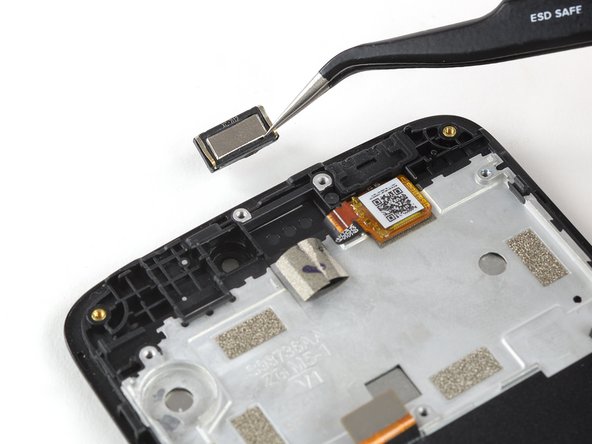
    • Remove the ear piece speaker.

    • When reassembling, be sure to properly orient the earpiece speaker such that the gold contacts are pointing away from the top edge.

  29. Moto C Screen Assembly Replacement, Screen Assembly: 手順 29、 2の画像 1 Moto C Screen Assembly Replacement, Screen Assembly: 手順 29、 2の画像 2
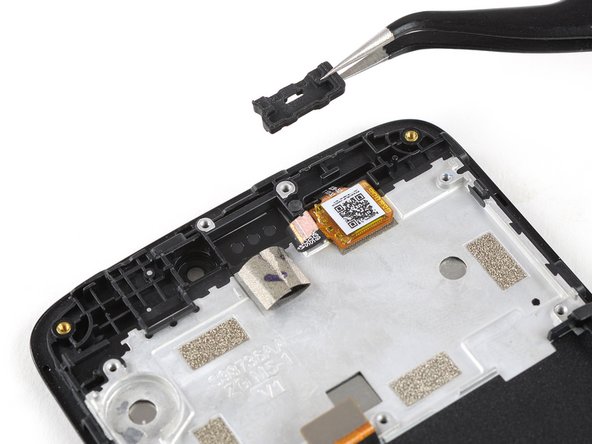
    • Use a pair of tweezers to grab and remove the charging port rubber gasket.

  30. Moto C Screen Assembly Replacement: 手順 30、 3の画像 1 Moto C Screen Assembly Replacement: 手順 30、 3の画像 2 Moto C Screen Assembly Replacement: 手順 30、 3の画像 3
    • Use a pair of tweezers to gently peel off and remove the power and volume buttons.

  31. Moto C Screen Assembly Replacement: 手順 31、 1の画像 1
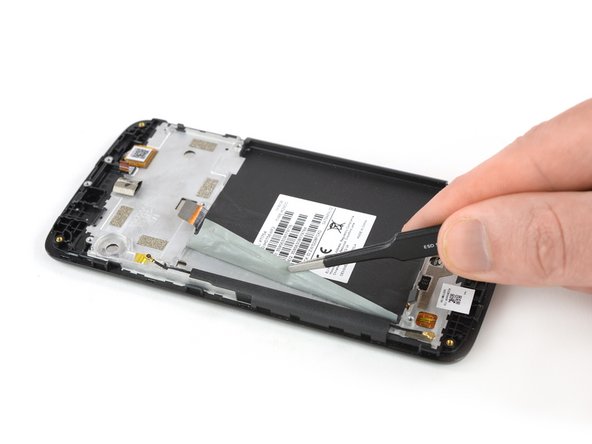
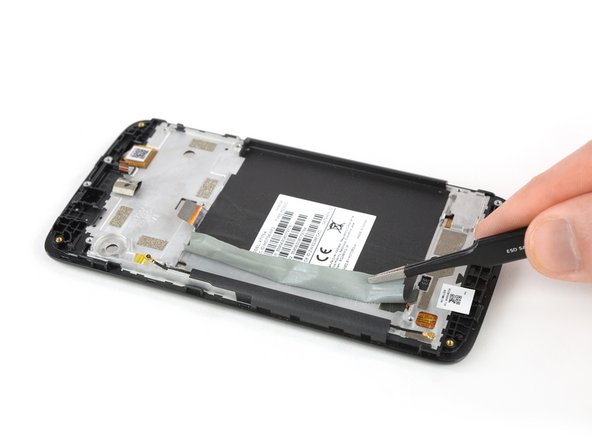
    • Prepare an iOpener and apply it for at least two minutes on the back of the phone to loosen the adhesive tape that sits on top of the display flex cable.

  32. Moto C Screen Assembly Replacement: 手順 32、 3の画像 1 Moto C Screen Assembly Replacement: 手順 32、 3の画像 2 Moto C Screen Assembly Replacement: 手順 32、 3の画像 3
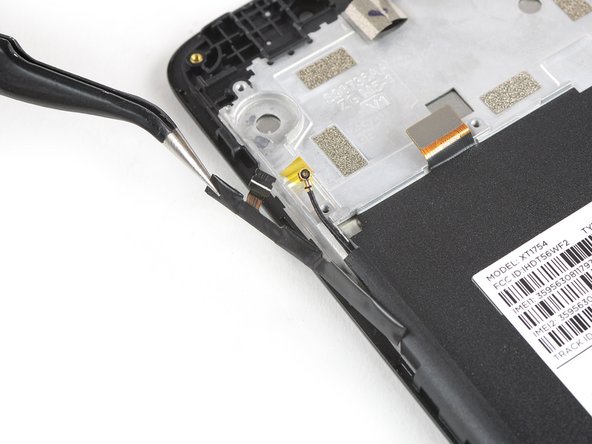
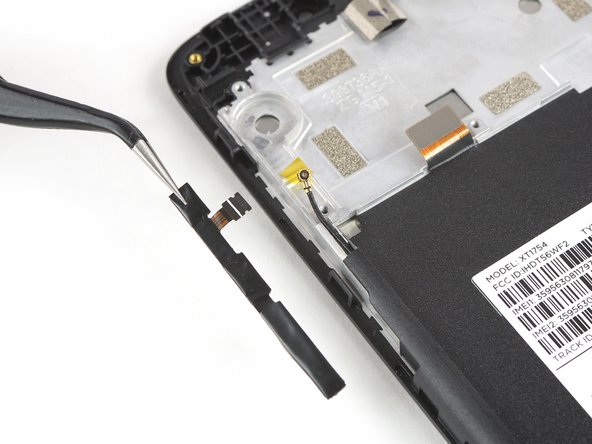
    • Use a pair of tweezers to peel the adhesive tape off the left side where the antenna cable runs and fold it out of the way.

  33. Moto C Screen Assembly Replacement: 手順 33、 3の画像 1 Moto C Screen Assembly Replacement: 手順 33、 3の画像 2 Moto C Screen Assembly Replacement: 手順 33、 3の画像 3
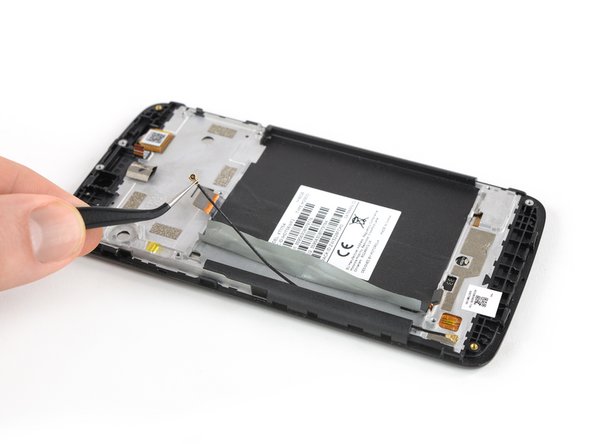
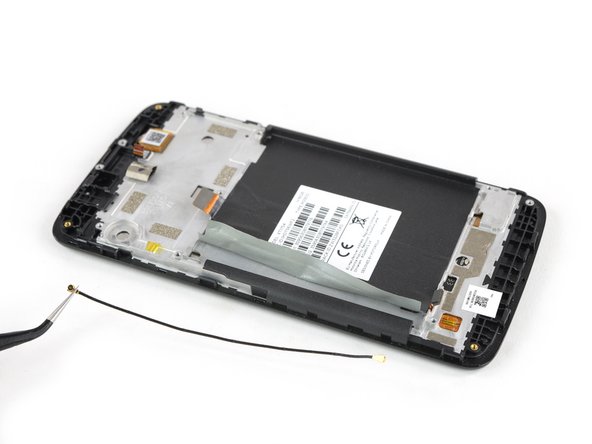
    • Use a pair of tweezers to pull the antenna cable out of its routing and remove it.

  34. Moto C Screen Assembly Replacement: 手順 34、 1の画像 1
    • Check your replacement part for any other components that need to be transferred before reassembly.

    • Maybe you also want to transfer the white label with the serial number and IMEI number on it.

終わりに

To reassemble your device, follow these instructions in reverse order.

Take your e-waste to an R2 or e-Stewards certified recycler.

Repair didn’t go as planned? Check out our Answers community for troubleshooting help.

2 の人々がこのガイドを完成させました。

作成者

5人の作成者と共同で作成されました。

Dominik Schnabelrauch

メンバー登録日: 11/23/16

201,129 ポイント

682のガイドは作成済み

チーム

iFixit iFixit人のメンバー

Staff

136 メンバー

16,579のガイドは作成済み

0 件のコメント

コメントを追加

統計データ:

過去 24時間: 1

過去 7 日: 1

過去 30 日: 18

今までの合計 2,173