はじめに
Do you need to replace your battery for a Microsoft Zune 80? This guide will show you how to completely remove and replace your battery with step-by-step instruction!
It's important to change your battery. The greatest advantage of replacing your battery is that it can manage a better battery life, it can improve your device's performance, and stop shutdowns that come randomly! You want to make sure you are replacing your battery every two to three years and treating your device with care.
Before you begin this repair, make sure to power off your device and unplug it from the charger and headphones if necessary.
This guide requires soldering. If you don't have experience or need a refresher, take a look at this How to Solder and Desolder Connections guide. Be cautious when using a soldering iron—it gets extremely hot and can cause burns. Always work in a well-ventilated area, as soldering produces fumes that can be harmful if inhaled.
Some of the images demonstrate the use of a metal spudger. Avoid using a metal spudger if possible. It can damage delicate components like the battery or motherboard. A nylon or non-metal spudger should be used.
必要な工具と部品
-
-
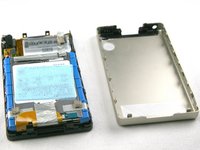
Using a metal spudger or Zune opening tool, remove the aluminum backing starting from the top. There are 5 clips on each side and two on the bottom.
-
-
-
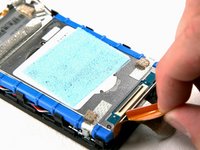
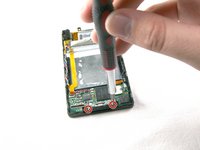
Remove the silver tape from the bottom center and the top right. This allows access to the hard drive and the battery.
-
-
-
-
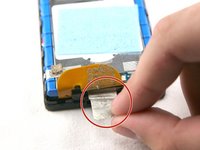
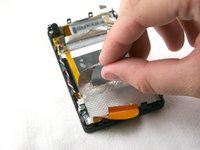
Unclick the black bar connecting the orange hard drive cable to the bottom of the hard drive. Gently push towards the bottom of the device on the black bar until you hear a click sound, it is now disengaged from the hard drive.
-
Now gently pull the orange hard drive cable to remove it from the hard drive.
-
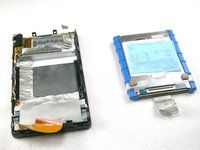
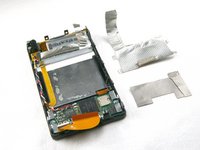
Lift the hard drive from the device.
-
Hard Drive Replacement Only: Check to make sure the hard drive cable is in good condition and then connect the new hard drive in the same place, following the steps in reverse order.
-
-
-
Remove two more pieces of silver tape from the bottom of the device. One of these pieces is below the other.
-
-
-
Remove the two T4 screws holding the headphone jack receiver on the top left corner of the device.
-
-
-
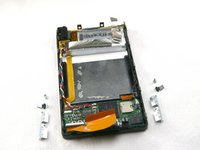
Remove the two T4 screws holding the metal brackets on both sides of the bottom of the device.
-
Remove the screws, brackets, and clips from the device. These are small pieces, so put them in a safe place.
-
-
-
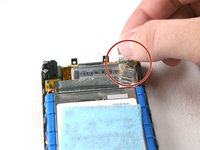
The orange audio board cable is clipped in with a small black bar, same as the hard drive cable. Un-clip the bar by pushing upwards on the edge of the black bar towards the orange cable. You will hear it click when is disengages.
-
-
-
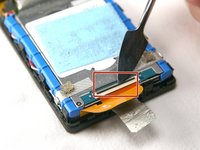
Flip the black bar to unclip the left side of the hard drive cable. You can now remove the hard drive cable.
-
-
-
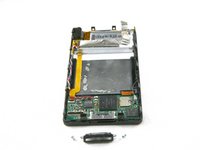
Remove the two T4 screws that hold the charging port on the bottom of the device.
-
Remove the charging port.
-
-
-
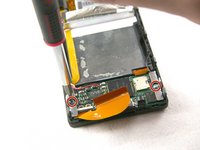
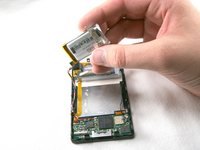
Remove the battery from the device with the cables still connected.
-
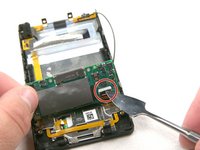
Carefully lift up the mother board located at the base of the Zune. Unclip the orange ribbon cable in the same manner as in the previous steps.
-
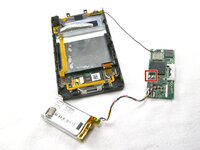
Use a soldering iron to desolder the battery connections from the motherboard.
-


To reassemble your device, follow these instructions in reverse order. Take your e-waste to an R2 or e-Stewards certified recycler.
24 の人々がこのガイドを完成させました。
チーム

Cal Poly, Team 6-5, Maness Fall 2009 Cal Poly, Team 6-5, Maness Fall 2009人のメンバー
CPSU-MANESS-F09S6G5
5 メンバー
8のガイドは作成済み
9件のガイドコメント
Where can you get a zune battery? Model 1376 120GB
Evan Freach - 返信 共有
battery replacement can be found at https://www.ebay.com/itm/364192772728.
Where can you get a battery?
Ethan Leroux - 返信 共有
changing email and passwords are bad at the same time
nutcase too - 返信 共有
On the 120 GB model, the cap in Step 1 is one complete unit. You should follow step 2 first.