はじめに
このガイドはスクリーンを壊さずに(これだけで大成功です)取り外すための修理ガイドです。
必要な工具と部品
-
-
iOpenerの使用方法を参照して温めたiOpenerを準備します。
-
温かいiOpenerをスクリーン上部端に載せてください。この熱によって、ディスプレイと本体の間に留められた接着剤が柔らかくなります。
-
-
-
-
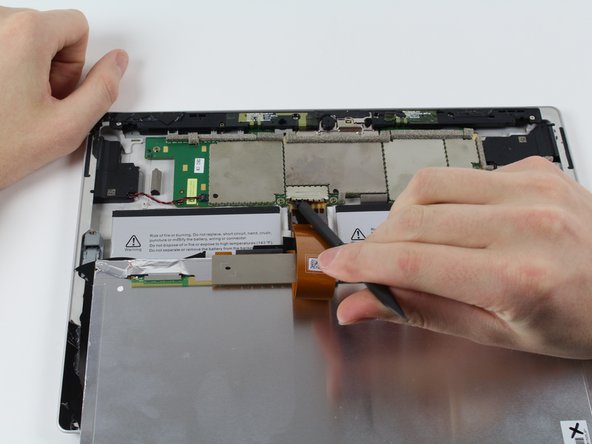
マザーボードに繋がっているディスプレイの接続場所を確認します。
-
スパッジャーを使って、RFシールドとブラケットのリテイナーを外します。
-
薄い開口ピックを使って、ディスプレイからマザーボードに繋がっているスナップピンを外します。
-


デバイスを再組み立てする際は、これらの手順を逆の順番に従って作業を進めてください。
デバイスを再組み立てする際は、これらの手順を逆の順番に従って作業を進めてください。
35 の人々がこのガイドを完成させました。
以下の翻訳者の皆さんにお礼を申し上げます:
100%

Midori Doiさんは世界中で修理する私たちを助けてくれています! あなたも貢献してみませんか?
翻訳を始める ›
チーム

Cal Poly, Team 5-12, Maness Fall 2015 Cal Poly, Team 5-12, Maness Fall 2015人のメンバー
CPSU-MANESS-F15S5G12
4 メンバー
18のガイドは作成済み
15 件のコメント
They sell them on this website
is the adhesive that is needed available on this site?
What would happen if that little RF shielding part was not reinstalled?
meric robb - 返信
The RF shield both helps prevent the closely packed together components from interfering with each other and also holds in the ZIF connector latch (the little black piece that I warn you not to lose) for the display cable. The results could vary between screen flickering with inconsistent touchscreen performance and the display cable possibly coming lose inside the device and needing to open it up and reattach it. I didn't find it too difficult to bend the RF shield back on, but you may have a harder or easier time.