メインコンテンツにスキップ
リペアコミュニティに参加 - アカウントの作成

Microsoft Surface 2 Volume Control Replacement

必要な工具と部品

    1. Microsoft Surface 2 Volume Control Replacement, Screen: 手順 1、 3の画像 1 Microsoft Surface 2 Volume Control Replacement, Screen: 手順 1、 3の画像 2 Microsoft Surface 2 Volume Control Replacement, Screen: 手順 1、 3の画像 3
      • Begin by using a heat gun or the iOpener (This will take longer.) to melt the adhesive all around the outer edge of the screen.

      • Avoid holding the heat gun too close to the Microsoft Surface 2 so as to not cause any unwanted warping.

      • Avoid touching the metal end of the gun. It will be very hot and can burn you.

      • Insert the opening picks just under the screen and black edging. Be sure to place them evenly on each side.

      • Using the gap created by the picks, slowly pry the screen from the body of the Microsoft Surface 2 with a plastic opening tool. Pry as uniformly as possible.

      FixBotに聞いてみる

      コメントを追加

    2. Microsoft Surface 2 Volume Control Replacement: 手順 2、 3の画像 1 Microsoft Surface 2 Volume Control Replacement: 手順 2、 3の画像 2 Microsoft Surface 2 Volume Control Replacement: 手順 2、 3の画像 3
      • Once the screen is free from the body, there will be a single ribbon cable connecting the screen to the motherboard.

      • Use a plastic spudger to pry the retaining clip away from the display cable.

      • The ribbon cable may be glued to the motherboard.

      • Carefully pull the ribbon cable from its socket on the motherboard.

      FixBotに聞いてみる

      コメントを追加

    1. Microsoft Surface 2 Volume Control Replacement, Volume Control: 手順 3、 2の画像 1 Microsoft Surface 2 Volume Control Replacement, Volume Control: 手順 3、 2の画像 2
      • Work close to Magnetic Project Map to avoid losing screws.

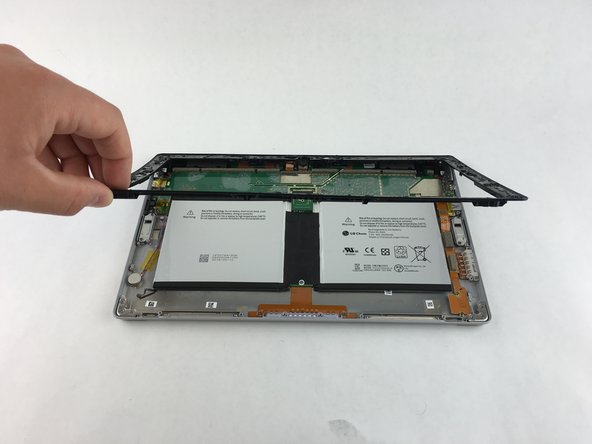
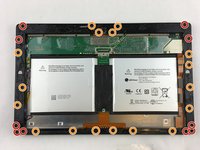
      • Remove ten 3.45 mm T3 screws from the corners of the black plastic bezel.

      • Remove the remaining seventeen 4.4 mm T5 screws from the perimeter of the bezel.

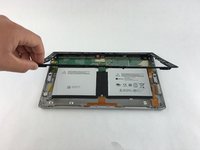
      • Once all screws have been removed, lift and remove the bezel from the rest of the device.

      FixBotに聞いてみる

      コメントを追加

    2. Microsoft Surface 2 Volume Control Replacement: 手順 4、 1の画像 1
      この手順で使用する道具:
      Tweezers
      $4.99
      • Gently peel off the yellow plastic tape using a pair of tweezers.

      FixBotに聞いてみる

      コメントを追加

    3. Microsoft Surface 2 Volume Control Replacement: 手順 5、 1の画像 1
      • Remove the two 1.70 mm T3 screws from the volume control switch.

      • Work close to Magnetic Project Map to avoid losing screws.

      FixBotに聞いてみる

      コメントを追加

    4. Microsoft Surface 2 Volume Control Replacement: 手順 6、 1の画像 1
      • Use a spudger to lift up the retaining flap on the volume control cable ZIF connector.

      • Make sure you are prying up on the retaining flap, not the connector itself.

      FixBotに聞いてみる

      コメントを追加

    5. Microsoft Surface 2 Volume Control Replacement: 手順 7、 1の画像 1
      • Now that the volume control switch is loose, pull it gently away from the motherboard.

      • No force is needed to plug in or remove the ribbon cable.

      FixBotに聞いてみる

      コメントを追加

終わりに

To reassemble your device, follow these instructions in reverse order.

キャンセル: このガイドを終了できませんでした。

作成者

3人の作成者と共同で作成されました。

oluchianya

メンバー登録日: 02/04/16

157 ポイント

1ガイドが承認済み

チーム

USF Tampa, Team 3-1, Wollert Spring 2016 USF Tampa, Team 3-1, Wollert Spring 2016人のメンバー

USFT-WOLLERT-S16S3G1

4 メンバー

40のガイドは作成済み

0件のガイドコメント

コメントを追加

統計データ:

過去 24時間: 0

過去 7 日: 4

過去 30 日: 62

今までの合計 2,052