はじめに
This guide will illustrate how to replace the analog battery in the Martian Victory watch.
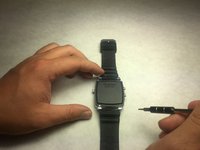
It is very important to tell your users to use the correct tool for the job. Metal spudgers and screwdrivers can damage delicate internal components and puncture an unprotected battery, potentially causing a fire. When working with electronics, it's important to choose a tool that's ESD-safe to avoid accidental damage to the device. The metal spudger is great when you need serious prying power, but the regular black nylon spudger or a plastic opening tool should be used whenever possible.
必要な工具と部品
-
-
Carefully lift the back plate off the watch. You will notice a lithium battery and rubber gasket attached to the back plate.
-
-
-
Using the plastic removal tool, pry the battery from the backing plate. The battery is simply attached with glue.
-
-
-
Desolder the battery connections from the motherboard. Learn how to solder components here!
-
-
-
この手順で使用する道具:Tweezers$4.99
-
Use a spudger or tweezers to remove a white sticker that covers a Phillips head screw.
-
-
-
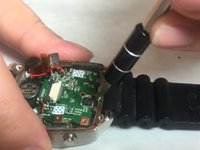
Use ESD safe tweezers to remove the gold ribbon cable.
-
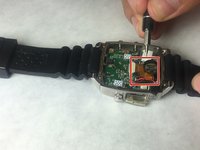
This will expose a second 5.2mm Phillips head screw that can be removed with a PH00 screwdriver.
-
-
-
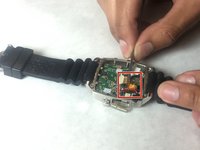
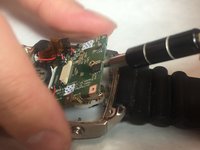
Use a spudger to gently pry on the motherboard towards the top of the watch, being towards the 12 o'clock position to loosen the motherboard.
-
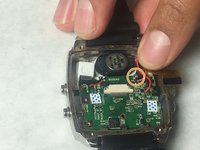
You can now access the parts and pieces on the bottom of, and below the motherboard.
-


To reassemble your device, follow these instructions in reverse order.
2 の人々がこのガイドを完成させました。
チーム

IUPUI, Team 3-3, Baechle Fall 2016 IUPUI, Team 3-3, Baechle Fall 2016人のメンバー
IUPUI-BAECHLE-F16S3G3
4 メンバー
8のガイドは作成済み
3件のガイドコメント
I am researching for methods to change batteries on a watch. Would like to thank you for this piece. It is really good. However, you have used some tools in your tutorial. but since they pins and scissors are in everyone's home, making your way easy
I shall be writing a post in the same topic. and would love to feature your guide on it..
Thanks
Ronald Mckim
Owner: http://www.mywatchvilla.com/
Ronald Mckim - 返信 共有
@ronaldmckim, you may embed our guide using the instructions here: https://ifixit.org/blog/8474/embed-guide.... For our content licensing policies, see: Content Licensing.
Hi.. Thank you for the detailed steps, it really helped a lot in replacing the analog battery ourselves
However, now we are not able to place the mother board back in its place, hence wanted to check if there is any tips or steps or screenshots how we can place it back?