はじめに
This guide demonstrates how to create a fabric patch to use in hand and machine sewn repairs. Patching is a reliable way to reinforce or cover damaged areas, adding both strength and character to well-loved gear.
Hand sewn repairs are a fun and effective way to extend the life of gear at home. DIY repairs won't void the Patagonia warranty—they're actually encouraged!
Patagonia items can also be taken in to a local retail store for repair evaluation or sent in to Patagonia through their mail-in repair service.
Let's get fixing!
Related Tutorials
Related Articles
必要な工具と部品
-
-
To choose the ideal patch fabric for performance and aesthetics, take the following aspects into consideration and match them to the garment:
-
Weave Structure - Whether the fabric is woven or knit.
-
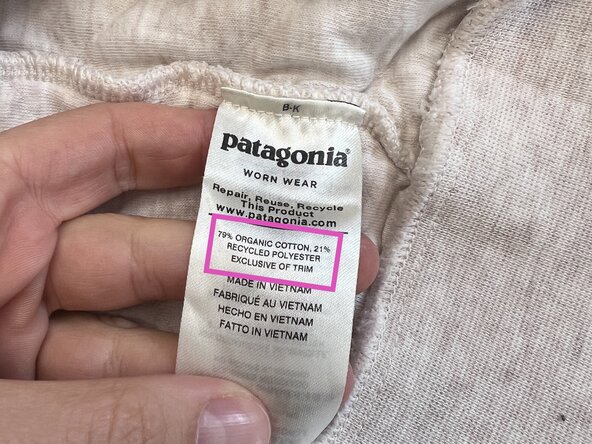
Fiber Content - The fiber that the fabric is made of (cotton, nylon, etc). This will likely be written somewhere on the garment tag.
-
Weight - How thick and rigid the fabric feels.
-
Stretch - Whether the fabric stretches horizontally, vertically, or both.
-
Color - Matching color is up to personal discretion but often a slightly darker fabric will look less obvious than a slightly lighter fabric.
-
Preference - A preference for a contrasting patch for a more visible repair.
-
-
-
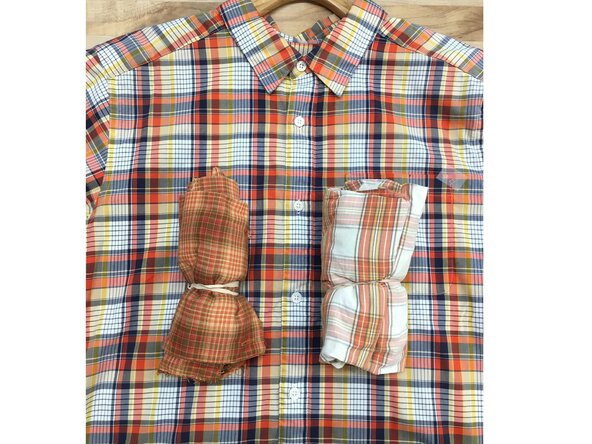
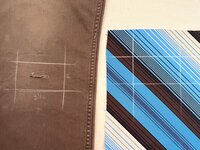
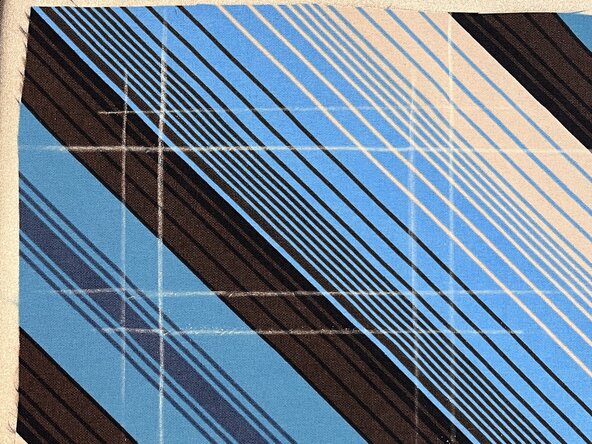
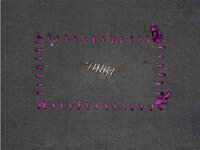
All of the pictured fabric samples are woven.
-
Options 1 - 4 are heavyweight organic non-stretch cotton in a variety of colors.
-
Option 5 is very close in color, but is woven nylon with noticeable stretch.
-
Option 6 is close in color and cotton, but is medium weight.
-
Option 7 is a medium weight cotton in a contrast print.
-
-
-
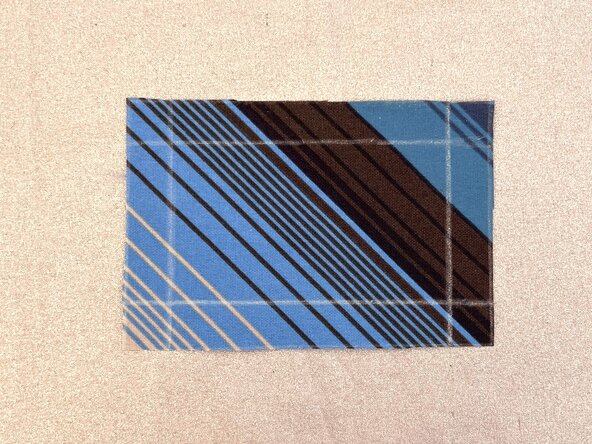
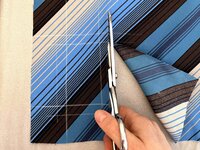
Choose your patch fabric and iron or steam the fabric so it's smooth and free of wrinkles.
-
-
-
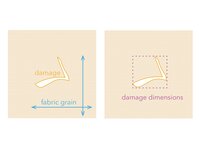
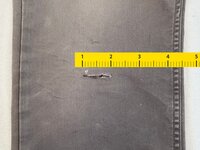
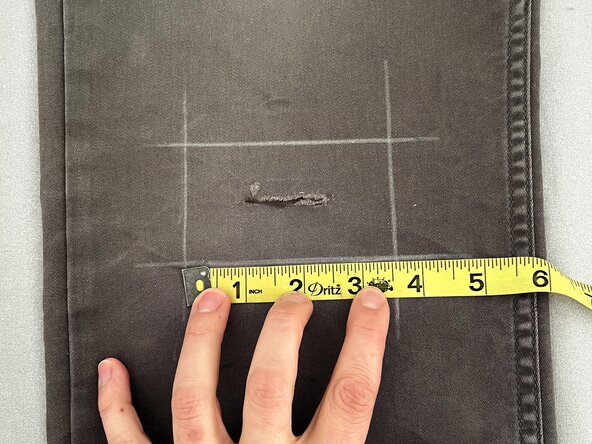
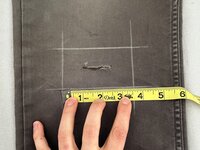
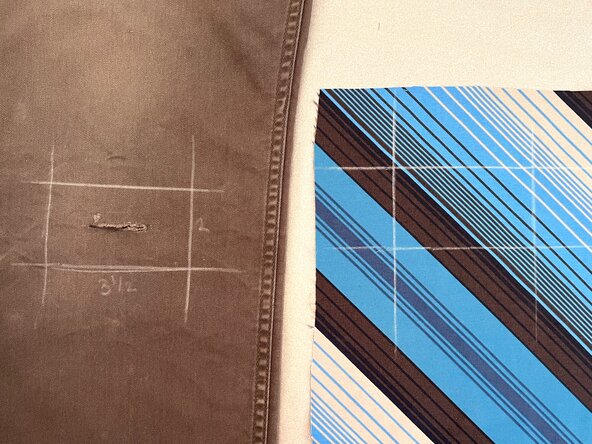
Measure the dimensions of the damage.
-
Remember these measurements for the next step.
-
-
-
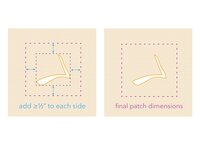
Add at least 1/2 inch (~13 mm) in each direction—so at least 1 inch (~25 mm) total—to each damage dimension measurement from the previous step.
-
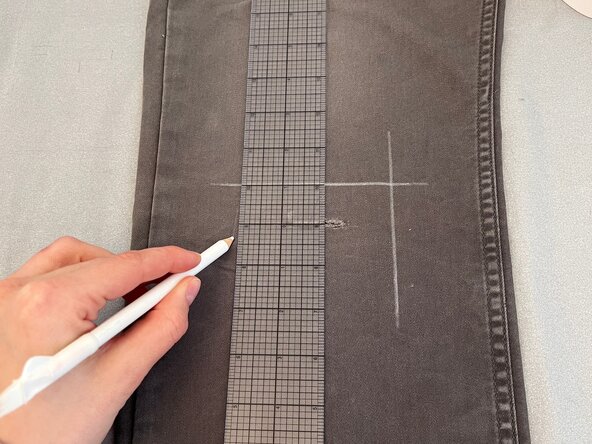
Optionally, mark the size and orientation of the patch onto the garment.
-
-
-
-
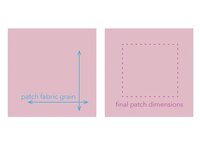
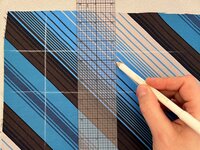
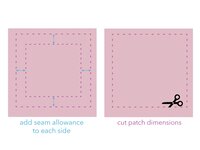
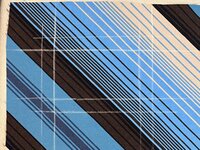
Use chalk or heat-erasable pen to mark the final patch dimensions found in the previous step onto the right (front) side of the patch fabric.
-
-
-
Add 1/2 inch (~13 mm) to each side of the drawn patch dimensions and mark these new lines using chalk or heat-erasable pen.
-
-
-
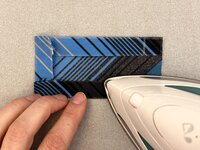
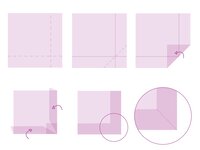
Using the guidelines on the patch, iron the seam allowance inward toward the backside of the patch.
-
Repeat on each side.
-
-
-
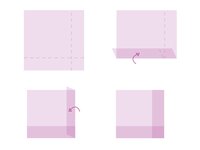
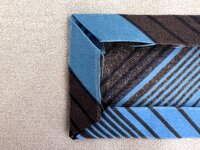
Miter each corner so no raw fabric is exposed at the edges of the patch. (See the next step for video instructions.)
-
Unfold the seam allowance on either side of the corner.
-
Use the fold lines to determine the diagonal line that bisects the point where the folds intersect.
-
Fold the corner inward along this diagonal line.
-
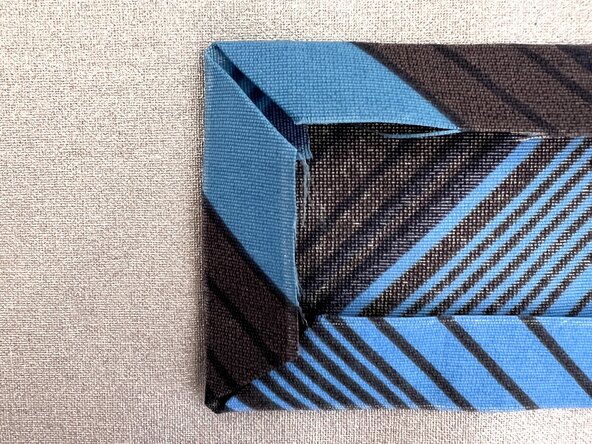
Refold the seam allowances of the adjacent patch sides. If done correctly, their corner edges will meet at a 45-degree angle.
-
Press the fabric in place and repeat on each corner.
-
-
-
This video shows how to miter a patch corner by following the instructions in the previous step.
-
-
-
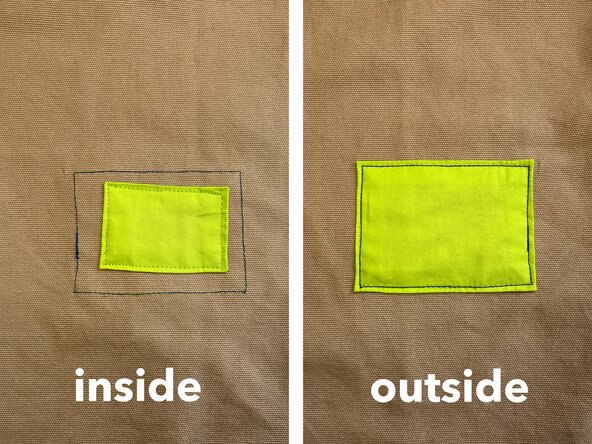
Pin the patch in place over the damaged area using the guidelines created in Step 5 (the final patch dimensions).
-
-
-
CLOSE TEAR: In most cases, stitch the tear closed before attaching the patch. This will seal the tear on the inside so it doesn't grow bigger or get caught while the garment is being worn. See Whip Stitch on a Tear.
-
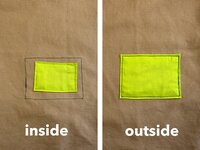
UNDERPATCH: If the tear is too large to be stitched closed, use an underpatch: a smaller patch that's sewn over the hole on the inside before the main patch is sewn on the front.
-
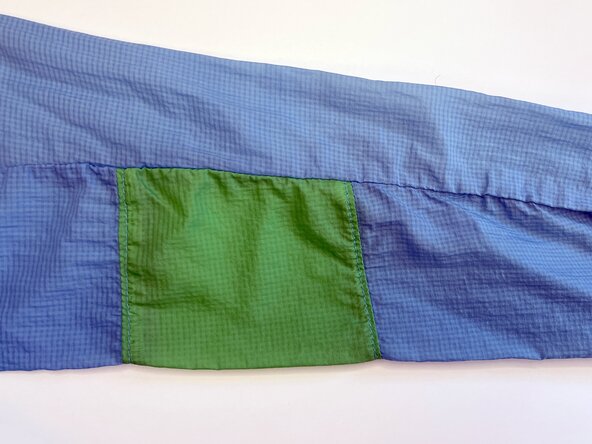
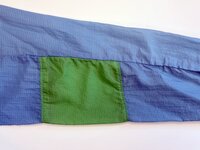
PATCH INTO A SEAM: For a patch that goes into a garment seam, use the same measurement steps but leave the seam allowance along that edge unfolded. The seam allowance will instead be sewn into the garment seam.
-


ある他の人がこのガイドを完成しました。

2件のガイドコメント
Doesn't the seam in the garment need to be opened in order to sew the patch into the seam? If so, what should be done to keep the threading in the cut open seam from loosening and freying during use and laundering?
Hey Toni! Yes, if you want to sew a patch into an existing seam, you'll need to carefully unpick the stitches and open the seam first.
When you re-sew the seam after the patch is attached:
(1) Overlap the existing stitches by at least 1/2 inch on both ends, rather than starting and stopping exactly where the old stitching ended.
(2) Back-tack at both ends of the new stitch line. Back‑tacking simply means sewing forward and backward over the same spot two or three times (for about ½ inch).
These steps help secure the new seam and “lock down” the ends of the original stitching, which prevents loosening or fraying during regular wear and laundering.