はじめに
このガイドを参照して、MacBook Pro 16インチ 2021 スクリーンを交換します。
安全のために、MacBook Proのバッテリー残量を25%以下まで放電してください。アクシデントで充電したリチウムイオンバッテリーに穴を開けてしまうと、危険な火災事故を起こすことがあります。バッテリーが膨張している場合は、 適切な方法で処分してください。
注:スクリーンを交換すると、True Tone機能が無効になります。
必要な工具と部品
-
-
P5ペンタローブドライバーを使って、下部ケースを固定している次の8本のネジを外します。
-
9.1mmネジー4本
-
5mmネジー4本
-
-
-
オープニングピックを作ったさ浮間の大に差し込みます。
-
オープニングピックをコーナー周辺までスライドして、それからMacBook Proの短辺側半分までスライドしながら移動させます。
-
-
-
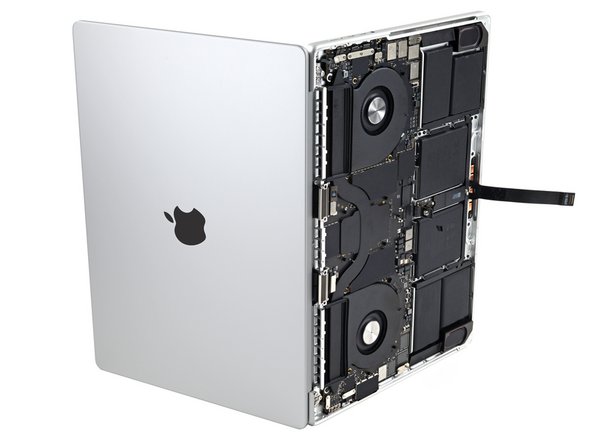
下部ケースを外します。
-
ディスプレイヒンジの近くにクリップをスライドして、位置合わせをします。ヒンジに向けてカバーを押し込んでスライドします。クリップがかみ合うと、これ以上スライドできません。
-
スライドクリップが完全にはまり、下部ケースが正しく装着されたら、ケースをしっかりと押し込み下にある4つの隠しクリップをはめ込みます。カチッと音がして、所定の位置に収まります。
-
-
手順7 バッテリーボードの接続を外す
注意: 手順 7-19 は、作業進行中としてマークされている ガイド から引用されています。
-
ロジックボード上のバッテリーボードのデータケーブルのコネクタを覆っているテープを剥がします。
-
-
-
-
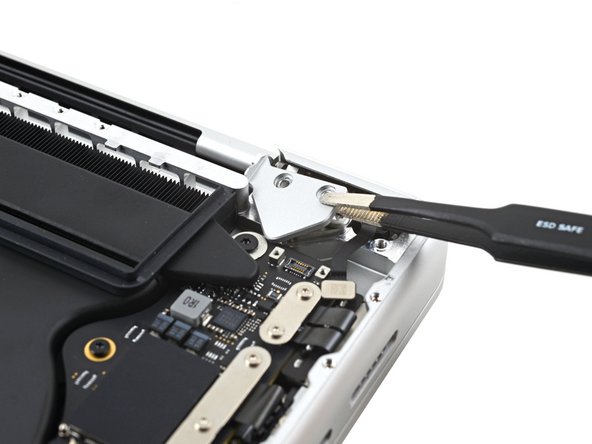
T3トルクスドライバーを使って、アンテナボードのブラケットと同軸ケーブルカバーをフレームに固定している、長さ2.1mmネジを3本外します。
-
-
-
T5トルクスドライバーを使って、フレームにアンテナバーを固定している6本のネジを外します。
-
7.5mmネジー2本
-
3mmネジー4本
-
P2ペンタローブドライバーを使って、フレームにアンテナバーを固定している1.5mmネジを9本外します。
-
-
-
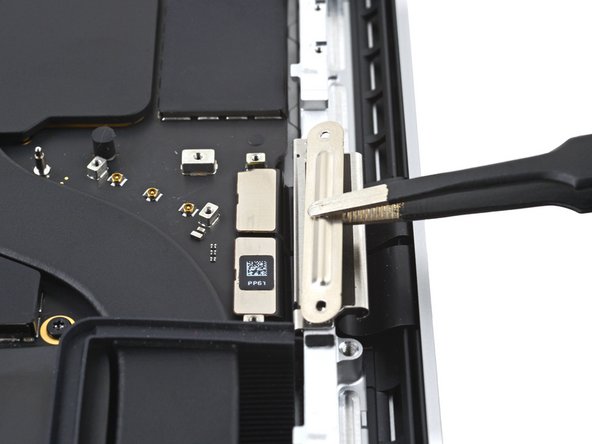
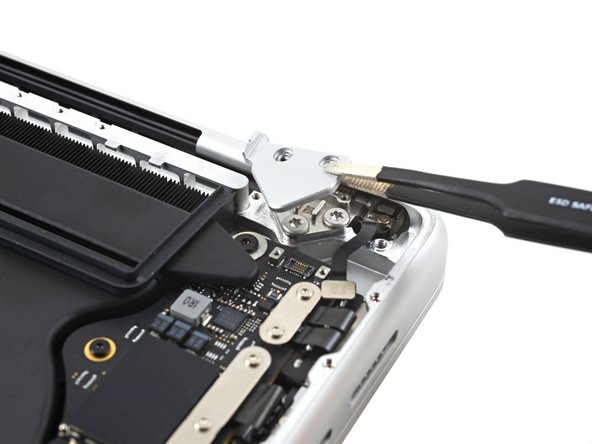
フレームにディスプレイケーブルブラケットを固定しているクリップを引き上げて外します。
-
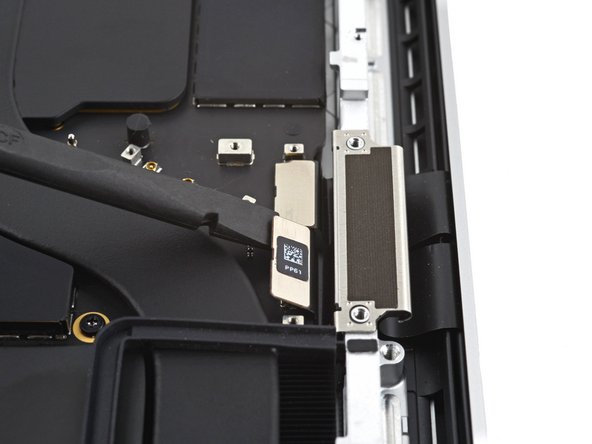
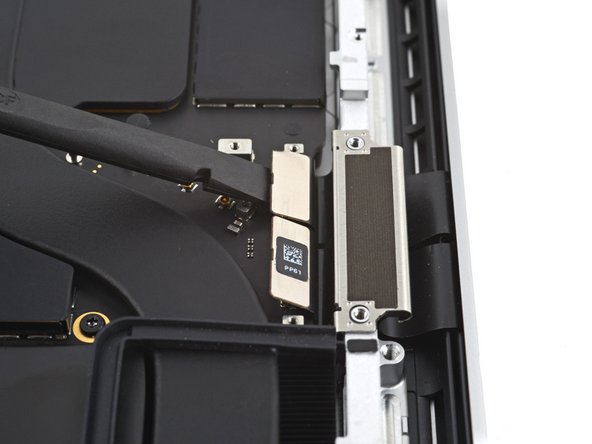
ディスプレイケーブルのブラケットを外します。
-
他のディスプレイケーブルブラケットにも同じ作業を繰り返します。
-
-
-
スクリーンを再利用する場合は、スクリーンを開き、各ヒンジの真上のガラスにマスキングテープを貼ってください。これは、次のステップでガラスに傷がつくのを防ぐのに役立ちます。
-
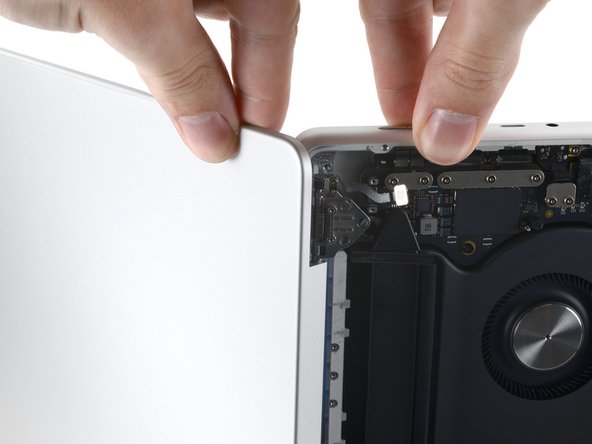
スクリーンを全開にして、MacBook Proを片側だけ立てます。
-
-
-
T8トルクスドライバーを使って、6.4mmネジを外します。(各ヒンジから1本ずつ)
-
一番上のネジを最後に外し、MacBook Proが分離して不意に倒れないように、片方の手でMacBook Proの両半分を固定します。
-


このデバイスを再組み立てするには、インストラクションを逆の順番に従って作業を進めてください。
オリジナルのパーツと交換用パーツをよく見比べてください。交換用パーツに付いていない残りのコンポーネントや接着シールなどは、インストールする前に新パーツに移植する必要があります。
修理がうまく進みませんか?ベーシックな トラブルシューティングを試してみるか、MacBook Pro 16インチ 2021 アンサーコミュニティを参照してください。
このデバイスを再組み立てするには、インストラクションを逆の順番に従って作業を進めてください。
オリジナルのパーツと交換用パーツをよく見比べてください。交換用パーツに付いていない残りのコンポーネントや接着シールなどは、インストールする前に新パーツに移植する必要があります。
修理がうまく進みませんか?ベーシックな トラブルシューティングを試してみるか、MacBook Pro 16インチ 2021 アンサーコミュニティを参照してください。
10 の人々がこのガイドを完成させました。
以下の翻訳者の皆さんにお礼を申し上げます:
100%

Midori Doiさんは世界中で修理する私たちを助けてくれています! あなたも貢献してみませんか?
翻訳を始める ›


7 件のコメント
Will I lose True Tone functionality even though I use an original Apple screen that has True Tone for the repair?
If you don't break the entire lcd, but only some part of it, the True Tone will still there. I have mine fixed because of the liquid damage. I only replace the LCD, not the fullset with the case. I have some locals to help me fixed it for me. So I don't know the details how they repair my macbook.
They gave me 2 options,
first told me that I will lose true tone feature if I replace it with the fullset lcd,
the 2nd option, If I replace the LCD only, the true tone still there because they can move the "ic" to the lcd replacement. But the disadvantage for the 2nd option that I will got some defect on my screen not much and not really visible if I don't really look at it. Please note that this options is possible because I didn't break the entire lcd.
I chose the 2nd option and it's work. The defect caused by my liquid damage is not really visible
ghiffari -
I had purchased my part from Apple directly, so when I was doing the system configuration at the end, they asked for my order number and my serial number, which I assume were used on their end to mark parts as genuine and restore TrueTone. If you purchased your part from apple and have the order number, then restoring TrueTone should not be a problem. If you got a part from elsewhere, then I don't how the service people on Apple's end would identify it to be able to mark it as genuine in their system, and to associate it with your machine. Perhaps you can contact them and ask..
I hope this has a video demonstration too
In case you are not aware: you can get a genuine replacement screen directly from Apple. This machine is one of the first to be a part of their new repair program. If you get the screen from them, you will not lose the TrueTone functionality! After completing the repair, you will have to contact heir online support, who will guide you through system configuration steps to mark installed parts as genuine, thereby restoring TrueTone. You will also be able to send in your old screen to get some money back. Cheers!