はじめに
容量を増やすため、ハードドライブをアップグレードしましょう!
必要な工具と部品
-
-
-
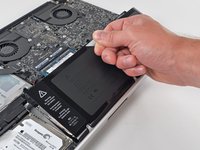
バッテリーケーブルコネクターにアクセスするために、ロジックボードからバッテリーを十分に傾けて下に隙間を作ってください。
-
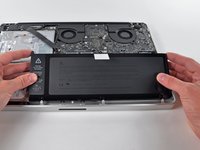
バッテリーケーブルのコネクターをメイン基板のソケットから手前に引いて接続を切り、バッテリーを上部ケースから取り外します。
-
100%になるまで充電します。充電後も最低2時間はプラグを繋げたままにします。それからプラグを外して、通常通り使用しながら、自然に放電させます。バッテリー残量小のサインが表示されたら、これまでの作業を保存して、スリープ状態になるまで放置してください。スリープ状態に入ったら、少なくとも5時間置きます。それから一気に100%まで充電します。
-
新しいバッテリーを装着後、通常通り作動しない場合は、MacBook ProのSMCをリセットしなければならない可能性があります。
-
-
-
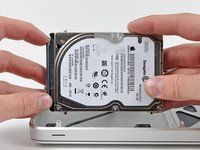
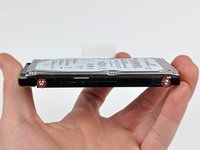
ハードドライブの両サイドから各2本ずつT6トルクスネジを外します。(合計4本)
-
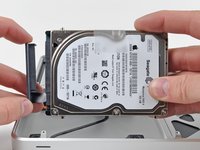
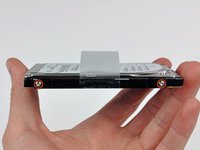
必要に応じて、古いハードドライブからプルタブを剥がして、新しいハードドライブの側面に移してください。
-


デバイスを再組み立てする際は、これらのインストラクションを逆の順番に従って作業を進めてください。
382 の人々がこのガイドを完成させました。
以下の翻訳者の皆さんにお礼を申し上げます:
100%

Midori Doiさんは世界中で修理する私たちを助けてくれています! あなたも貢献してみませんか?
翻訳を始める ›

22件のガイドコメント
I went all over the place trying to find that stupid 7.4 mm Tri-Wing bit or driver to remove the battery per your instructions then I took a harder look and realized there was no need for all that SMFH!
We have you remove the battery because as long as it is connected, certain components on the logic board are electrified. If you accidentally drop something metallic on the board or touch the wrong part with a screwdriver, you could fry the board be out another $700+.
I bought the 1TB and the tool kit. Got it today. The step by step directions made it a piece of cake. Afterwards I booted up my MacBook Pro off of my system software cd. The new hard drive didn't show up so I called iFixit and talked to Scott. He told me how to format my drive and had me up and running in about 2 minutes. You guys are awesome! My computer works great and I went from a maxed out 500 GB hard drive to a full 1 TB Hybrid hard drive. Thanks for the new lease on life.
josephpass - 返信
So, SSD´s can replace an the original HDD without any sort of fitting?
Nico Sauer - 返信