はじめに
MacBook Pro 13" Unibody Mid 2010 のサブウーファーと右側スピーカーを交換します。
必要な工具と部品
-
-
取付台タブを外すため、底ケースをわずかに持ち上げて、デバイス本体の背中側に向けて押します。
In the introduction you should link fixers to this excellent doc: https://www.ifixit.com/Misc/HD_Software_...
It is really critical, super easy, and free(!) to clone your existing drive onto the new one you will install. I ran into one error, but SuperDuper! support replied immediately on how to fix it...Thanks ifixit and SuperDuper! (I ponied up the $28 for the software anyway, I was so impressed!)
Long story short: I drank the AppleKoolAid back in 1984 and have always left the guts of my machines up to Apple - until recently when I needed to swap the SATAs from my original MacDaddy (2009 13" MBPro that I killed in 2018 - coffee + blackout = OOOOPS) into a pristine 2009 MBPro from a Goodwill in North Carolina through eBay. I need the files from iCal and MacMail that can't be opened in my newer machines.
Well . . . I ain't never done nuttin' like that, before!
Enter Luke Miani on YouTube. He raves about you guys! So, I watched everything I could, read your site, bought the right tools and at the ripe old age of 72, I sat down, this morning and did the work. Now my original MacDaddy lives in MacDaddy2.0.
Am I allowed to cry?
Seriously, I can't thank you enough for your bitchen site and killer tools. I wish I'd'a been turned on to this shizzle 30+ years ago.
IFIXIT - IDIGIT!
kath myers - 返信
HAHAHAHAHAHAHAHAHAHA.
That was a brilliant read.
Yes, I came across ifixit a few years ago. Totally helped me out on several occasions.
Glad your Mac repair journey worked out.
:)
Cary B -
-
-
-
スパッジャーの平面側先端を使って、ロジックボード上のソケットからバッテリーコネクターを持ち上げます。
How do you get that battery connector back on? Do you just press it in back in place after you're done?
yes. I usually plug it in before I screw it down so I can lift the battery a bit and have enough slack to be able to go straight down on the connector, otherwise it comes in on a bit of an angle, which can't be good (though not necessarily bad).
This step almost finished me, and I did extensive damage to the battery plug. Fortunately, I later replaced the battery, and the replacement came with a new plug! :) Newbies need to know - 1. The battery plug is like a thin lip on a thicker lip, so you need to pry BETWEEN 2 thin lips to get it off, else you are trying to yank out the socket. 2. Mine was initially VERY tight, and trying to get it out broke the plastic on all sides of plug, even though I was as careful as possible. Luckily, this didn't hurt functionality and I later replaced the battery. AFTER disconnecting once, it was never so tight again,
-
-
-
サブウーファーのコネクタの上部に付いている柔らかいパッドを外して、基板上のソケットからコネクタをゆっくりと引き抜きます。
It is not necessary to remove the camera cable connector (step 5) or the camera cable connector (step 10). Simply push the camera cable gently aside to remove one of the three screws securing the optical drive (step 11). Gently wiggle the optical drive from under the camera cable connector and go to step 12. Less chance of ruining your motherboard!
Absolutely. Leave it alone, you don’t need to run the risks of removing this cable, I did the replacement fine without it
It does indeed come out of the connector, but the picture makes it hard to see how; the connector it goes into sits on top of the board—however, I, too, ripped mine off the board trying to remove it; I only got it out of the clip after I tore it off. SIMPLY DONT; it's unnecessary. I plan to solder it back if one of my Robotics club friends lets me borrow a soldering iron.
The 4-pin push connector for the sub-woofer is near impossible to reconnect
It mates with a female connector that sits on top of 4 tiny solder points (it's held on by a spot of glue, I believe), and when applying ANY pressure to connect, the side clip(s) will snap off. Then the connector itself will become unglued. It would be simple enough to connect the 2 parts, then place a drop of glue on the logic board after positioning it above the solder points, but the female connector broke apart in my hand. So now screwed, with no way to connect sub/ R speaker without installing another logic board. Fan connector looks to be exactly the same
-
-
-
カメラケーブルのコネクタを光学ドライブ側に引っ張り、基板から接続を外します。
-
-
-
-
光学ドライブと上部ケースを固定している2.5 mmプラスネジを3本外します。
-
右側端から光学ドライブを持ち上げて、コンピュータから引き抜きます。
Install 2 outside screws first and then single inside screw to allow wiggle room to get outside screws in. Do not tighten screws until all are started.
JASON CULP - 返信
-
-
-
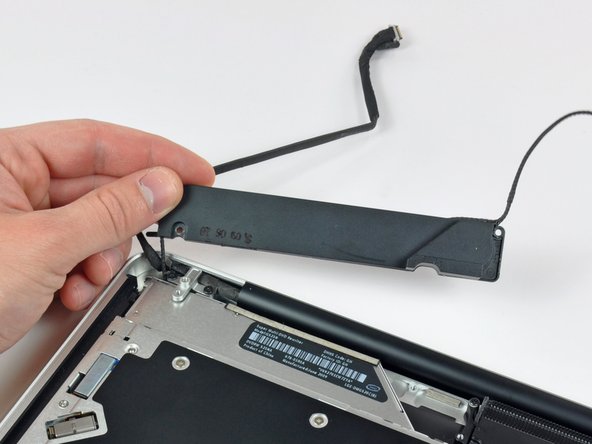
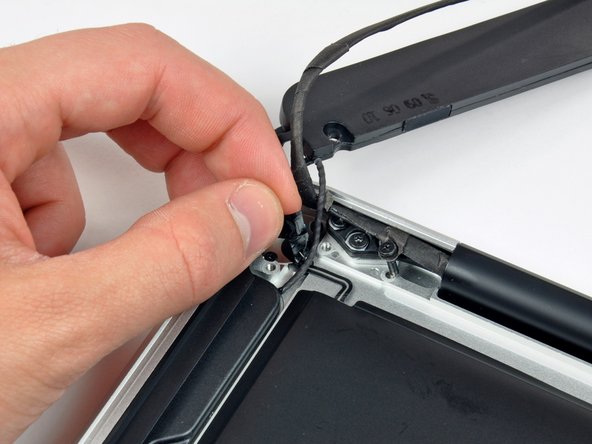
スパッジャーの先端を使って、上部ケースに右側スピーカーを固定している接着剤を剥がします。
The new speakers don’t come with adhesive, so some double sided tape is handy. Also, the right speaker cable can be rather long, so some tape is useful to carefully loop it out the way.
-
デバイスを再組み立てする際は、これらのインストラクションを逆の順番に従って作業を進めてください。
デバイスを再組み立てする際は、これらのインストラクションを逆の順番に従って作業を進めてください。
55 の人々がこのガイドを完成させました。
以下の翻訳者の皆さんにお礼を申し上げます:
100%
Midori Doiさんは世界中で修理する私たちを助けてくれています! あなたも貢献してみませんか?
翻訳を始める ›
3 件のコメント
Hello, I've just brought a MacBook Pro 8,1 to life with an SSD. It works great but unfortunately no sound. There is no output listed in sound window. I tried cmd+opt+P+R without success. Would replacing the speaker assembly solve the problem or is this a hardware problem? Thanx
PS- I also restarted cord...something in processes that didn't work either.




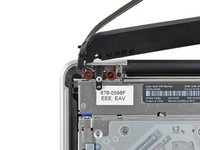
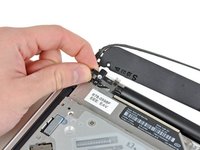


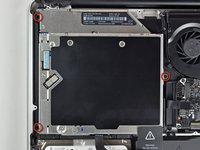
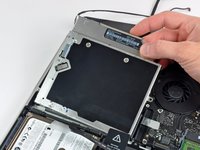


Compare the short screws carefully before reinstalling them. The shouldered screws go in the holes on the front edge.
David Kilbridge - 返信
Before I started removing any screws I took a piece of paper and drew the bottom of the laptop and put a piece of double-sided tape in the spot where each screw goes. That way when I took out the screws, I could put them on the tape so I knew exactly which screw went in which spot. I did the same thing for dismantling the inside on another sheet of paper, then a third sheet for the screen after getting the front glass off.
mastover - 返信
I use a similar technique: I print out the iFixit manual for the job, and Scotch-tape down the screws/brackets/cables I remove at each step next to the component descriptions. That way, when I'm reassembling, the bits are taped right next to the photo of where they came from.
adlerpe -
That's exactly what I do for all my repairs! It's the best way to keep track of all of the parts ' original location and to make sure that you don't miss any parts during reassembly.
joyitsjennie -
Great idea and one I use often
Thomas Overstreet -
Excellent idea! Thanks for sharing it here.
Laura Sharkey -
I used a 00 that fit but the screws were very tight so I used a tiny paintbrush with some wd40 on it and put it around the edges of the screws. Worked like a charm
valentinedhdh - 返信
I use a magnetic mat and place the screws in order on that :)
Cary B - 返信
How to tell all screws apart?
Spudgeboy - 返信