はじめに
このガイドを使ってヒートシンクを交換します。もしくは放熱グリスを再装着するために、ヒートシンクを外します。
ヒートシンクを再装着する前に、必ず放熱グリスを塗布してください。
必要な工具と部品
-
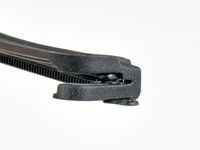
この手順で使用する道具:P5 Pentalobe Screwdriver Retina MacBook Pro and Air$5.99
-
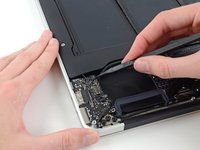
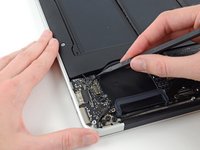
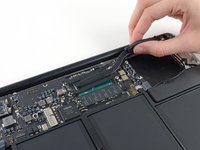
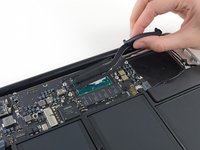
P5ペンタローブドライバーを使って、下部ケースをはずしてください。ネジは次の長さに分かれます。
-
9mm ネジー 2本
-
2.6mm ネジー 8本
-
-


デバイスを再組み立てする際は、これらのインストラクションを逆の順番に従って作業を進めてください。
e-wasteを処理する場合は、認可済みリサイクルセンターR2を通じて廃棄してください。
修理が上手くいきませんか?ベーシックなトラブルシューティングを試してみるか、アンサーコミュニティに尋ねてみましょう。
デバイスを再組み立てする際は、これらのインストラクションを逆の順番に従って作業を進めてください。
e-wasteを処理する場合は、認可済みリサイクルセンターR2を通じて廃棄してください。
修理が上手くいきませんか?ベーシックなトラブルシューティングを試してみるか、アンサーコミュニティに尋ねてみましょう。
20 の人々がこのガイドを完成させました。
以下の翻訳者の皆さんにお礼を申し上げます:
100%

Midori Doiさんは世界中で修理する私たちを助けてくれています! あなたも貢献してみませんか?
翻訳を始める ›


6 件のコメント
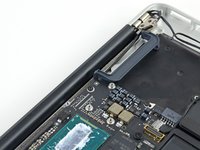
My MAC didn’t have a gasket on the heat sink. It’s not about lazy, it’s about not finding that part. I assume the repair shop didn’t reassemble it correctly, or it came without.
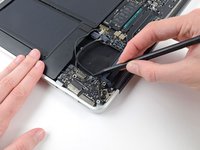
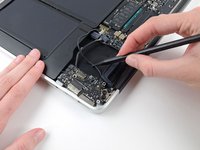
The gasket is what is shown in step 8 that surrounds the long heatsink next to the backside of the case. It essentially wraps around the heatsink and rests on top of the small fan. The two purposes of this small gasket is primarily insulate the fan against vibration. The second function is that in some small part it could help provide insulating effects for air flow. This is to ensure that air passes through the fan and out of the rear of the heat exchanger and then out of the back of the laptop.
I suspect it for the first reason I gave primarily and really don’t see an issue as to the performance of the laptop. It just means it might be a little louder with rattle due to vibration.